- What is 'PAM Tools'?
PAM Tools is an application conceived and created by Ronn Sokol - lead software engineer for 'PAM application development', in his spare time to serve as an aid in better understanding the complex nature of the thousands of internal files and components used to create plugins, classes, interfaces, menu structures, options, configurations, etc. all associated with integrating (Parker Branding) the CODESYS front-end IDE application.
Over the course of time it has evolved into an immense asset for providing assistance to, but not limited to other developers, testers, support personnel, as well as end-users.
- What is 'CODESYS'?
CODESYS is a comprehensive software suite used by automation specialists as a development environment for programming controller applications. It’s an IEC 611131-3 programming tool that was developed by the Germany-based company, 3S ( Smart Software Solutions) in order to provide users with integrated solutions that make the engineering of automated solutions more convenient. It’s a platform-independent development environment that is compatible with PLC hardware and many other automation components available from hundreds of companies, making it a versatile solution that helps users implement a variety of tasks.
 Click here to learn more about CODESYS.
 - 'Main' window - 'Main Commands' tab
The 'Main' window in PAM Tools contains a tab control consisting of two tabs:
- The Main Commands tab
- The Files and Folders tab
The 'Main Commands' tab contains numerous buttons that when clicked, provide detailed internal and external information regarding the PAM application.
Clicking the buttons on this tab if need be, write their respective data to the output window (which is automatically expanded the first time it is written to):
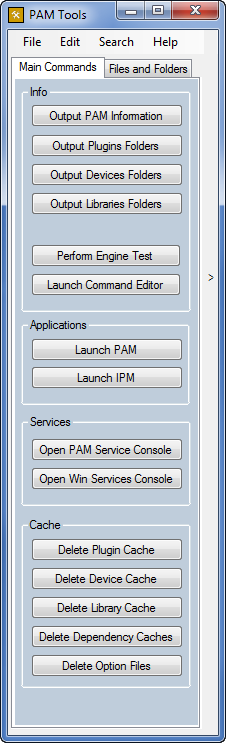 Some of the buttons on this tab serve as shortcuts to launching other applications and/or support tools; Other buttons open Service consoles; And still other buttons are extremely useful for executing commands to easily remove cache files and/or folders from the computer PAM is installed on.
 - 'Main' window - 'Files and Folders' tab
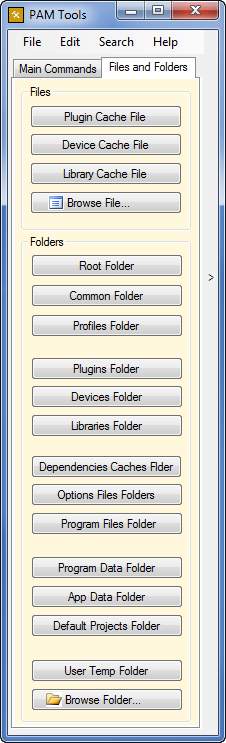
The 'Files and Folders' tab is a secondary tab containing numerous buttons used for easily opening specific files and/or folders (many of which PAM is dependent on) inside a new 'Window's Explorer' window:
- 'Main' menubar - 'File' menu
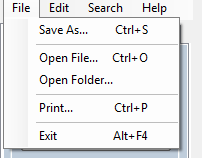
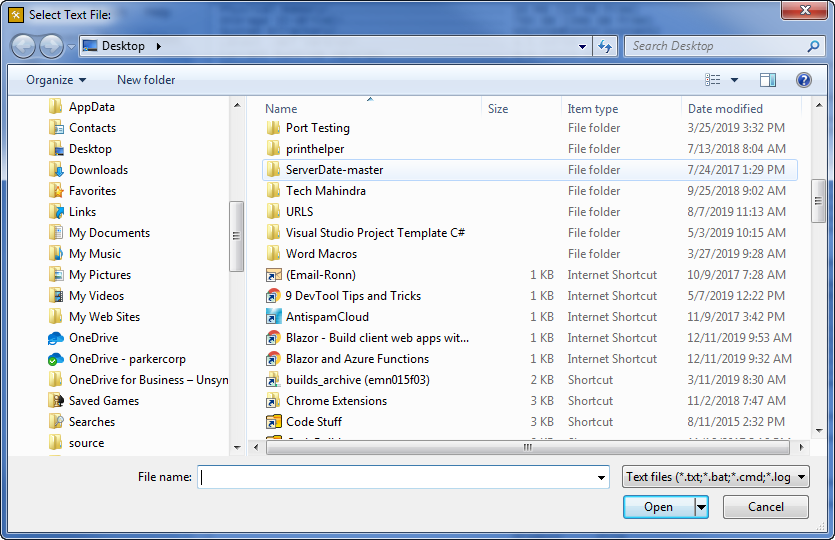
- 'Main' menubar - 'File' menu - 'Open File...' menu item
Click the 'Open File...' menu item to display the 'Browse for File' dialog:
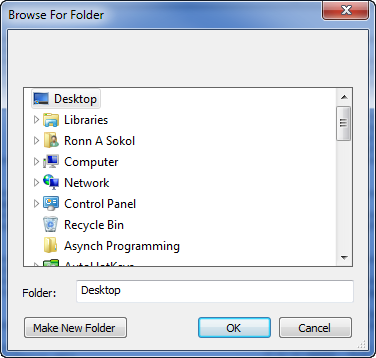
- 'Main' menubar - 'File' menu - 'Open Folder...' menu item
Click the 'Open Folder...' menu item to display the 'Browse for Folder' dialog:
- 'Main' menubar - 'File' menu - 'Print...' menu item
Click the 'Print...' menu item to open the 'Print Preview' window;
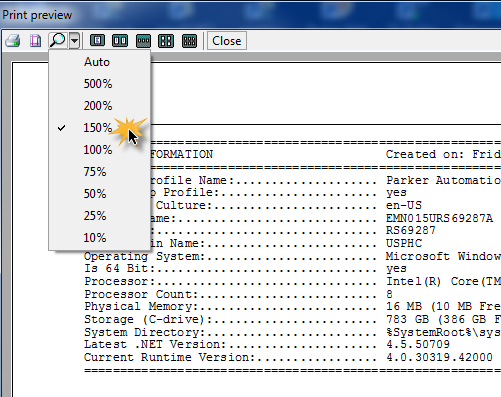
- 'Print Preview' window - 'Magnify Page' drop down
Click the 'Magnify Page' drop down and select a value to increase or decrease the magnification:
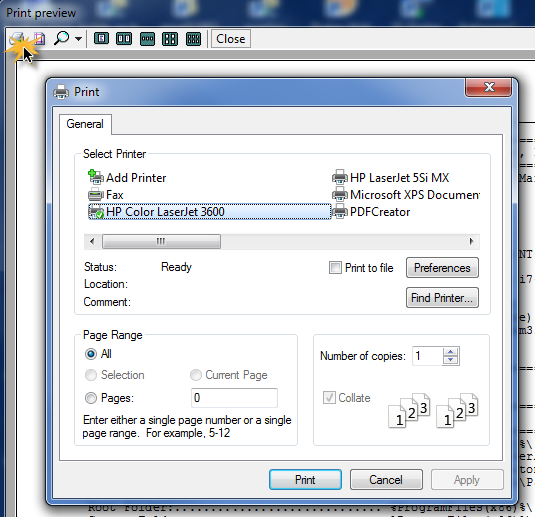
- 'Print Preview' window - 'Print' button
Click the 'Print' button on the 'Print Preview' window toolbar to open the 'Print' dialog:
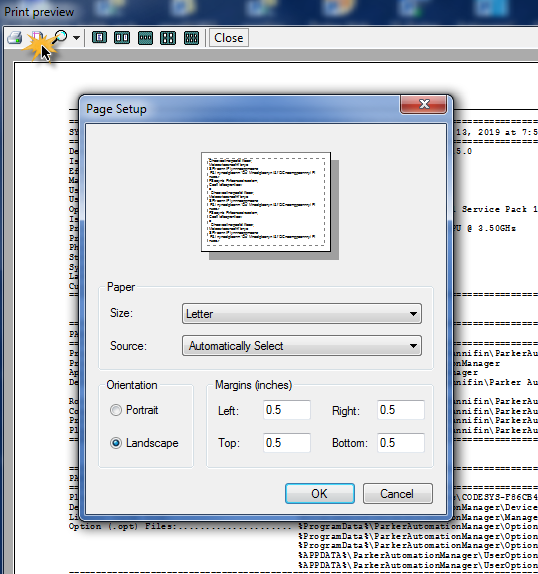
- 'Print Preview' window - 'Page Setup' button
Click the 'Page Setup' button on the 'Print Preview' window toolbar to open the 'Page Setup' dialog:
- 'Main' menubar - 'Edit' menu
The 'Edit' menu contains functions which operate on selections inside the 'Output Window':

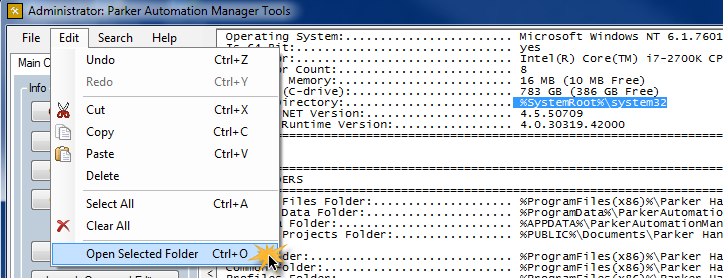
- 'Main' menubar - 'Edit' menu - 'Open Selected File or Folder' menu item
When text is selected in the 'Output' window and the selected text represents an existing file, this menu item becomes enabled and its text changes to 'Open Selected File'.
When text is selected in the 'Output' window and the selected text represents an existing folder, this menu item becomes enabled and its text changes to 'Open Selected Folder'.
You can then select the menu item which will either open the file or open the folder:
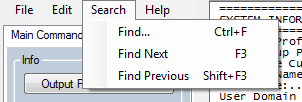
- 'Main' menubar - 'Search' menu
The 'Search' menu contains the various menu items to 'Find' selected text in the 'Output' window:
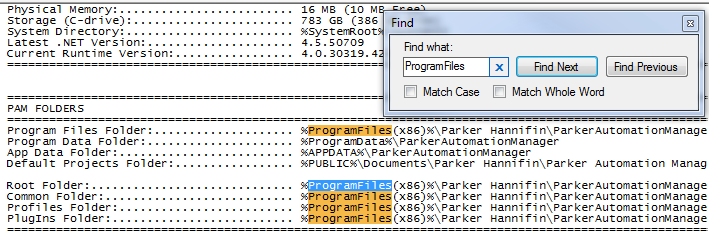
The currently selected text in the Output window is automatically loaded into the 'Find' window whenever the 'Find...' menu item is first selected.
All the text in the Output window meeting the current 'Find' condition is highlighted in yellow.
When issuing the 'Find Next' or 'Find Previous' menu item, the most currently found text is highlighted in blue.
- 'Main' menubar - 'Search' menu - 'Find' menu item
- 'Main' menubar - 'Help' menu

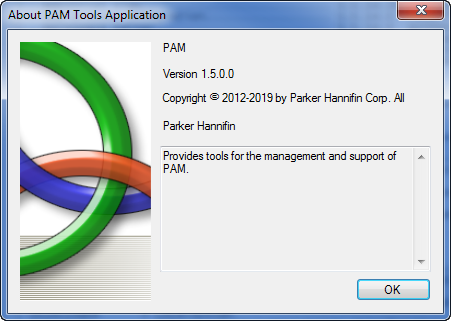
- 'Main' menubar - 'Help' menu - 'About PAM Tools' dialog
Click the 'About PAM Tools' menu item in the 'Help' menu to display the 'About PAM Tools' dialog:
- 'Open Selected Folder' menu item - 'Explorer' window
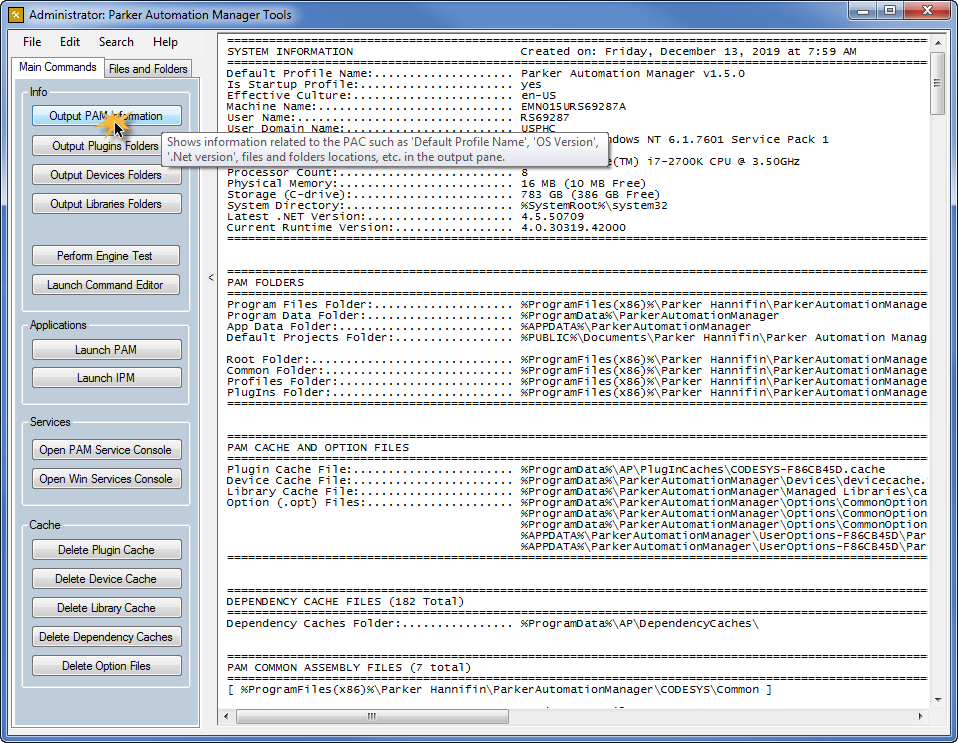
- 'Main Commands' - 'Output PAM Information' button
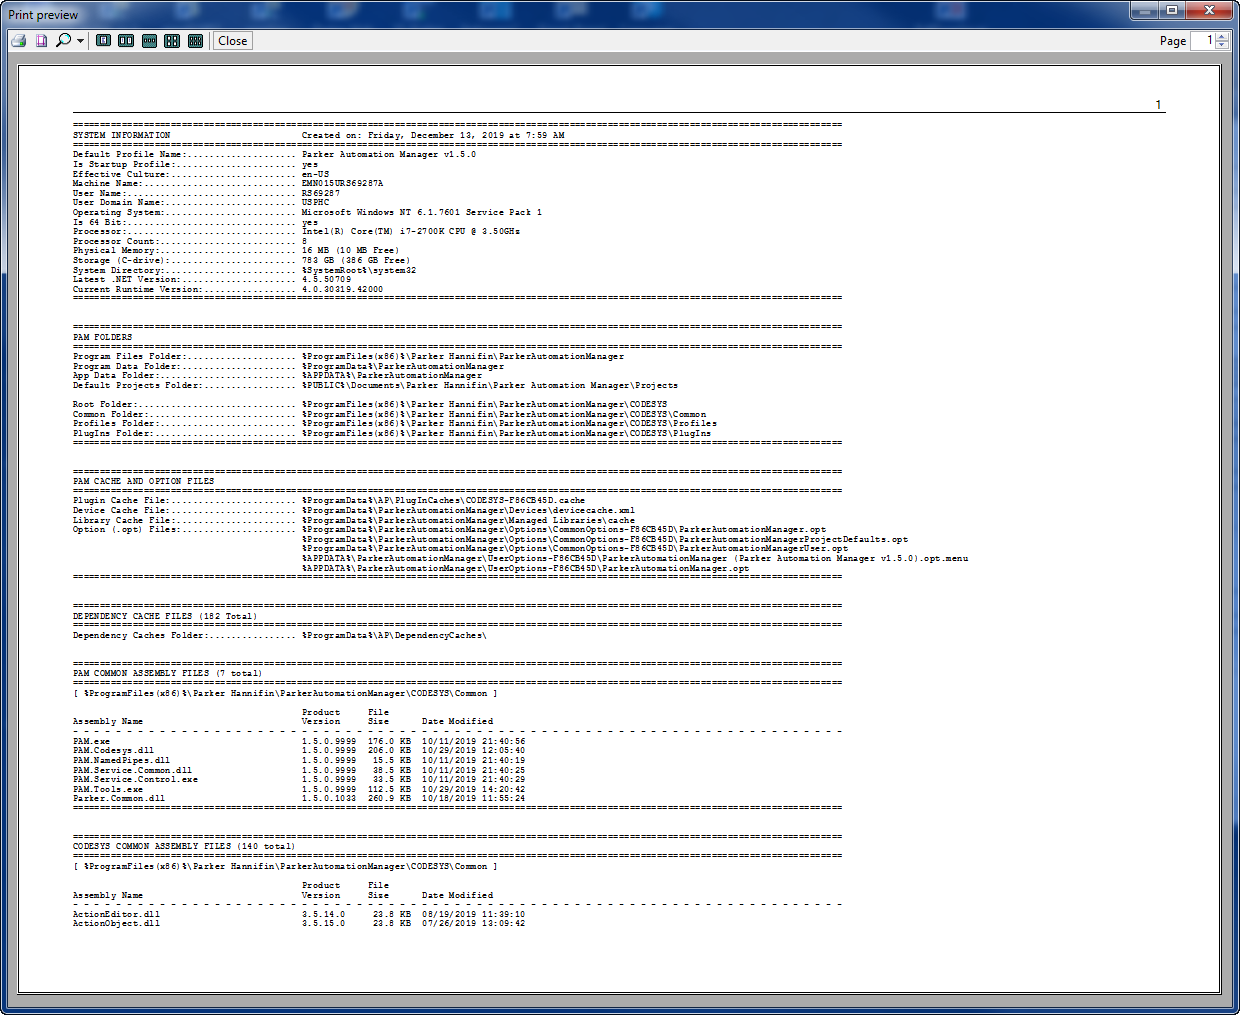
Click the Output PAM Information' button on the 'Main Commands' tab to echo an extensive list of information to the Output window which is related to the entire application:
 The information displayed in the Output window can easily be saved to a file or sent to a printer. Click here to see a sample of the generated output subsequently saved to a file.
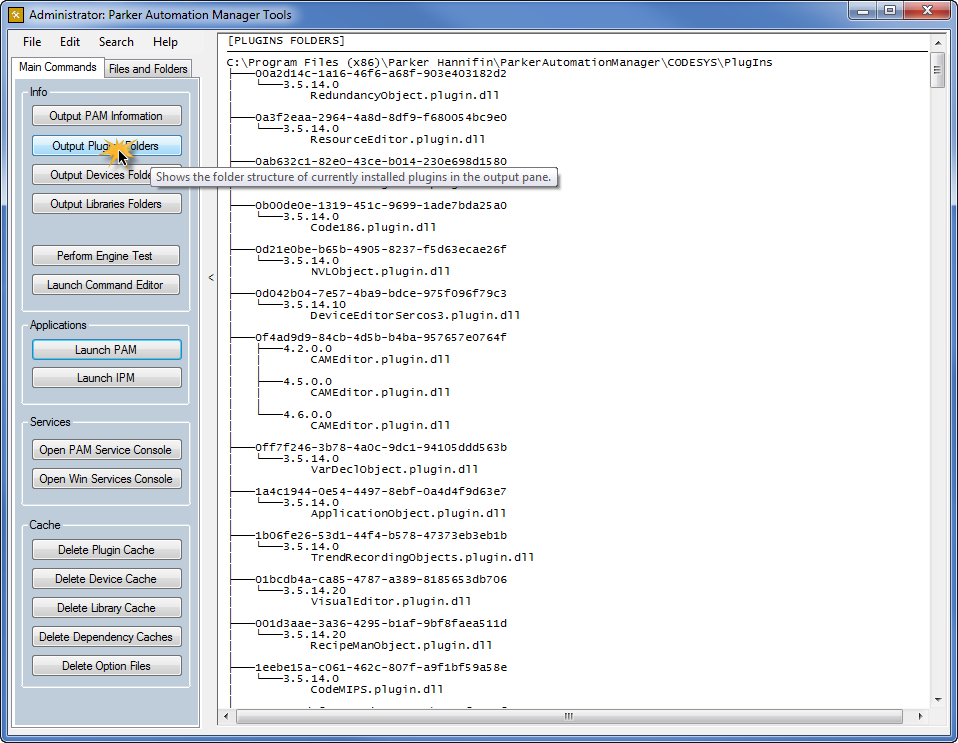
 - 'Main Commands' tab - 'Output Plugin Folders' button
Click the 'Output Plugin Folders' button to display an abbreviated tree containing all the plugin files from this application in the output window.
 The information displayed in the Output window can easily be saved to a file or sent to a printer. Click here to see a sample of the generated output subsequently saved to a file.
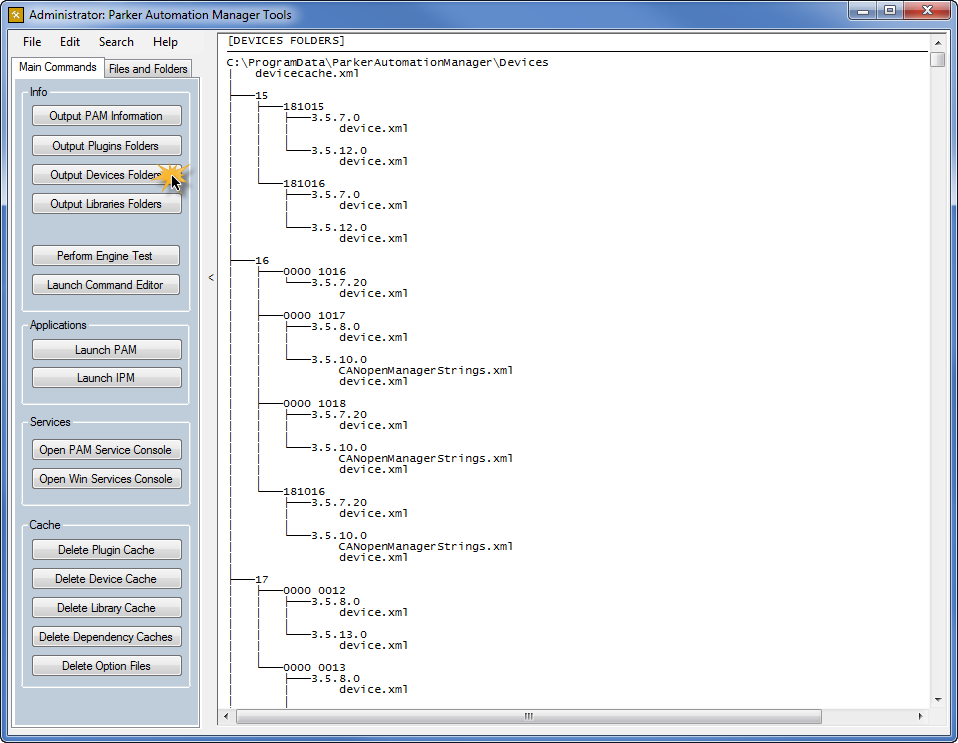
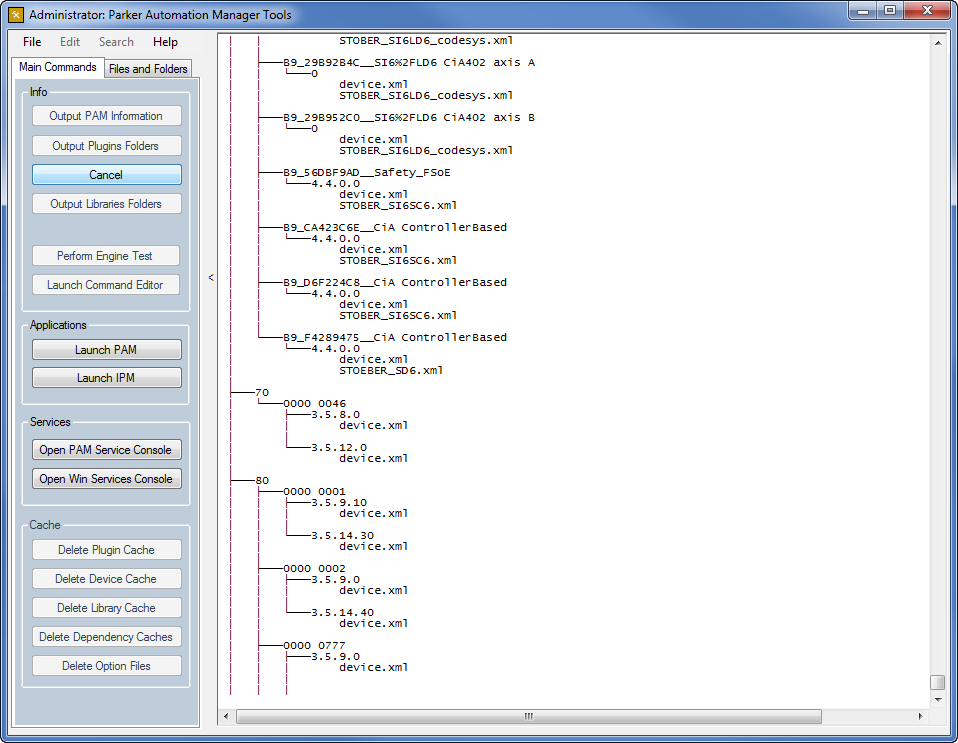
 - 'Main Commands' tab - 'Output Devices Folders' button
Click the 'Output Devices Folders' button to display an abbreviated tree containing all the device description files in the output window.
 The information displayed in the Output window can easily be saved to a file or sent to a printer. Click here to see a sample of the generated output subsequently saved to a file.
 - 'Main Commands' tab - 'Output Libraries Folders' button
Click the 'Output Libraries Folders' button to display an abbreviated tree containing all the library (xml) files from this application in the output window.
 The information displayed in the Output window can easily be saved to a file or sent to a printer. Click here to see a sample of the generated output subsequently saved to a file.
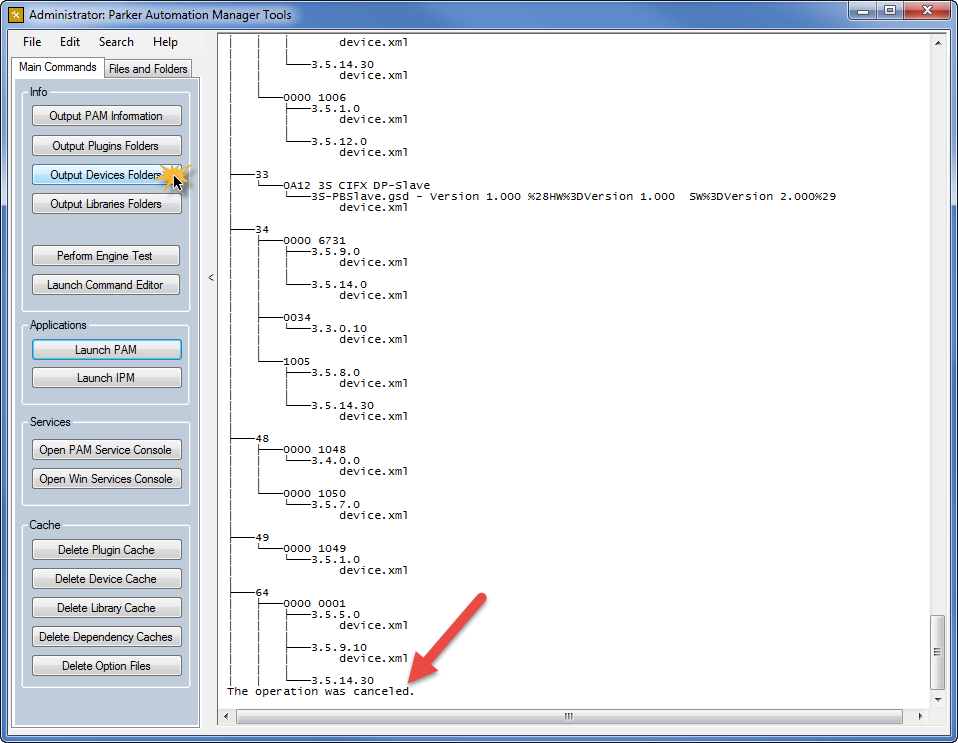
 - 'Main Commands' tab - 'Cancel' button
Because of the complexity and length of many of the operations particularly when running the procedures associated with the 'Info' buttons, all of these processes are run asynchronously so as not to tie up the UI.
 As a result of the process running asynchronously you have the option to cancel the process before it has completed. While the process is running, the respective button text changes to 'Cancel'. This also applies to the many other buttons in the interface as well as then menu items being temporarily disabled since only one operation can be run at a time. NOTE: each of the "Info" buttons utilize this same logic.
 - 'Cancel' button
Whenever a particular cancel button is clicked, the operation is immediately stopped and a message "The operation was cancelled" is echoed to the last line of the output window:
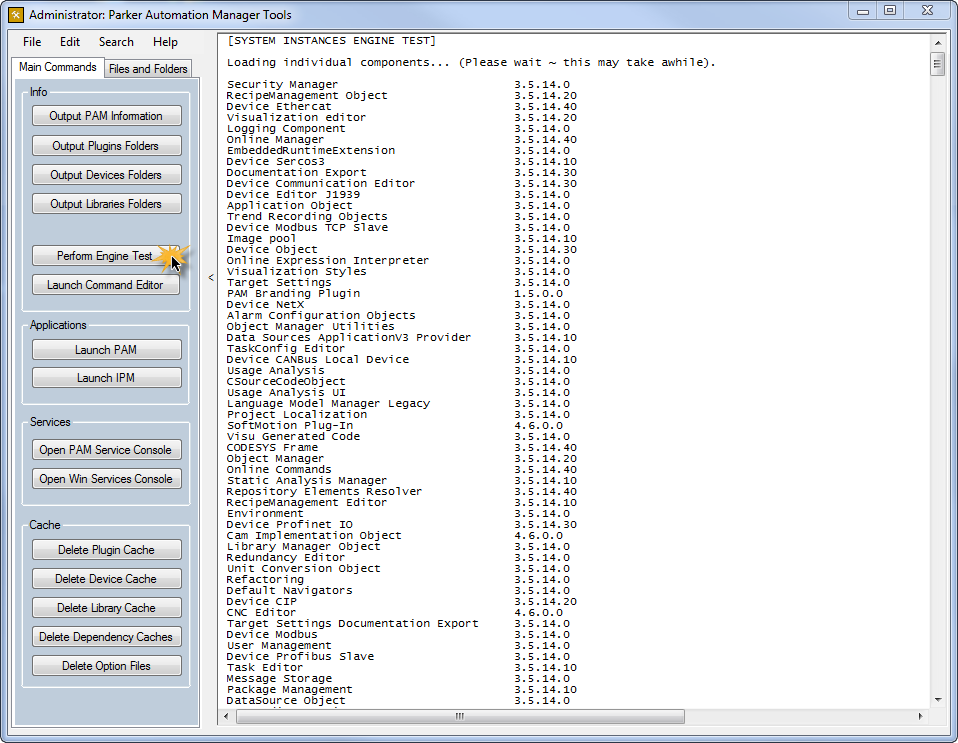
- 'Main Commands' tab - 'Perform Engine Test' button
 The information displayed in the Output window can easily be saved to a file or sent to a printer. Click here to see a sample of the generated output subsequently saved to a file.
 - 'Main Commands' tab - 'Launch Command Editor' button
 The information displayed in the Output window can easily be saved to a file or sent to a printer. Click here to see a sample of the generated output subsequently saved to a file.
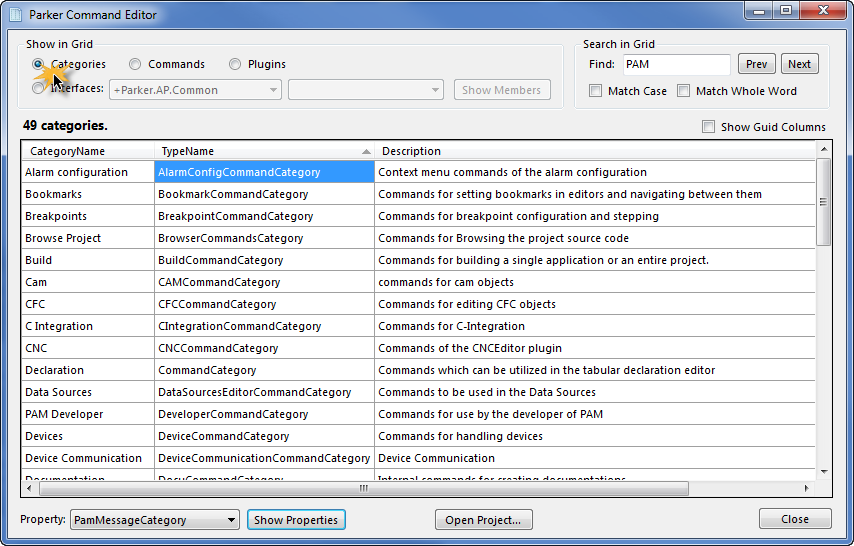
 - 'Command Editor' window - 'Categories' selection
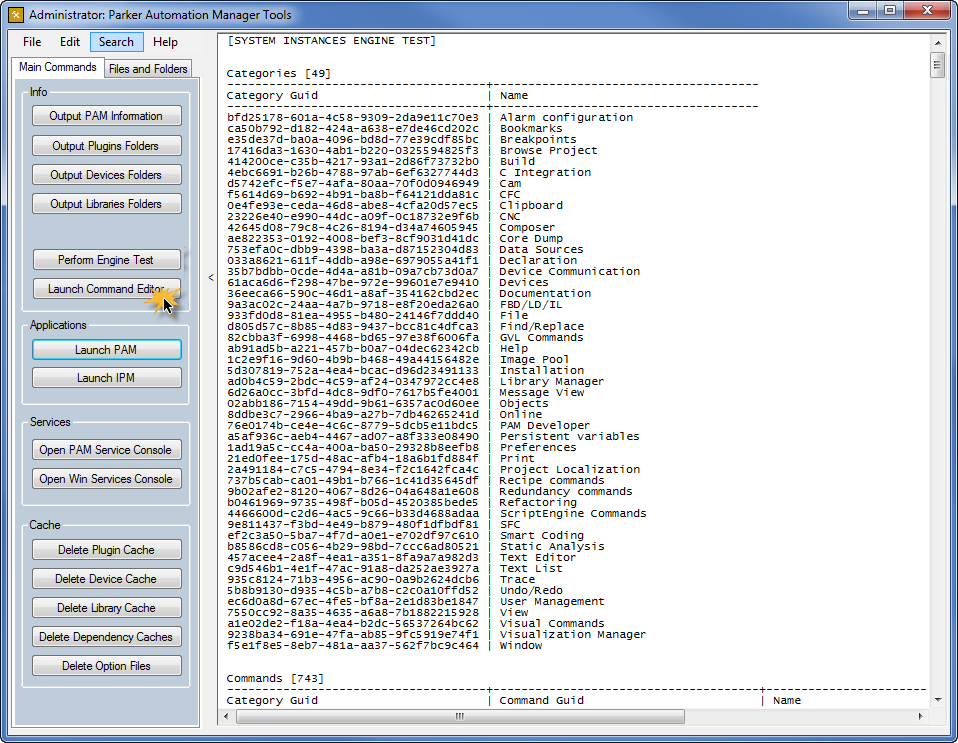
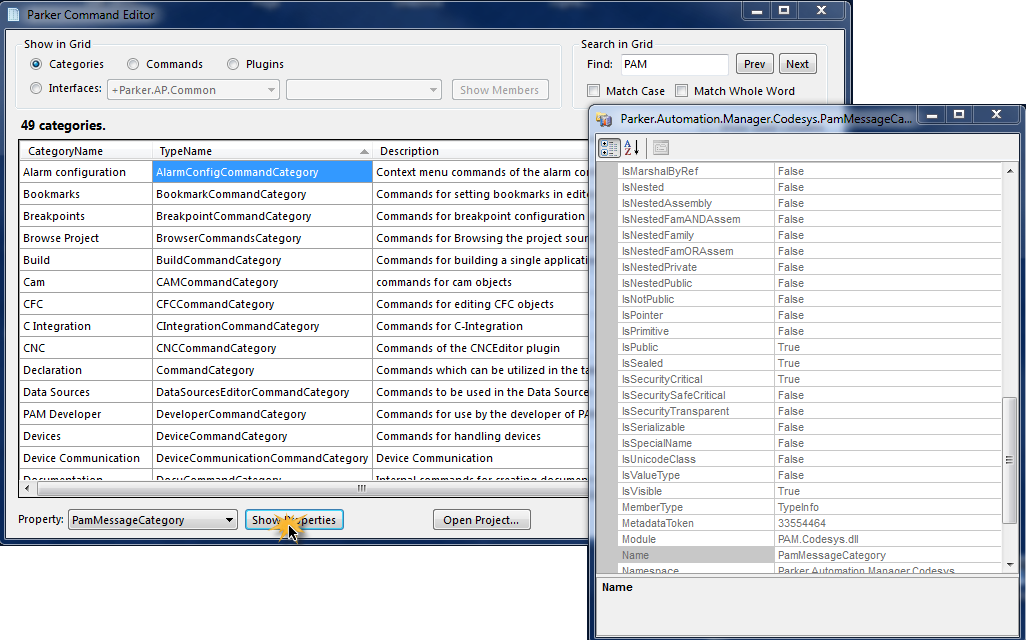
Click the 'Categories' radio button to display information in the grid related to all available categories:
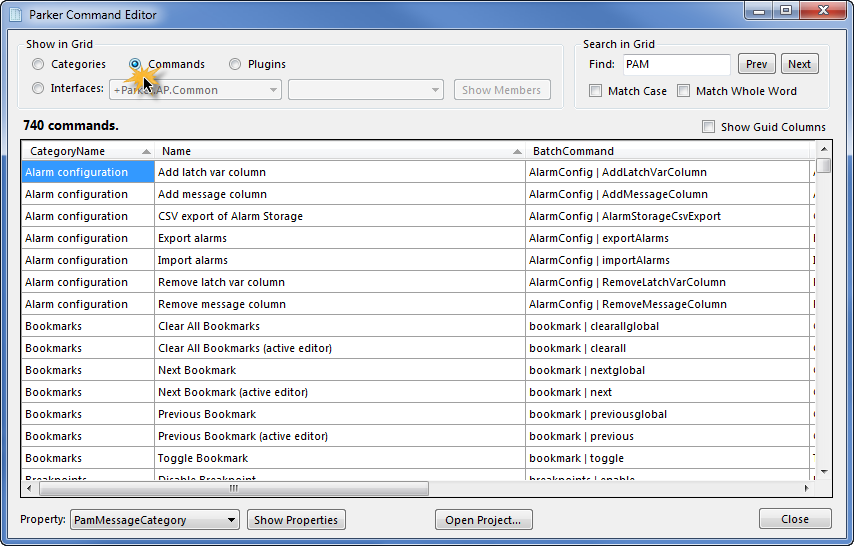
- 'Command Editor' window - 'Commands' selection
Click the 'Commands' radio button to display information in the grid related to all available commands:
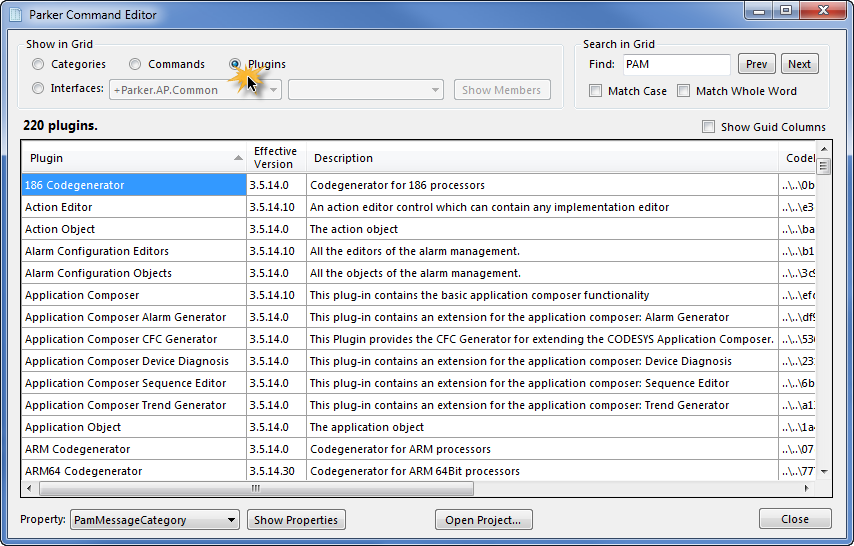
- 'Command Editor' window - 'Plugins' selection
Click the 'Plugins' radio button to display information in the grid related to all available plugins:
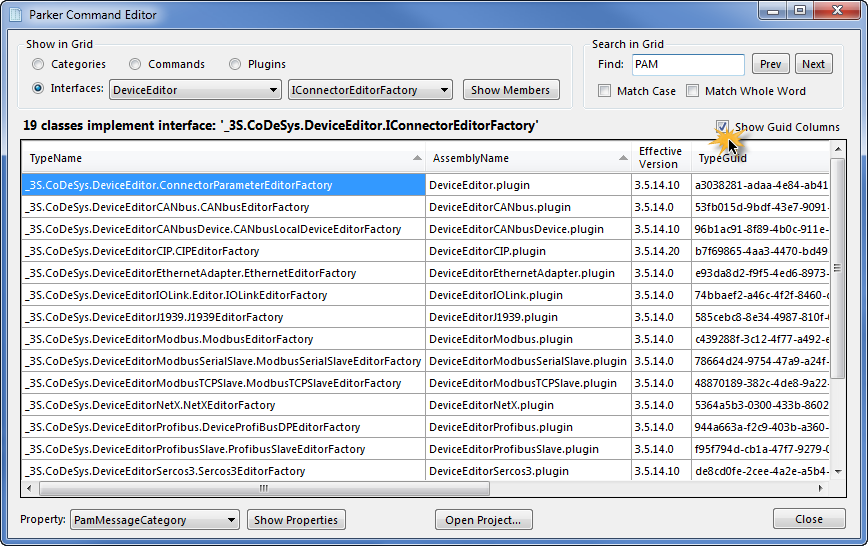
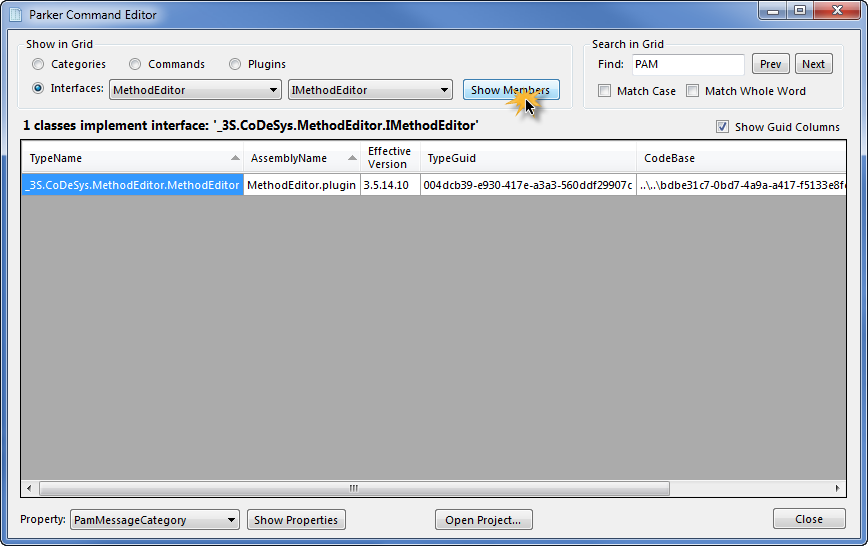
- 'Command Editor' window - 'Interfaces' drop down selection
Click the 'Interfaces' radio button to display information in the grid related to all available interfaces:

- 'Command Editor' window - 'Show Guid Columns' checkbox
Click the 'Show Guid Columns' checkbox to show or hide the 'Guid' columns displayed in the grid:
 NOTE: this checkbox is always available and applies to all data displayed in the grid no matter which radio button is currently selected.
 - 'Command Editor' window - 'Interfaces' selection - 'Show Members' button
Click the 'Show Members' button to open a 'Members' dialog which uses .NET Reflection to show all the members of the currently selected class or interface:
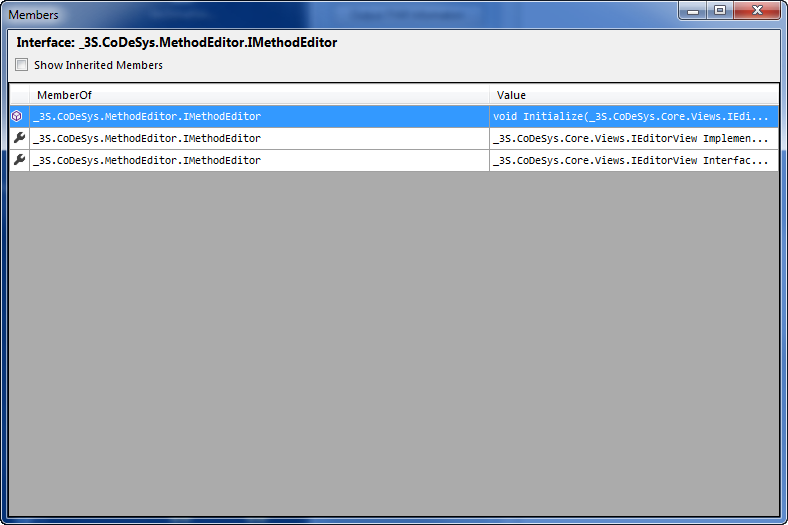
- 'Command Editor' window - 'Interfaces' selection - 'Members' dialog
- 'Command Editor' window - 'Interfaces' selection - 'Members' dialog -
'Show Inherited Members' checkbox
Click the 'Show Inherited Members' checkbox to show or hide the members inherited from the base class and all other interfaces.
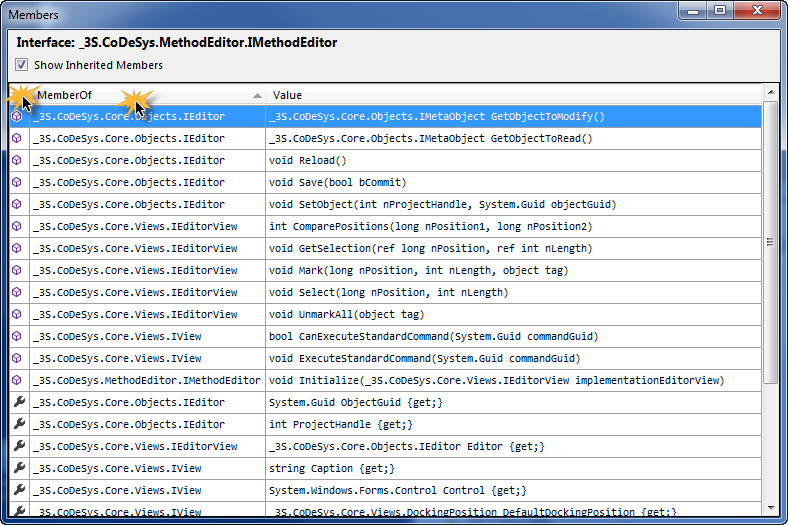 NOTE: You can easily sort the data displayed in the grid on multiple columns by holding down the control key and clicking the columns in the order you want the sort to be performed!
 - 'Command Editor' window - 'Show Properties' button - 'Properties' dialog
Select any of the properties in the 'Property' drop-down and click the 'Show Properties' button to display the 'Properties" window populated with data corresponding to the value selected in the 'Property' drop-down:
- 'Command Editor' window - 'Output Window' context menu
Right-click a line in the grid to display its context menu:
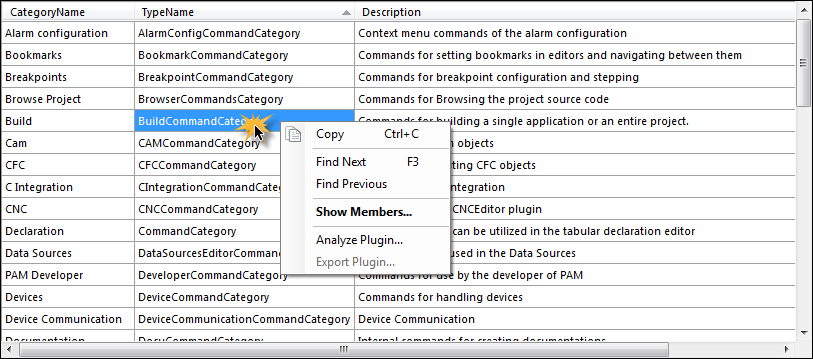
- 'Command Editor' window - 'Analyze Plug-In' menu item
Right-click a line in the grid containing data related to a plugin to display the context menu, then select the 'Analyze Plug-In' menu item to open the 'Analyze Plug-In' window:
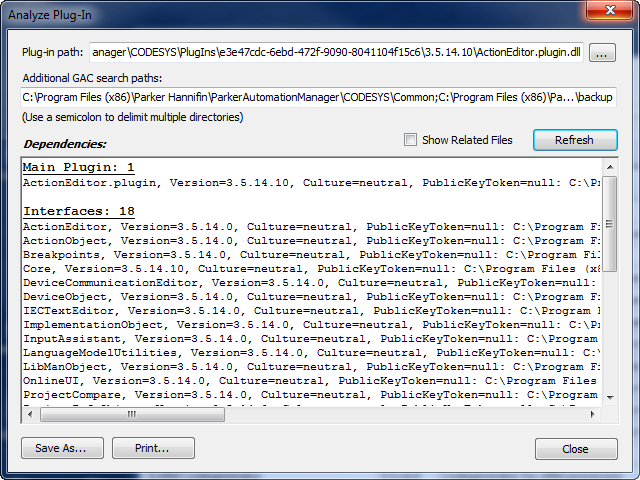
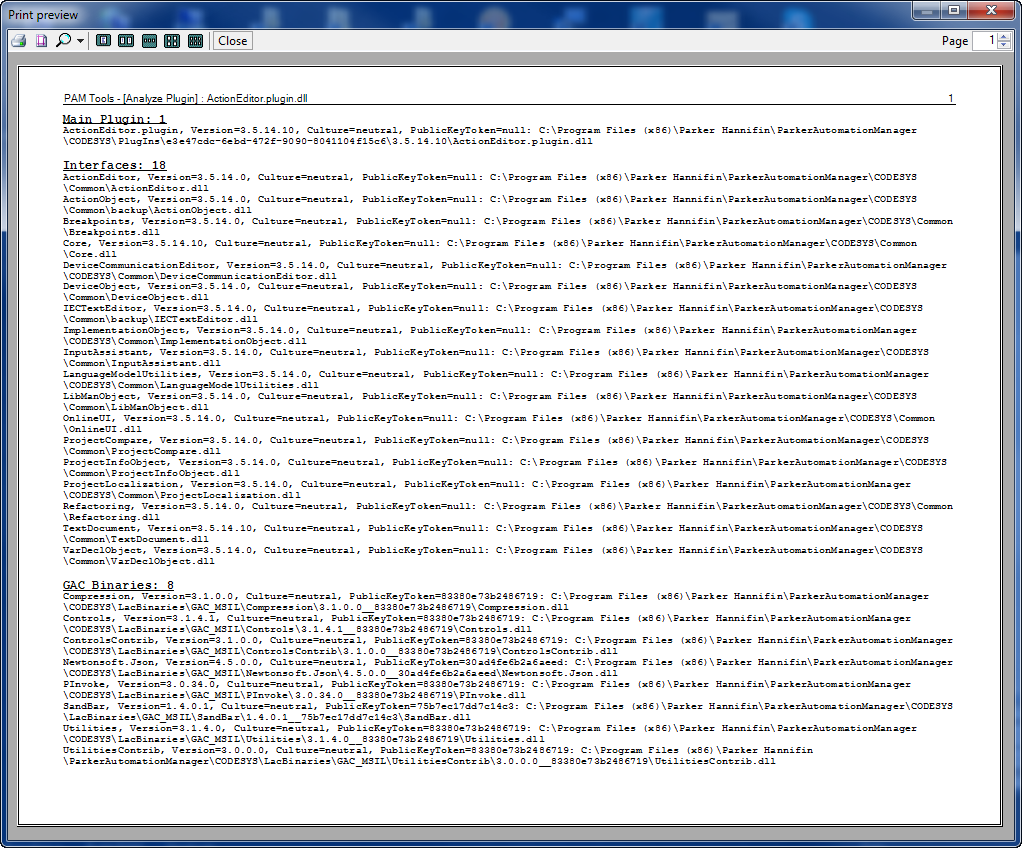
- 'Command Editor' window - 'Analyze Plug-In' window - 'Print' button
Click the 'Print...' button in the 'Analyze Plug-In' window to open the 'Print Preview' window:
- 'Command Editor' window - 'Search in Grid' functionality
In the 'Command Editor' window - 'Search in Grid' groupbox, type a value into the 'Find' field and click the 'Prev' or 'Next' button to highlight the found lines inside the grid :
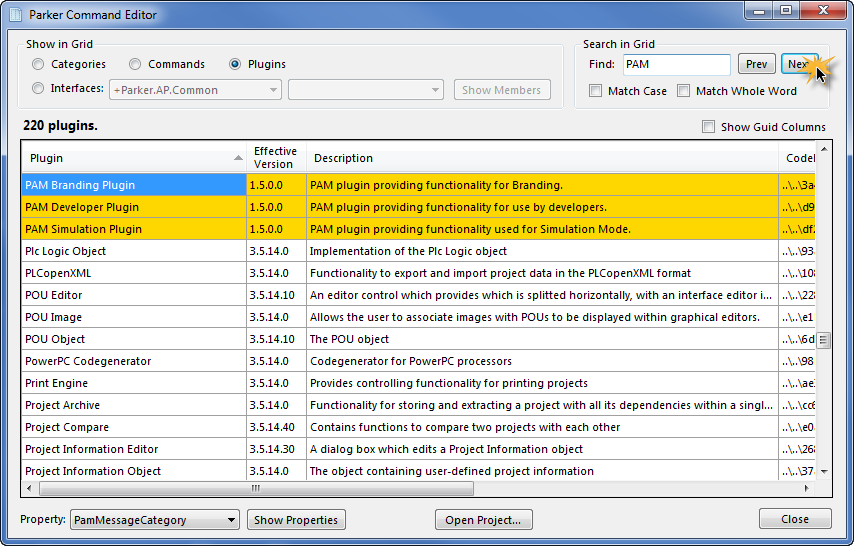 The first found line will be automatically scrolled into view.
 - 'Command Editor' window - 'Open Project...' button
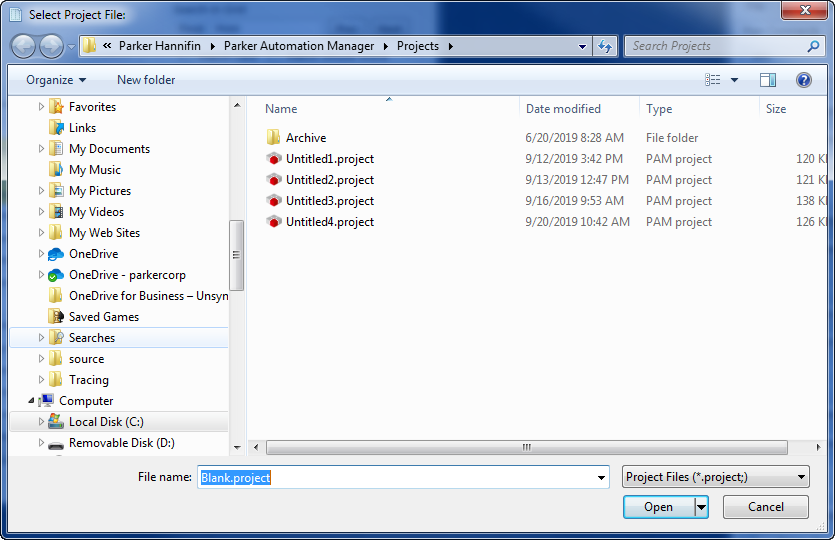
Click the 'Open Project...' button in the 'Command Editor' window to display the 'Select Project File' dialog:
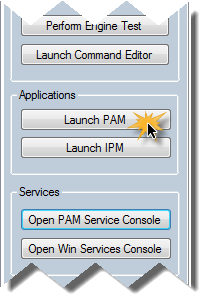
- 'Main Commands' tab - 'Launch PAM' button
Click the 'Launch PAM' button to launch the 'PAM (Parker Automation Manager)' application.
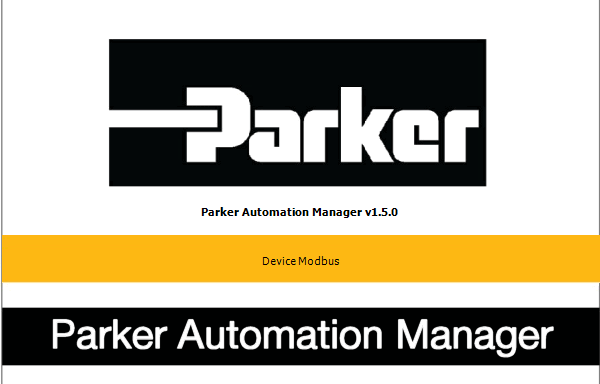
- 'Parker Automation Manager' startup screen
Whenever the ' PAM (Parker Automation Manager)' application is started up, the startup screen is displayed momentarily while all the dependent plugins are being loaded.
- 'Parker Automation Manager' main window
The first time PAM is launched only a 'start page' will be shown inside a window pane located in the center of the application.
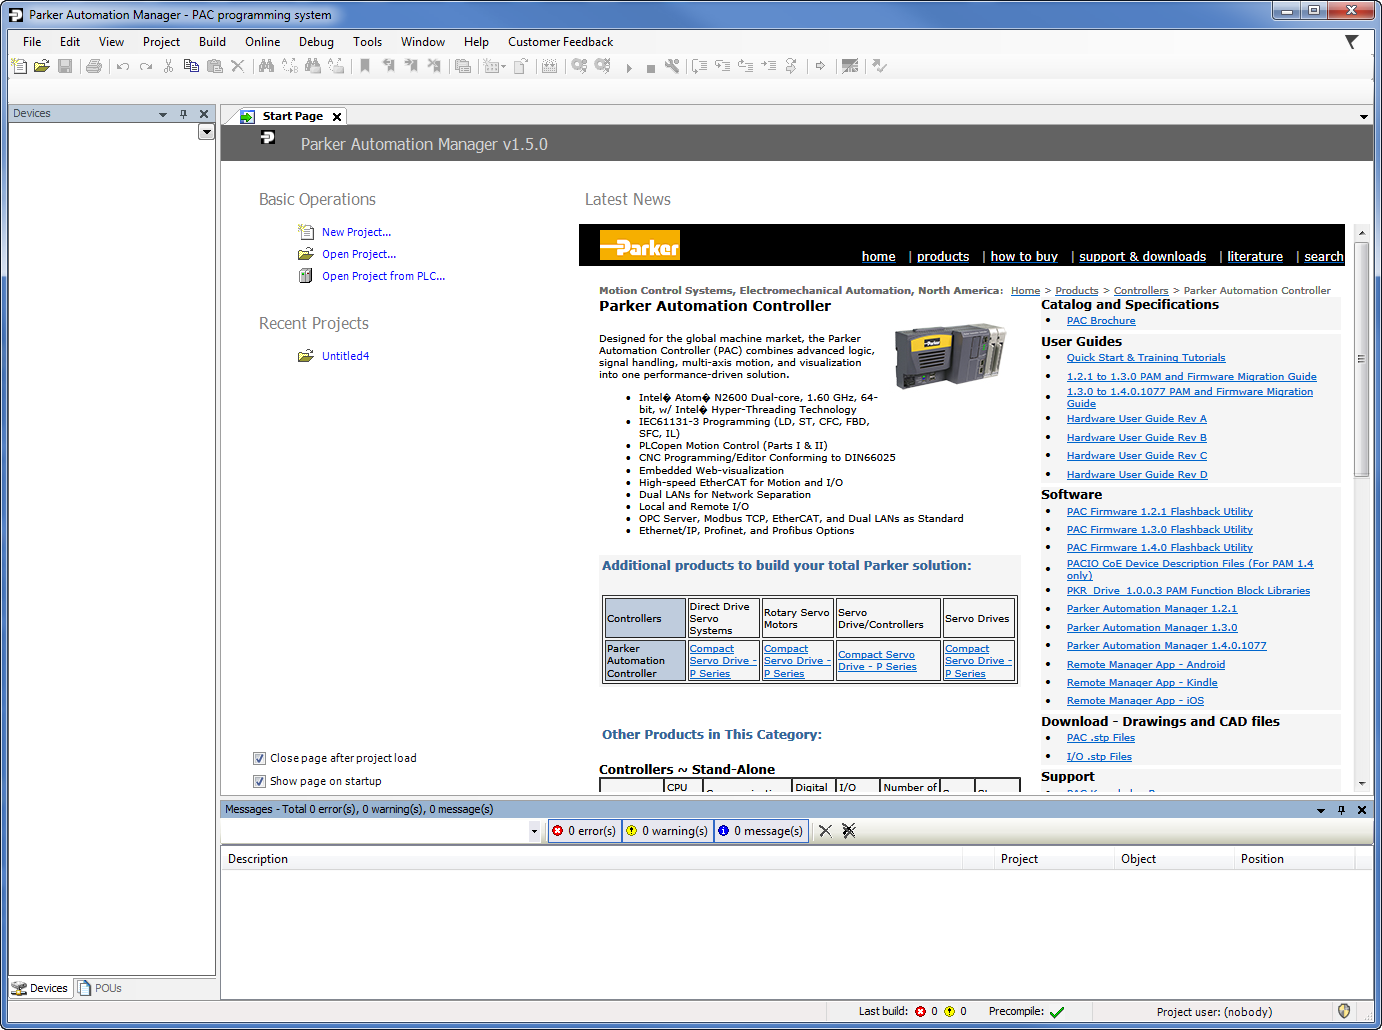 Subsequent launches of PAM can default to launching the last (most recent) project into the tree.
 - 'Parker Automation Manager' - 'New Project' dialog
Click the 'File' - 'New Project' menu item to open the 'New Project' dialog:
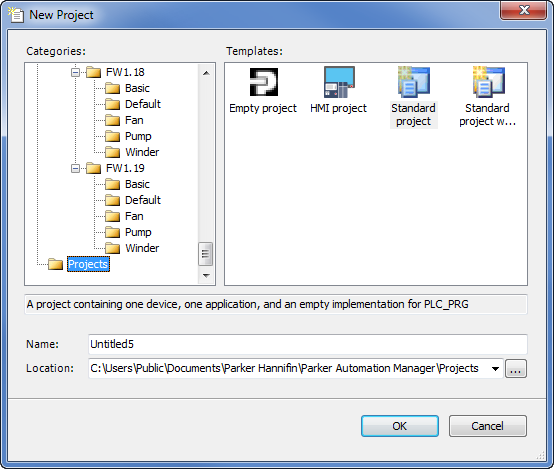
- 'Parker Automation Manager' - 'New Project' dialog - 'Standard project' selection
Click on the Standard Project template.
Give the project a new name or use the default value (which is "Untitled" plus an auto-incremented suffix)
Provide the location to save the project or use the default value (which is in a pre-determined location)
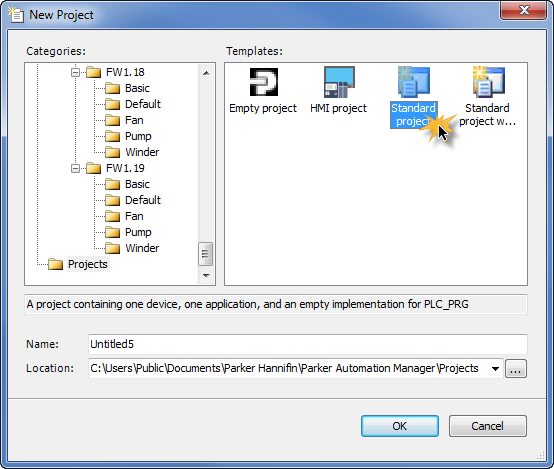
- 'Parker Automation Manager' - 'New Project' dialog - 'Standard project' dialog
Whenever you select a 'Standard project' template from the 'New Project' dialog, you will be prompted for more definition.
For instance, you will need to specify the kind of device you are using as well as what language to program the PLC with:
 In this example, we are using "PAC320-CXX2X-XX (Parker Hannifin)" as the device and "Structure Text (ST)" as the programming language:
 - 'Parker Automation Manager' - 'Main' window
After clicking the 'OK' button on the 'Standard Project' dialog, the main 'PAM' window is displayed with default data loaded into the tree view pane.
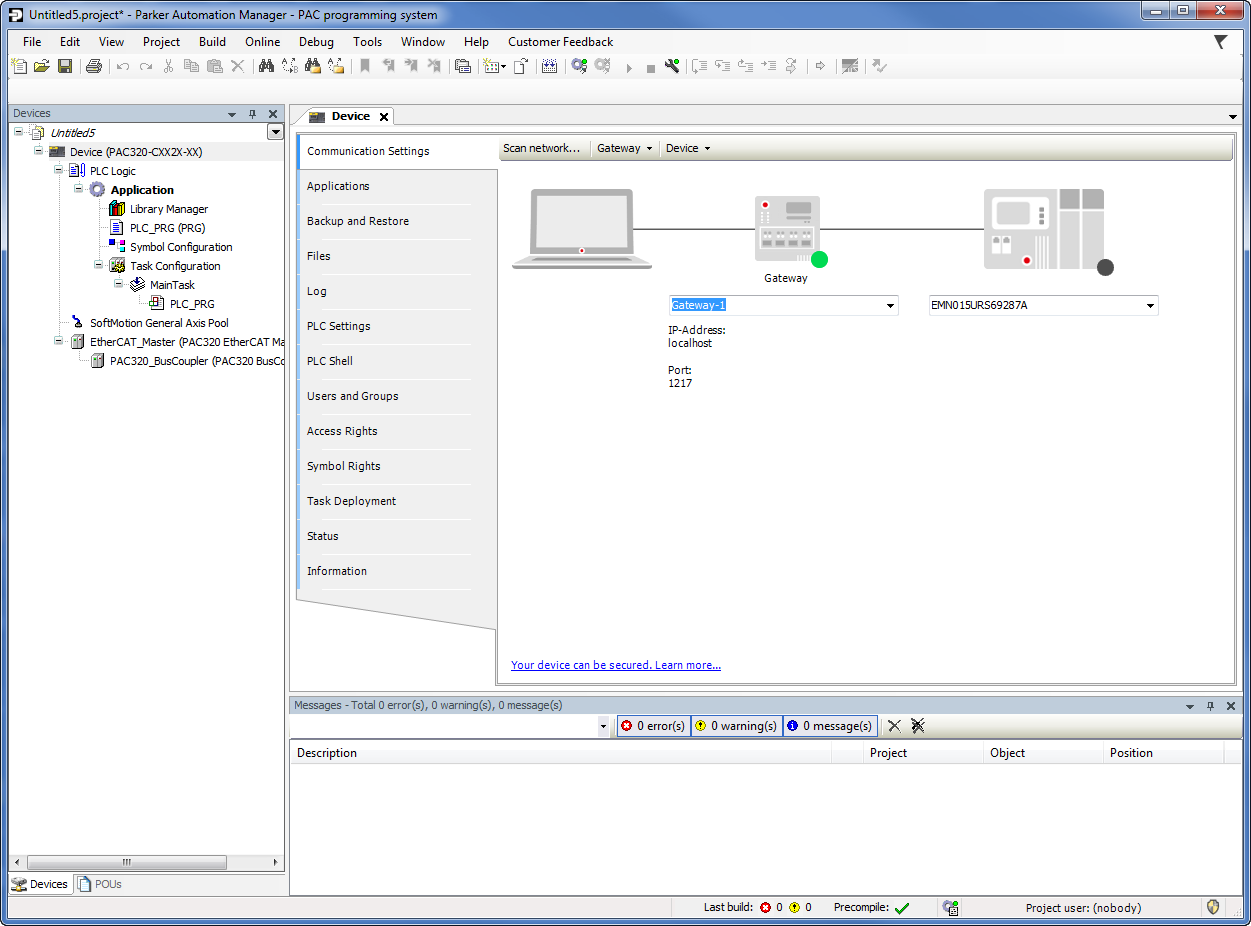 NOTE that while the project defaults (devices, libraries, are being loaded) there is a brief pause, but information is constantly being echoed in the status bar accordingly.
 - 'Parker Automation Manager' - 'Help' menu
Select the 'Help' menu to display its menu items:
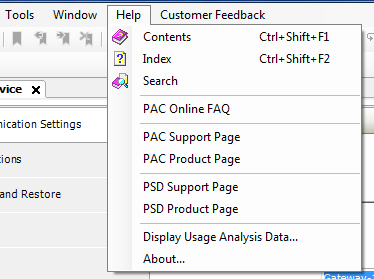
- 'Parker Automation Manager' - 'Help' menu - 'PAC Online FAQ' menu item
Select the 'PAC Online FAQ' menu item from the 'Help' menu to display:
- 'Parker Automation Manager' - 'Help' menu - 'PAC Support Page' menu item
Select the 'PAC Support Page' menu item from the 'Help' menu to display:
- 'Parker Automation Manager' - 'Help' menu - 'PAC Product Page' menu item
Select the 'PAC Product Page' menu item from the 'Help' menu to display:
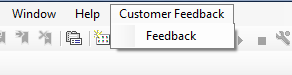
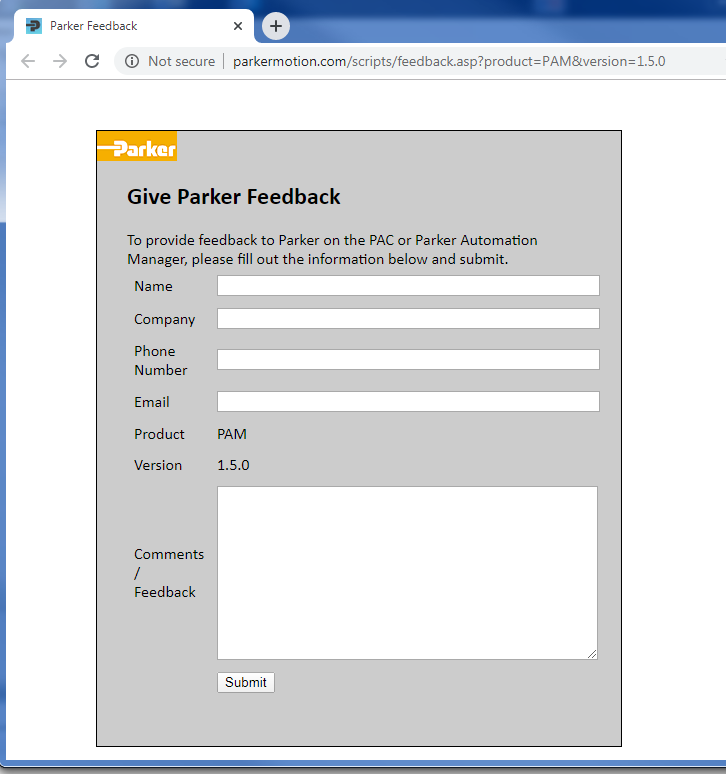
- 'Parker Automation Manager' - 'Customer Feedback' menu - 'Feedback' menu item
Select the 'Customer Feedback' menu to display a single 'Feedback' menu item:
- 'Parker Automation Manager' - 'Customer Feedback' web page
Select the 'Feedback' menu item from the 'Customer Feedback' menu to display the 'Parker Feedback' web page:
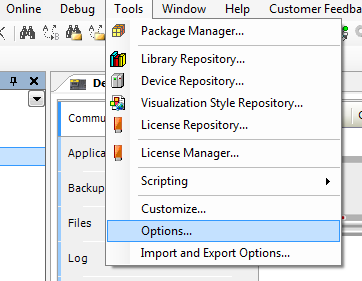
- 'Parker Automation Manager' - 'Tools' menu
Click the 'Tools' menu in the main menubar to display its menu items:
- 'Parker Automation Manager' - 'Tools' menu - 'Options' dialog - 'PAM' tab
Select the 'Options...' menu item from the 'Tools' menu to open the 'Options' dialog:
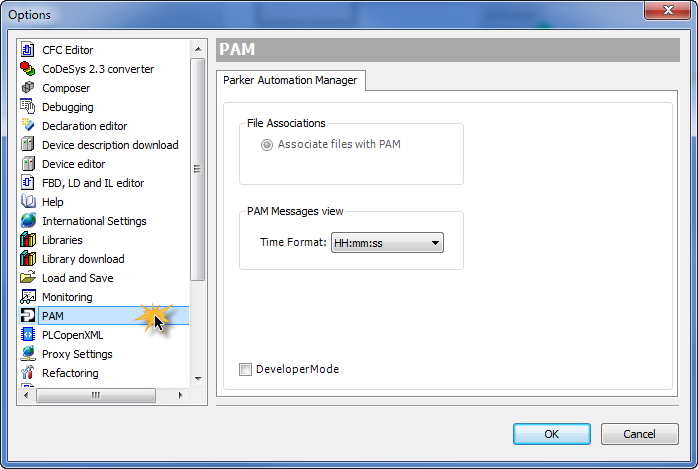
Click on the 'PAM' list item in the list box at the left of the dialog to display the 'PAM' related options pane:
If CODESYS is installed alongside of PAM, then there will be another 'File Associations' radio button visible called 'Associate files with CODESYS' enabling you to toggle the file association back and forth between the two applications.
You can select the 'Time Format' to use for prefacing messages displayed in the 'PAM Messages View' window.
NOTE: whenever the PAM application is first opened and there is a previous version of CODESYS installed, a confirmation message is displayed asking you if you would like to reassociate the files with PAM.
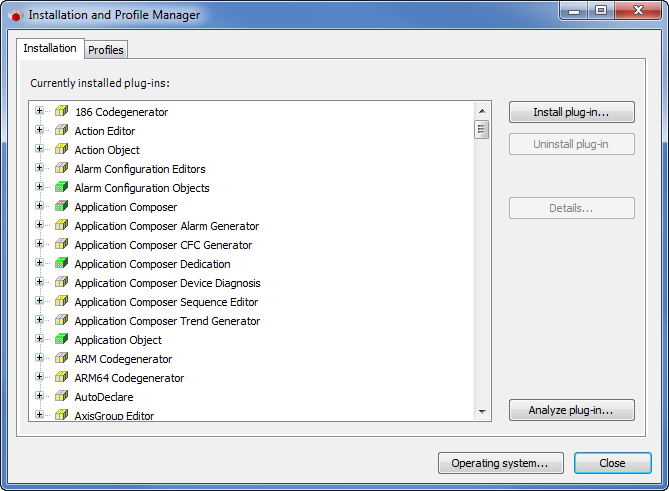
- 'Main Commands' tab - 'Launch IPM' button
Click the 'Launch IPM' button on the 'Main Commands' tab to open the IPM application to the defauly Installation tab.
- 'Main Commands' tab - 'Launch IPM' button
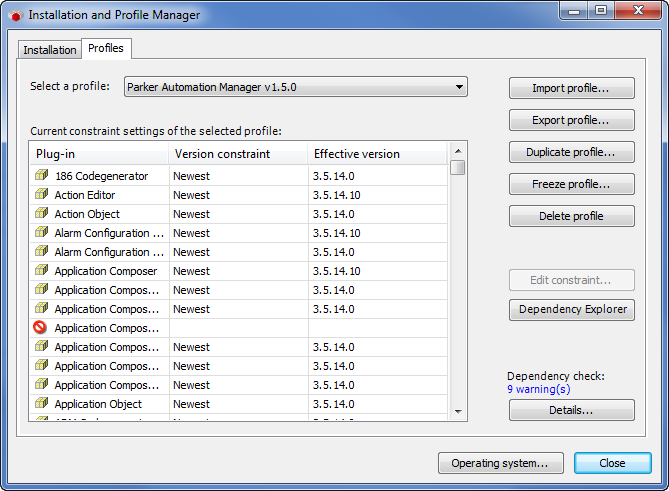
Click the 'Profiles' tab on the 'Installation and Profile Manager' window :
- 'Main Commands' tab - 'Open PAM Service Control' button
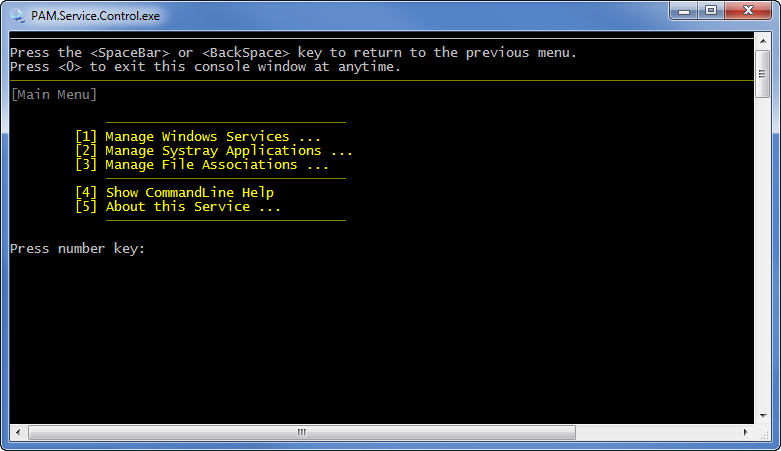
Click the 'Open PAM Service Control' button on the 'Main Commands' tab to launch the PAM.Service.Control.exe.
 Click here to see more information regarding the PAM Service Control
 - 'Main Commands' tab - 'Open Win Services Control' button
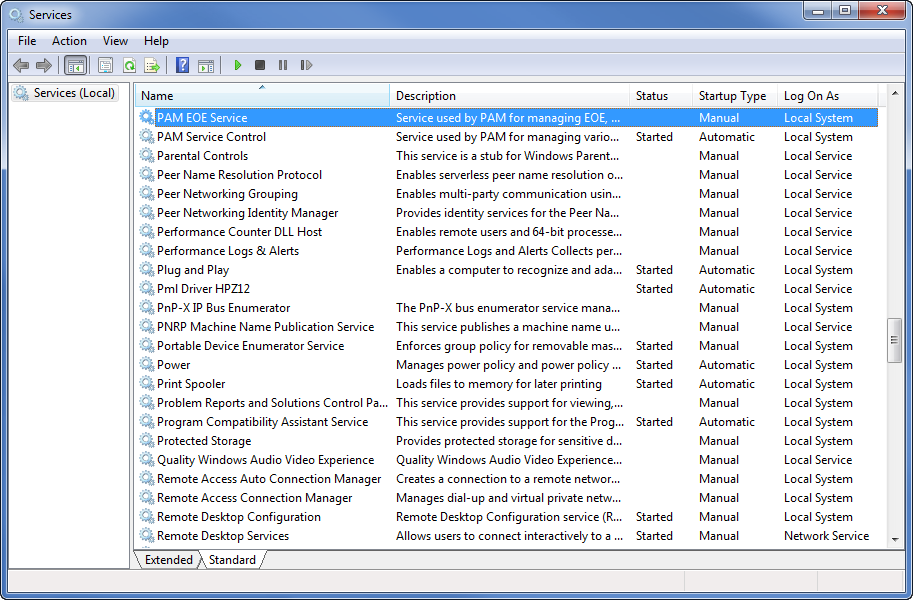
Click the 'Open Win Services Control' button on the 'Main Commands' tab to open the standard Windows 'Services' control panel with the first PAM-related service preselected.
- 'Files and Folders' tab - 'Plugin Cache' button
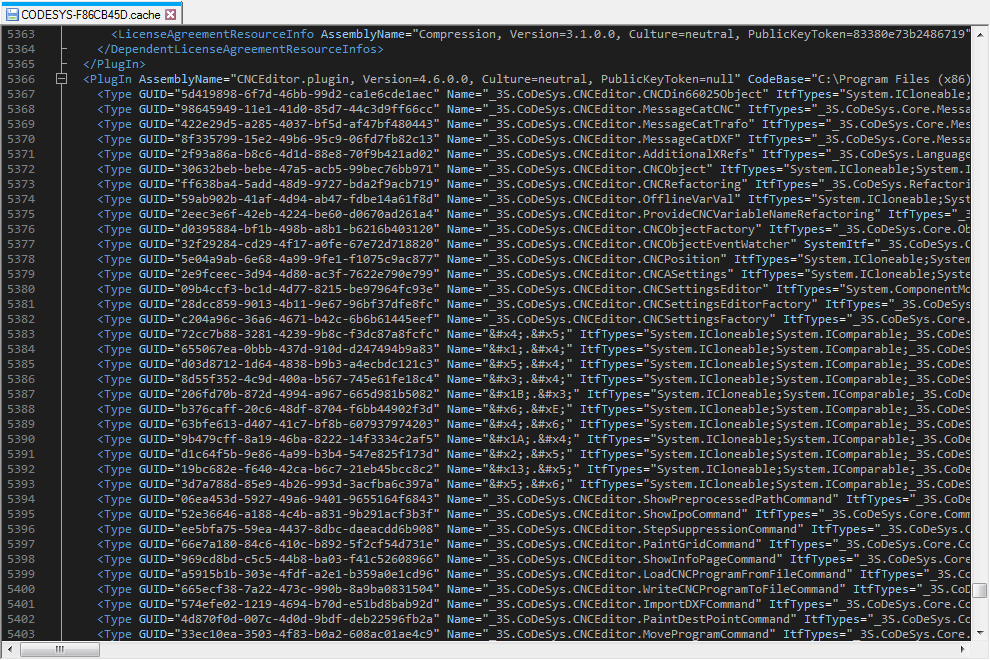
Click the 'Plugin Cache' button on the 'Files and Folders tab to open the plugin cache file in your default text editor.
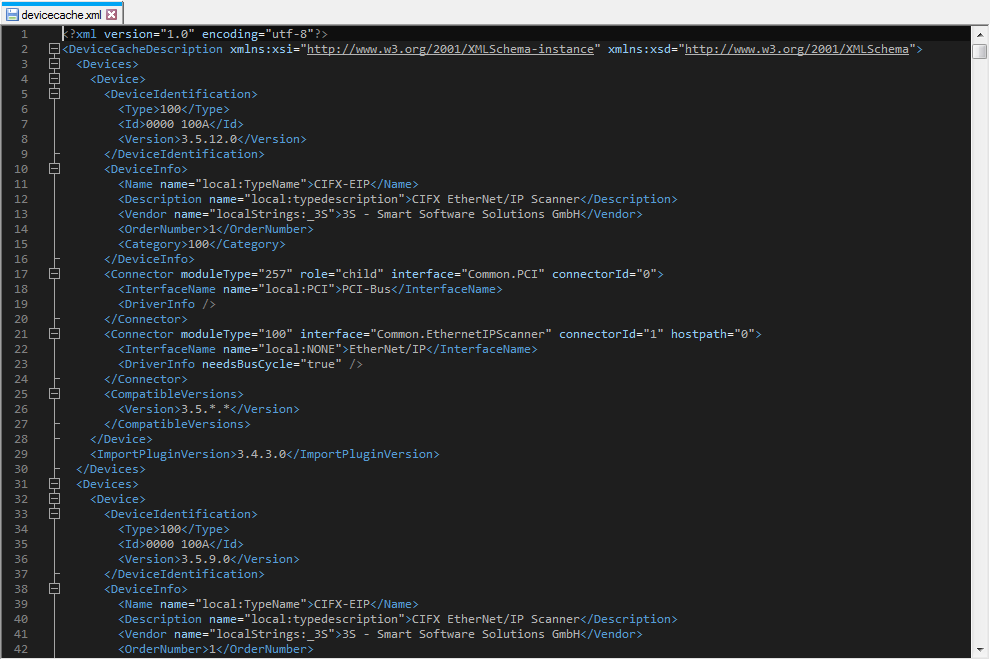
- 'Files and Folders' tab - 'Device Cache' button
Click the 'Device Cache' button on the 'Files and Folders tab to open the device cache file in your default text editor.
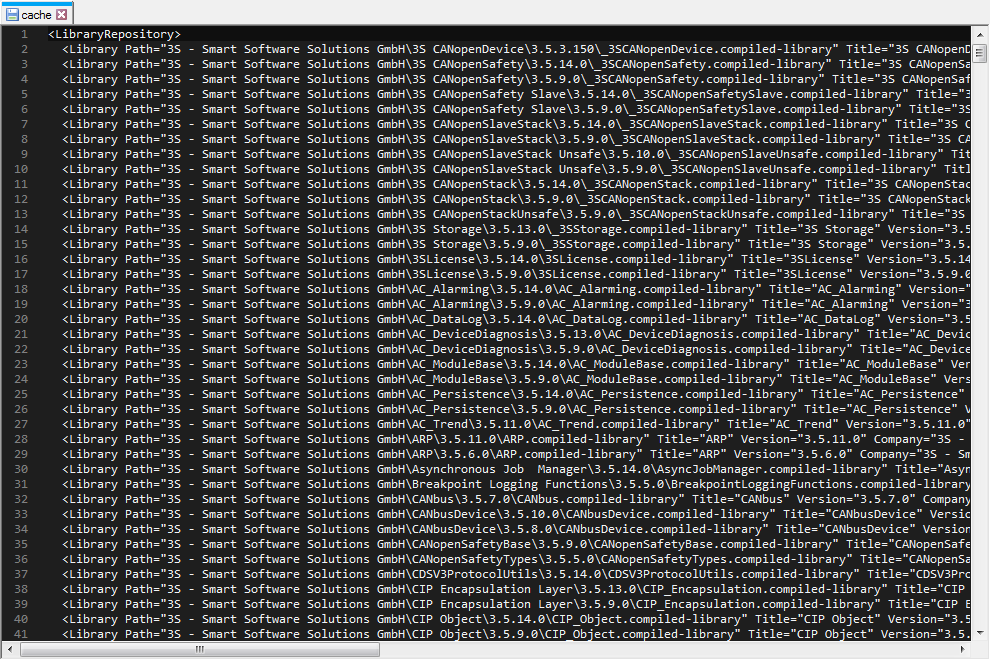
- 'Files and Folders' tab - 'Library Cache' button
Click the 'Library Cache' button on the 'Files and Folders tab to open the library cache file in your default text editor.
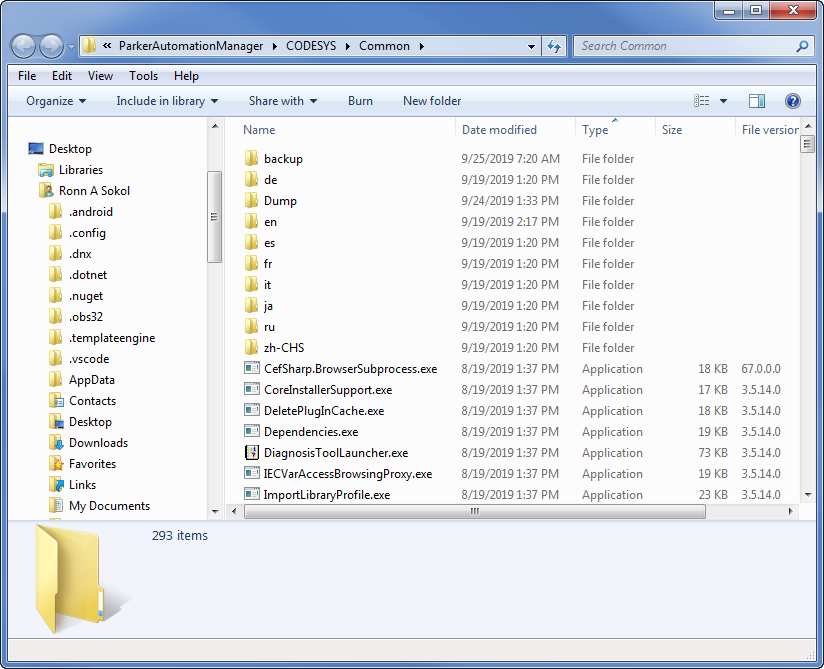
- 'Files and Folders' tab - 'Common Folder' button
All of the buttons inside the 'Folders' group provide the mechanism to quickly and easily open to the the respective folder inside a new Windows Explorer window:
Below is an example of clicking the 'Common Folder' button: