-
Displaying the Xpress HMI Settings
page Pt. 1
Following is an example of what gets displayed in the web browser when the Xpress HMI Settings tab is first clicked
on:
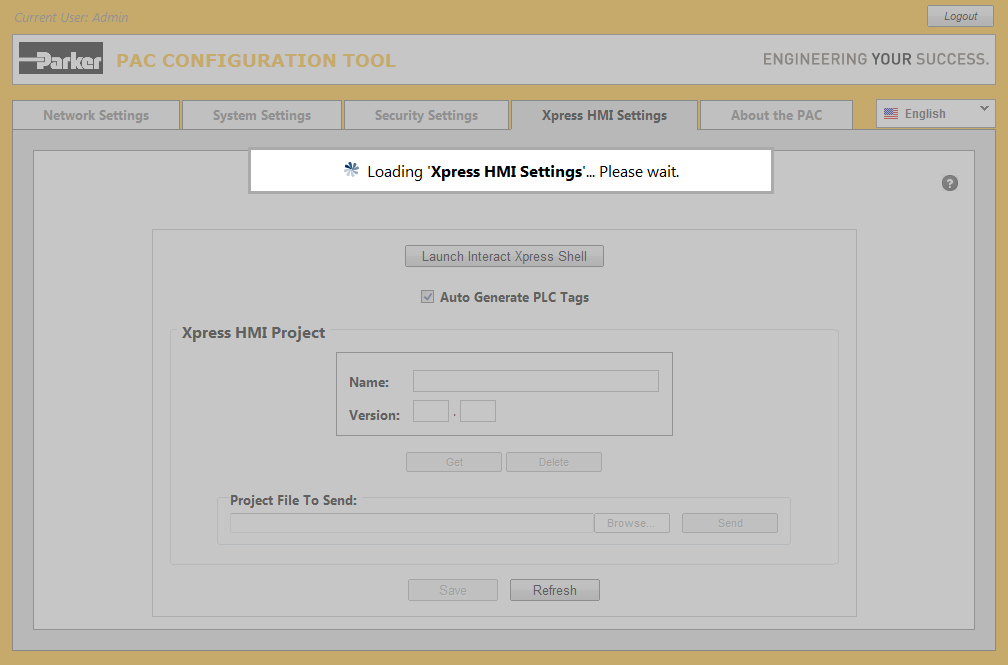
The window is temporarily locked with a notification displayed in its center indicating that the page is in the process
of being loaded. The notification window disappears once the data is loaded successfully.
The loading notification will not be displayed on subsequent trips to the same tab page during the same session unless
or until you re-login to the PAC Configuration Tool or click the browser's own Refresh button.
-
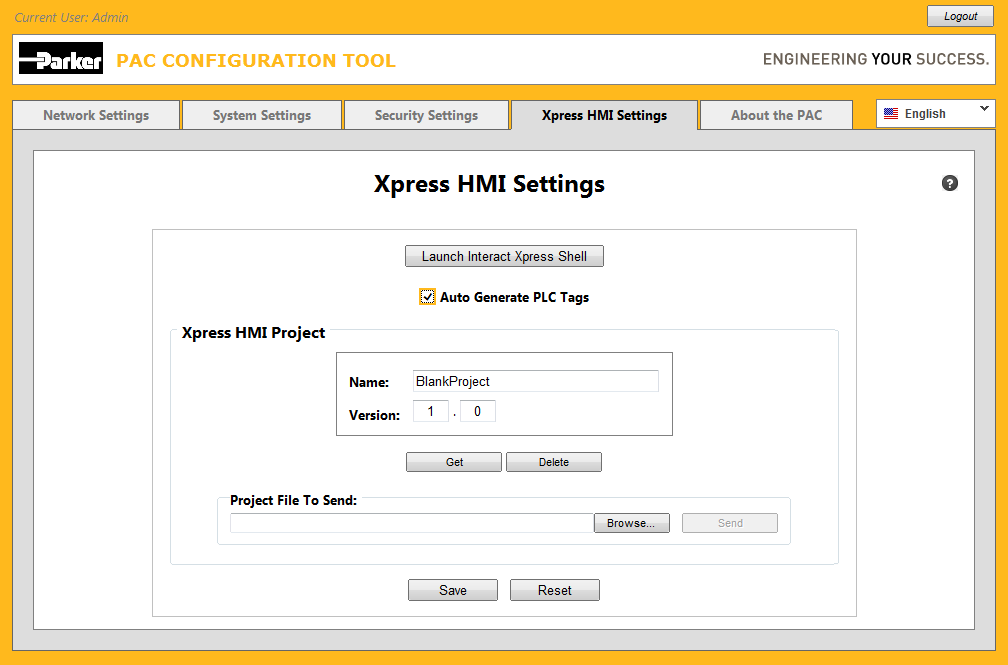
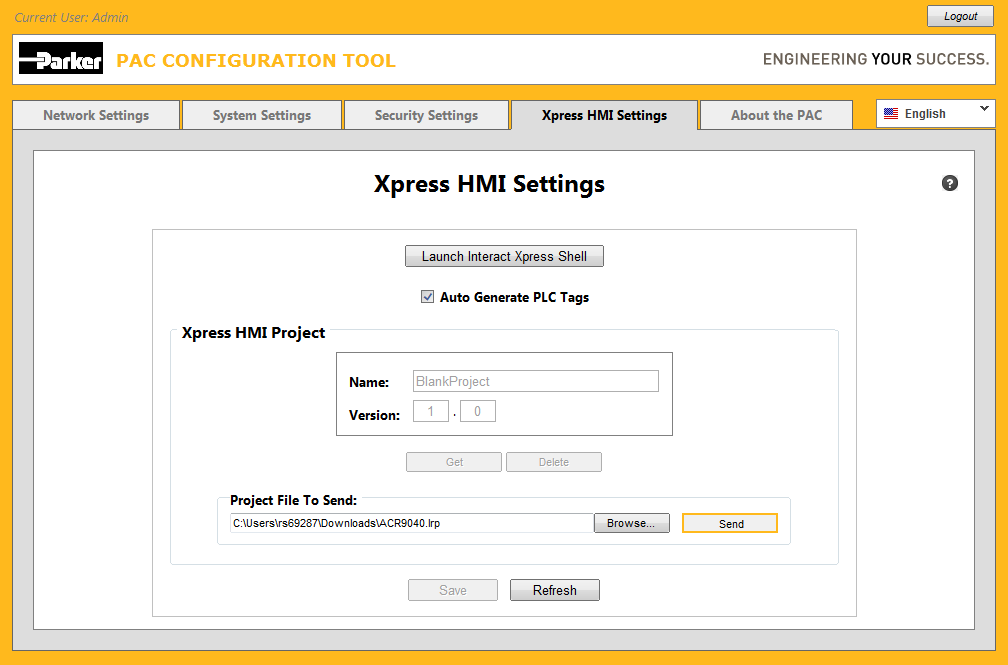
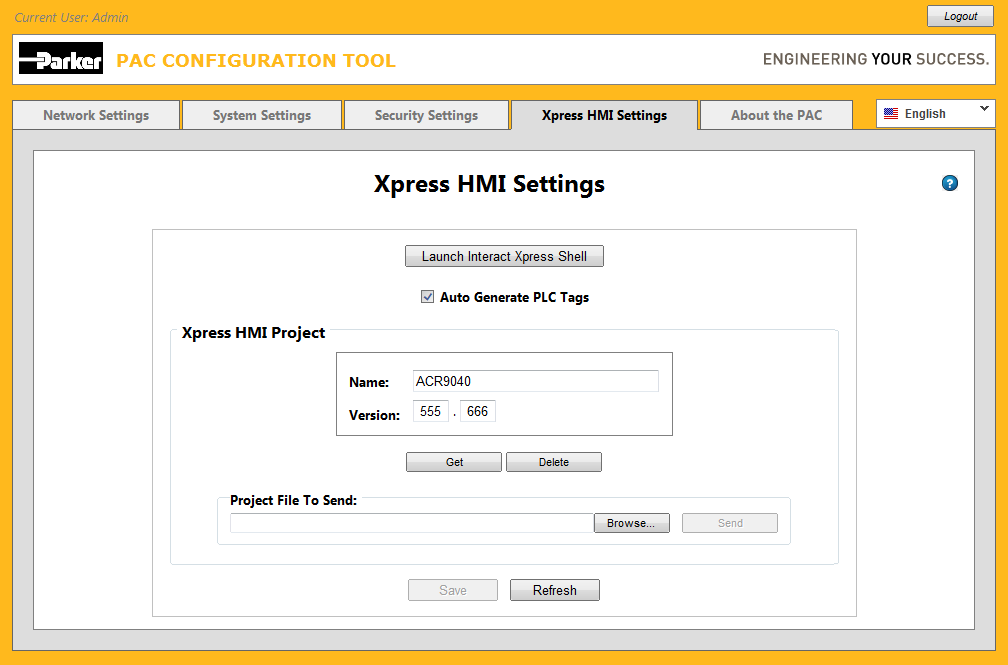
Displaying the Xpress HMI Settings
page Pt. 2
This is the standard Xpress HMI Settings view when opening the tab for the very first time.

-
Launching Interact Xpress Shell
Click the Launch Interact Xpress Shell button to open a new browse window containing the Interact Xpress Shell.
Clicking the same button again, will bring a pre-existing 'unclosed' Interact Xpress Shell window to the foreground*.

* This situation could occur if the PAC Configuration Tool window (or another window) is clicked without first closing
the Interact Xpress Shell window.
-
Displaying the Interact Xpress Shell window
An independent Interact Xpress Shell window is opened on top of the current PAC Configuration Tool window.
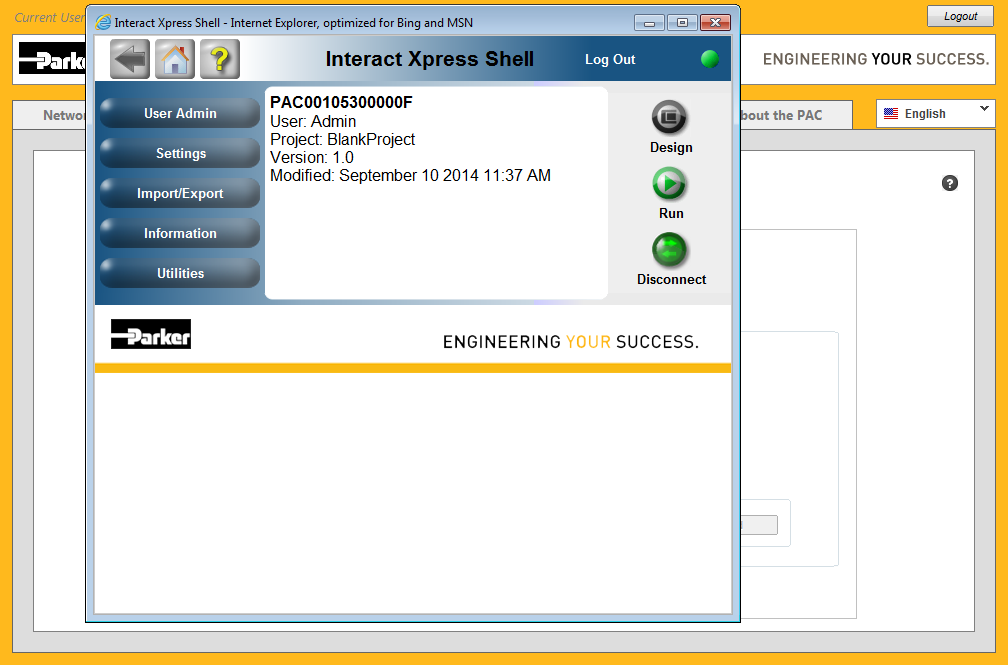
If an already open Interact Xpress Shell window is brought to the foreground by clicking the Launch Interact Xpress
Shell button, its contents will be simultaneously refreshed.
-
Auto Generate PLC Tags
Place a checkmark into the Auto Generate PLC Tags checkbox to indicate that PLC tags should be automatically generated.
The Auto Generate PLC Tags checkbox contains a checkmark by default when the PAC is launched for the first time.
-
Saving Xpress HMI Settings
Click the Save button to permanently save this or any other changed data on this page to the PAC.
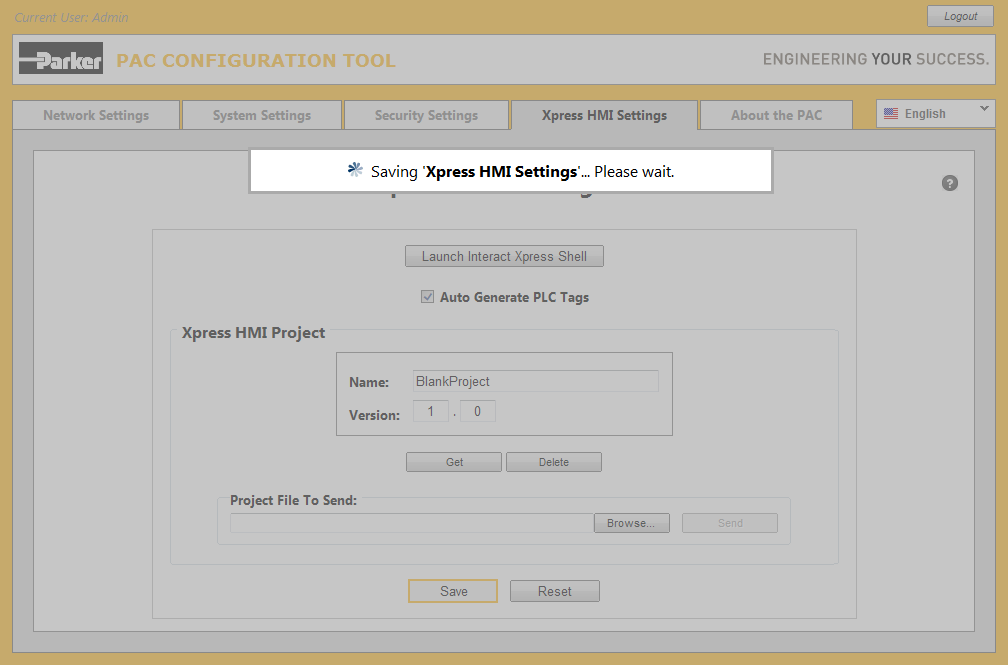
The window is temporarily locked and a notification displayed in its center indicating that the page is in the process of
saving its contents. The notification window disappears automatically once the data is saved succcessfully.
-
Browsing for a new Project file
Click the Browse... button to open the Choose File to Upload dialog.
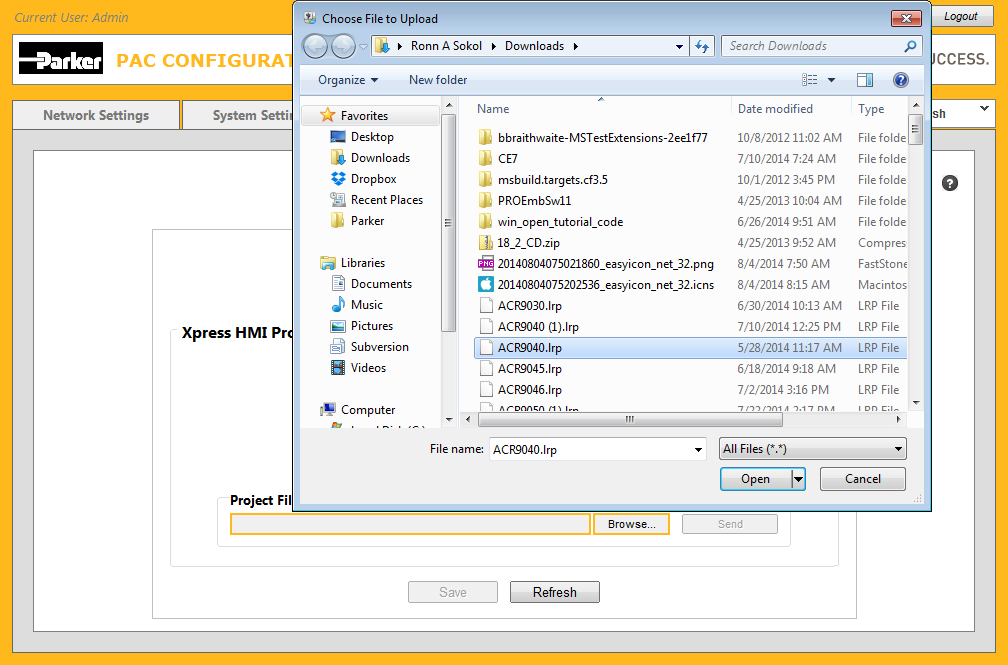
Navigate to the folder containing the desired Xpress Project file you wish to upload; select the file; then click
the Open button in the dialog. Once the dialog is dismissed you will notice the Project File To Send contains
the full path of the project file and the Send button is now enabled.
-
Sending a new Project file to the PAC
Click the Send button to send (upload) the designated project file from your computer to the PAC.
-
Displaying the Sending Xpress Project
file notification
Whenever the Send button is clicked, a progress notification is displayed indicating that the Xpress Project is in
the process of being sent to the PAC.

The progress notification disappears automatically once the send has completed.
-
Project File sent successfully to the PAC
Once a project file is successfully sent to the PAC, the Xpress HMI Project Name and Version fields
will be immediately updated to contain the new information relative to the project.

-
Attempting to Launch Interact Xpress Shell
If you click the Launch Interact Xpress Shell button immediately following a new project file being sent to the PAC,
a warning dialog may be displayed:
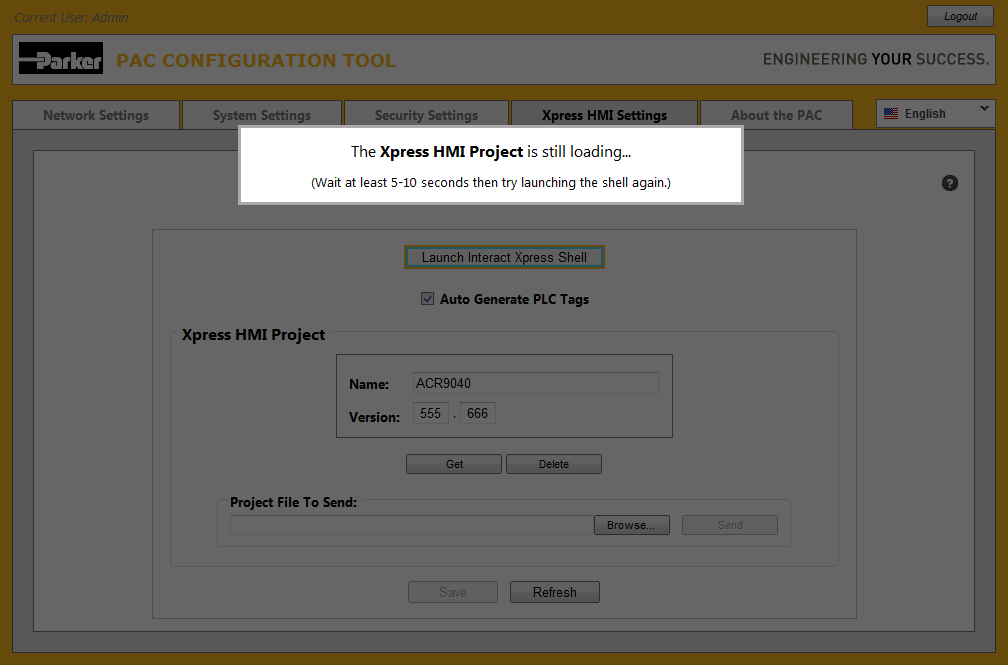
This message indicates that behind the scenes, the PAC is still in the process of loading the Xpress project, thus
preventing the Xpress Shell from physically being opened.
Wait 15-20 seconds (or more) for the PAC to complete the loading process then click the Launch Interact Xpress Shell
button again. (Note that a longer wait time may be necessary depending upon how big the project file to upload actually is.)
-
Getting Xpress HMI Project from the PAC
Click the Get button to get (download) the Xpress HMI project from the PAC to your computer.
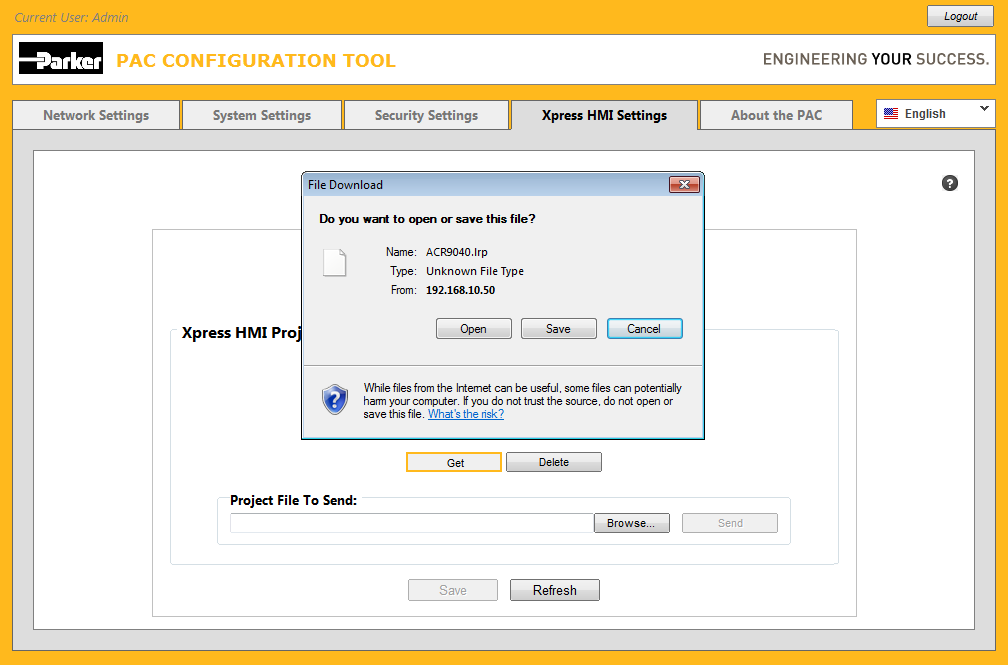
A File Download dialog will appear such as the one shown above providing you with the option of opening or
saving the '.lrp' file to your computer.
Click the Save button on the File Download dialog.
-
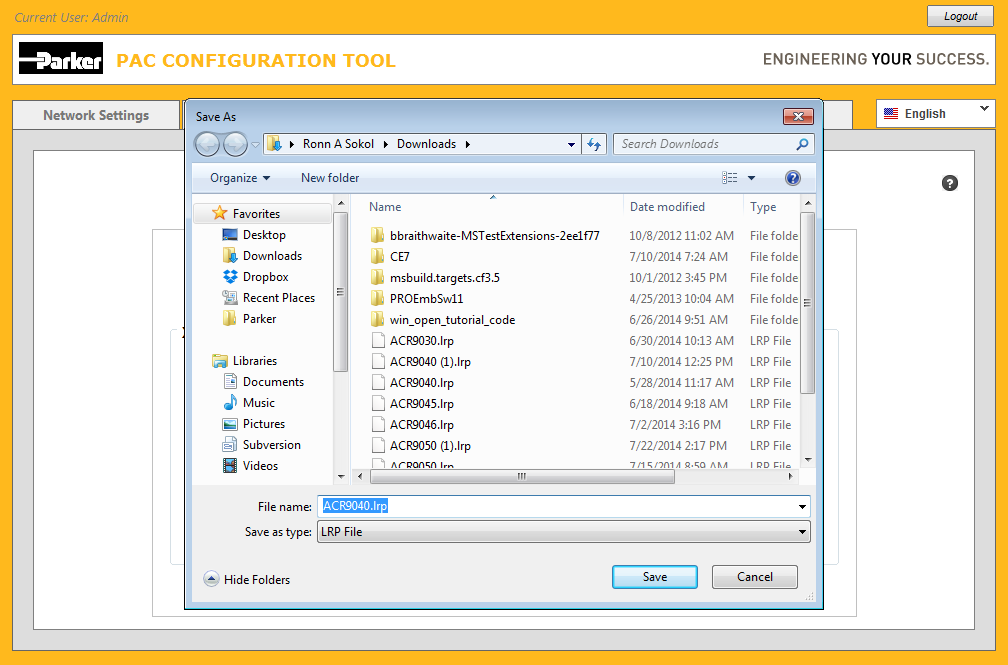
Saving an Xpress HMI Project downloaded from the PAC
You are presented with a standard Save As dialog where you can navigate to a specific folder to save in and/or set
the name of the downloaded project file. (You can also abort the process of downloading the project file altogether by clicking
the Cancel button.)
-
Deleting the current Xpress Project from the PAC
Click the Delete button to indicate your desire to have the Xpress HMI Project deleted from the PAC.

The Name and Version fields appear with a strike through the middle of its text. The project is not yet deleted.
-
Displaying the Deleting Xpress Project notification
Click the Save button to actually have the project deleted from the PAC.
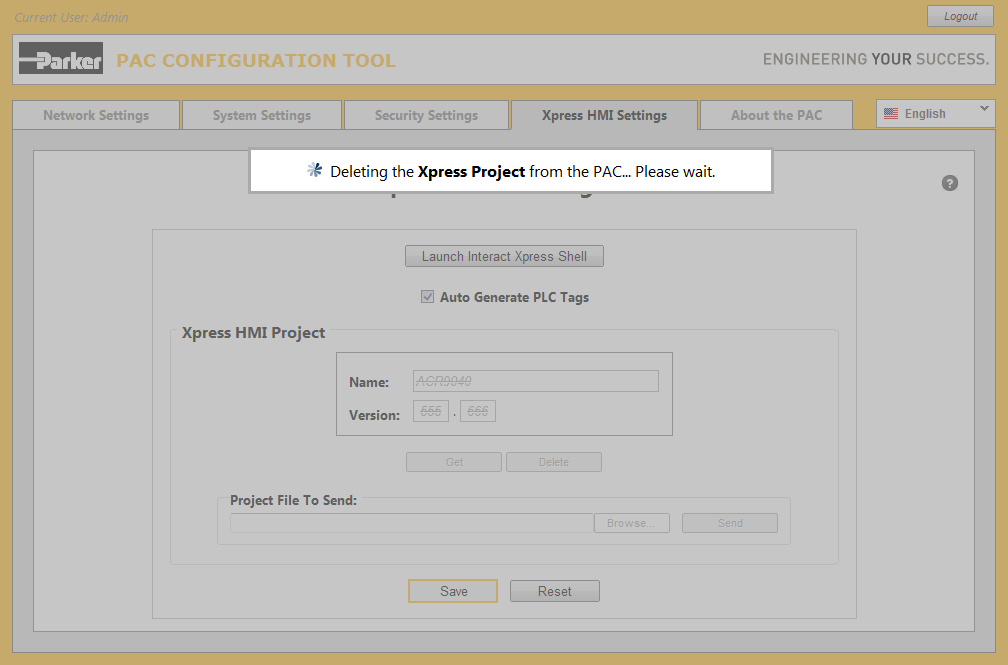
A progress notification is displayed indicating that the Xpress Project is being deleted from the PAC.
The progress notification disappears automatically once the delete has completed.
-
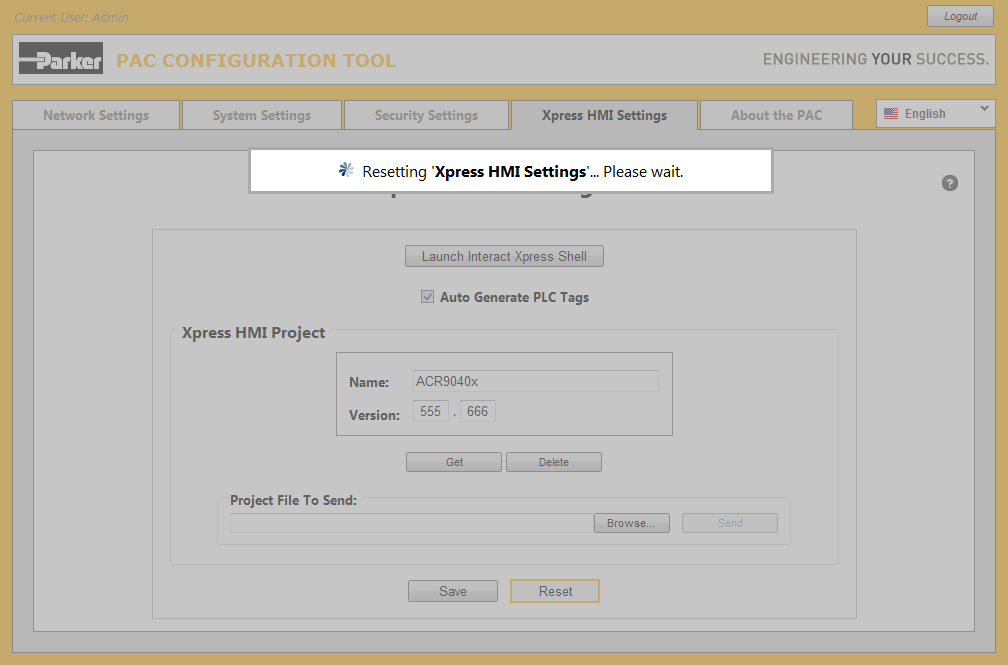
Resetting Xpress HMI Settings
Click the Reset button anytime prior to clicking the Save button, to discard changes you may have made (inadvertently
or otherwise), to the Xpress HMI Settings.
A progress notification is temporarily displayed until the reset has completed at which time the Reset button
is replaced by a Refresh button.
-
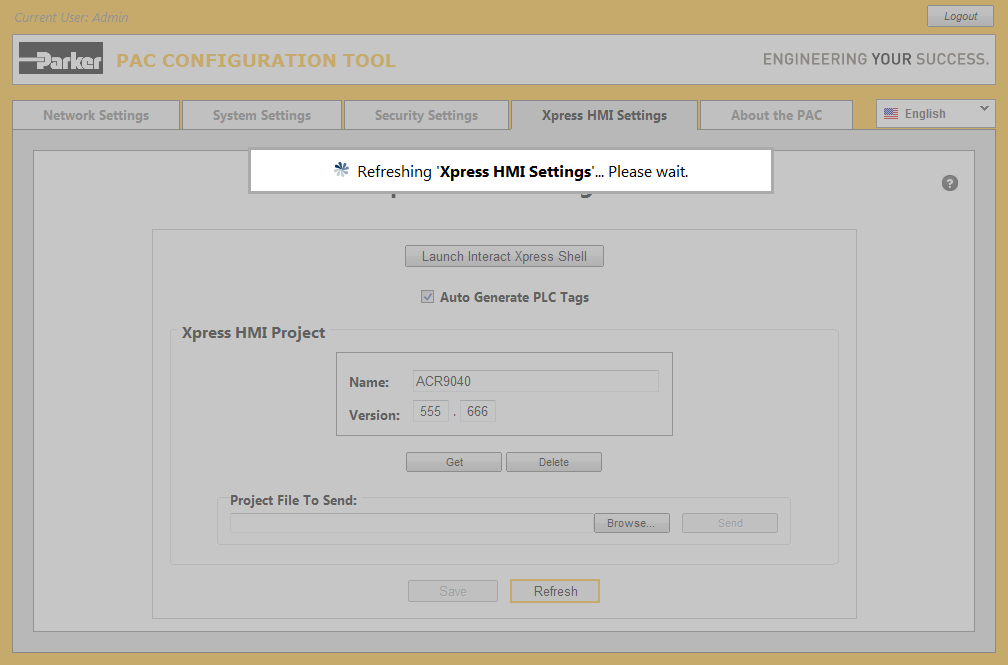
Refreshing Xpress HMI Settings
You can click the Refresh button anytime you wish to refresh the contents of the Xpress HMI Settings
tab page.
Note that the Refresh button is automatically replaced by a Reset button once any change is made to the currently
displayed data.
A progress notification is temporarily displayed until the refresh has completed.
-
Xpress HMI Settings Error
Attempting to send an Xpress project to the PAC when the Xpress HMI Core is unavailable, results in the following dialog being displayed:
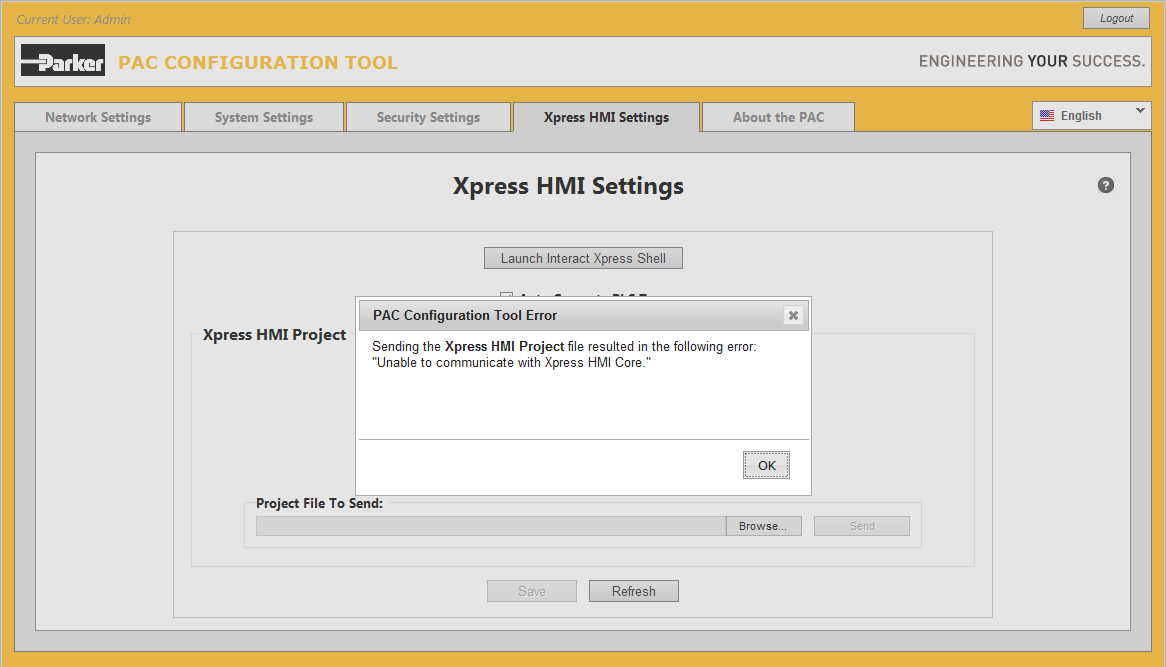
Please contact your system administrator as soon as possible as this usually requires the PAC to be restarted.
-
Opening the Online Help
Click on the [?] button at the upper right corner of the page to display this online help at any
time:
Online help appears independently in its own window within the web browser.