-
Displaying the System Settings
Page
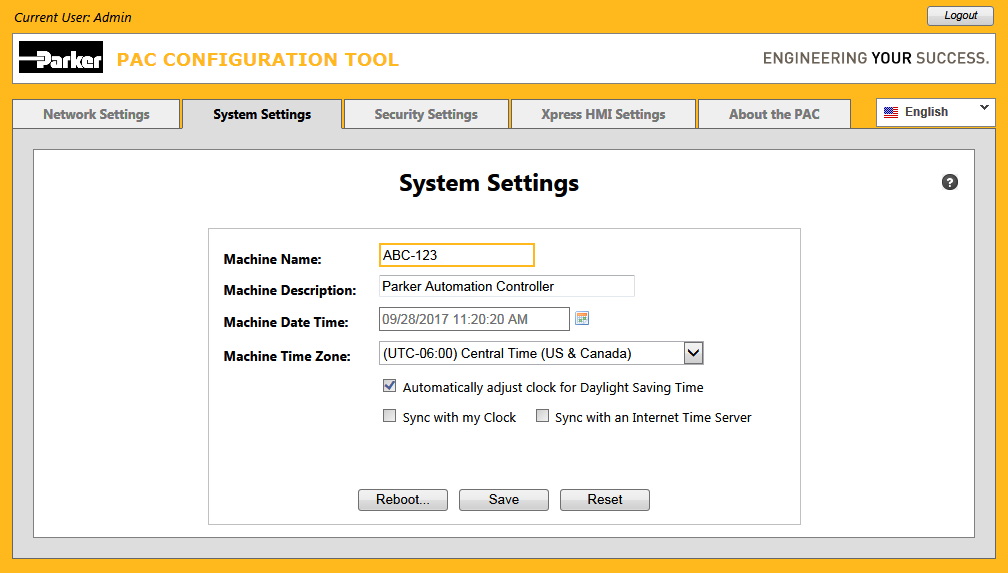
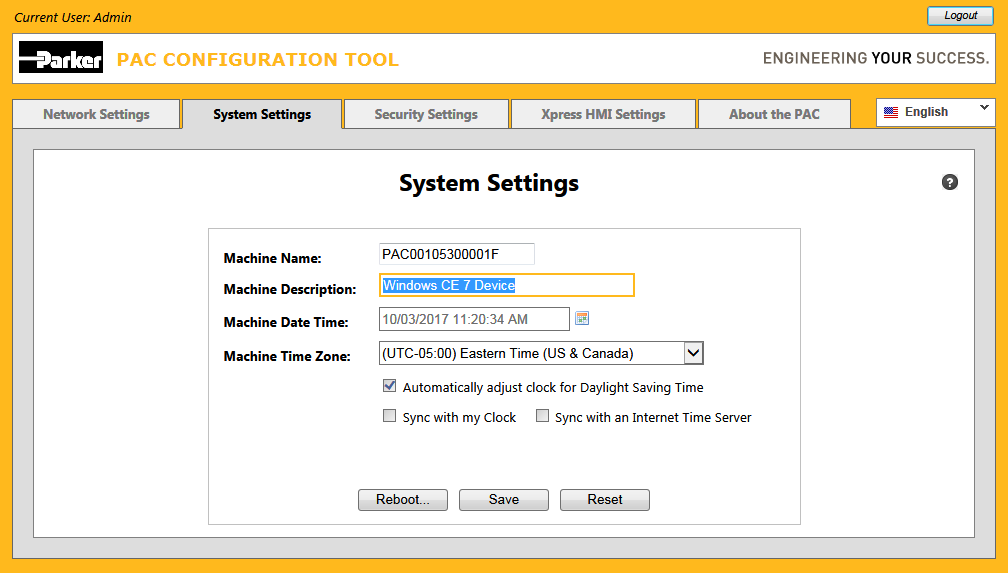
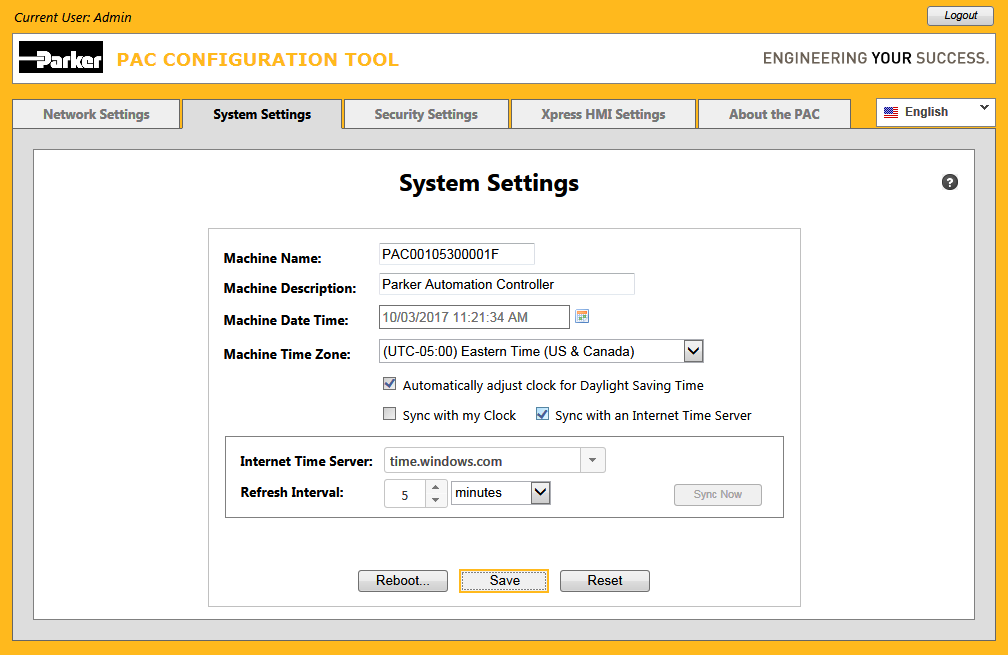
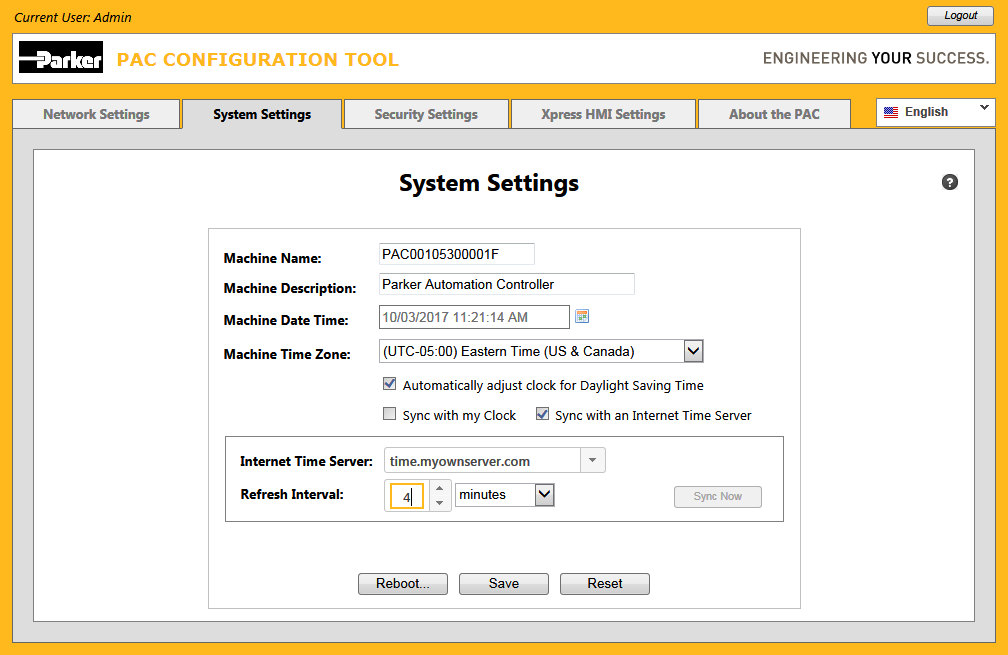
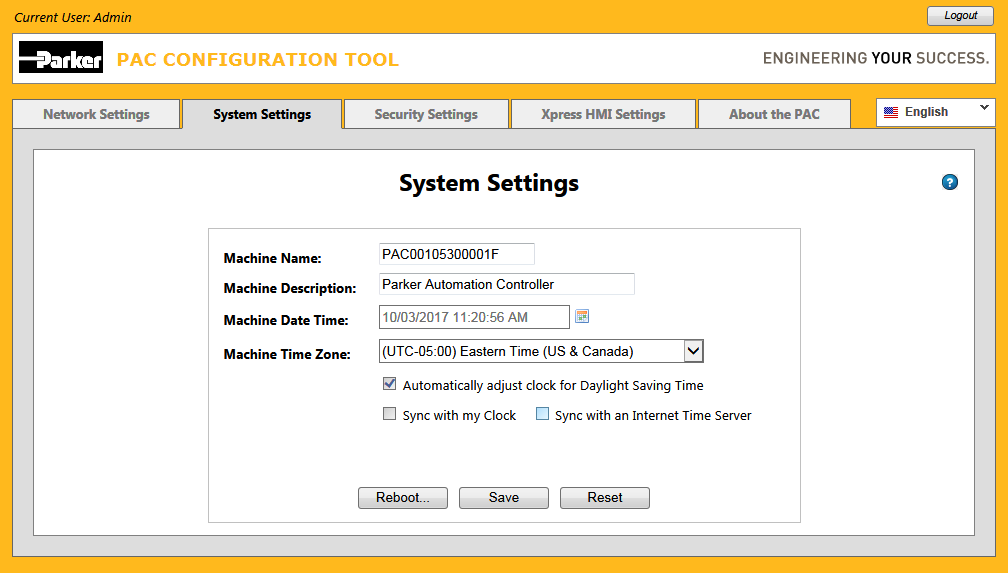
The following is an example page displayed in the web browser when the System Settings tab is clicked:
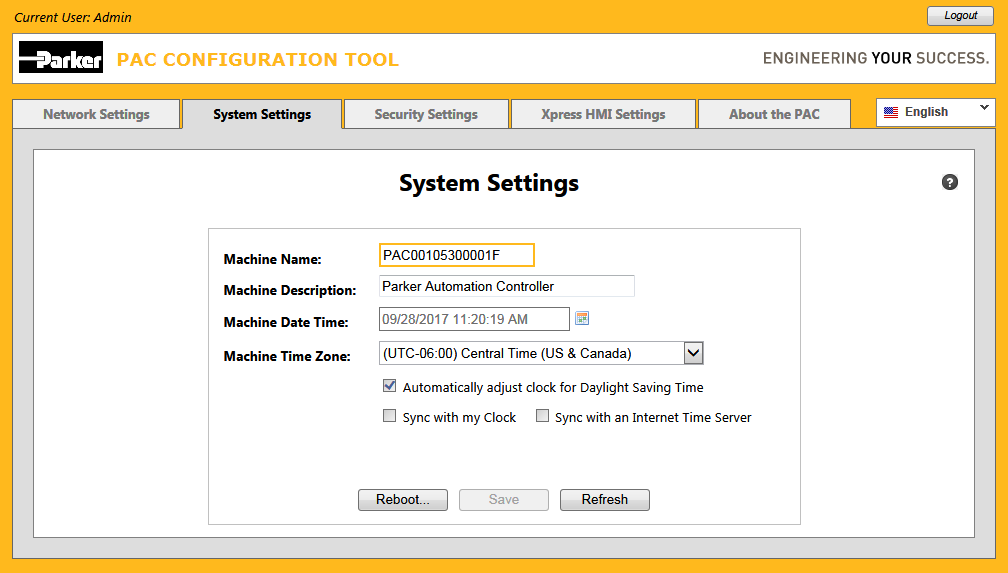
The Machine Name is by default initially set to: "PAC" prepended to the digits making up the MAC Address of
the default adapter on the PAC.
-
Clicking the Refresh
button
You can click the Refresh button at the bottom of the page at any time to retrieve the latest values
from the device:

Note that this is the preferable method versus clicking the browser's own refresh button which always resets and retrieves
all the tabs and corresponding values instead of just the values
being retrieved for the current tab....
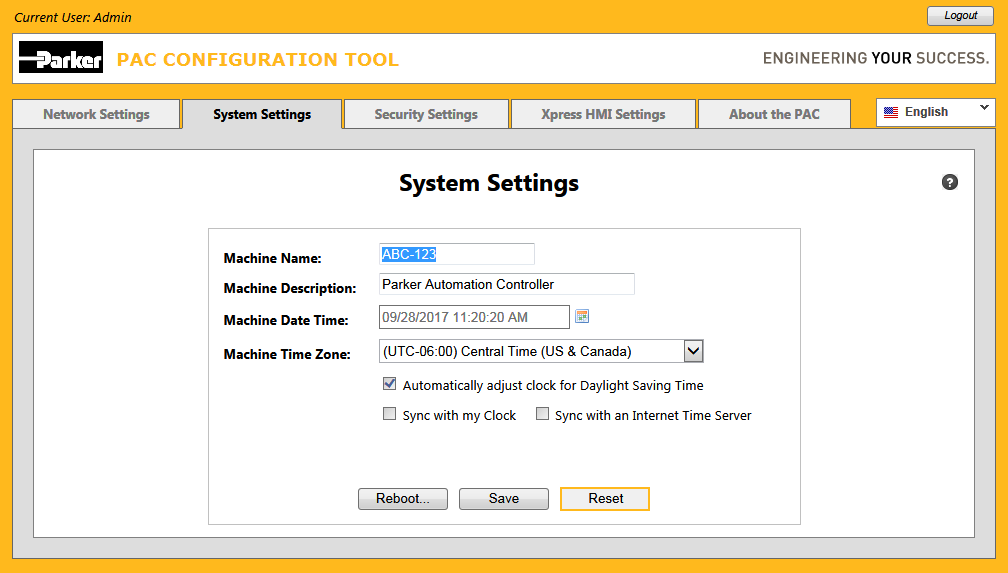
Whenever you make changes to the page, the name of the "Refresh" button automatically changes to "Reset".
Subsequently resetting or saving the contents of the page results in the name of the button reverting back to "Refresh"...
Another note of interest is that the Machine Date Time
is automatically updated every second as long as there are no pending changes to be saved
and only while the page is 'active'. That is, if you click another tab in the browser window, or click off the browser window altogether,
the automatic update will stop until the 'System Settings' page is reactivated.
-
Changing the Machine Name
To change the Machine Name, click anywhere on the corresponding field (which is shown as being empty in the following
example):
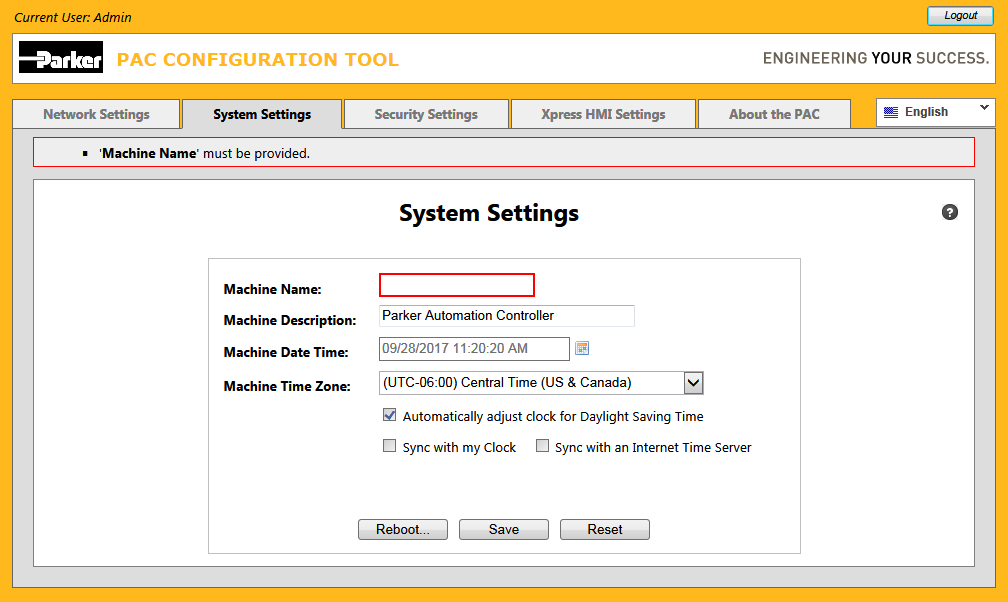
Machine Name is a required field and must be entered before the System Settings can be saved.
-
Validating the Machine Name
before Saving Pt. 1
Notice that as you change the Machine Name a bright red border appears around the field and a notification
frame appears near the top of the page:
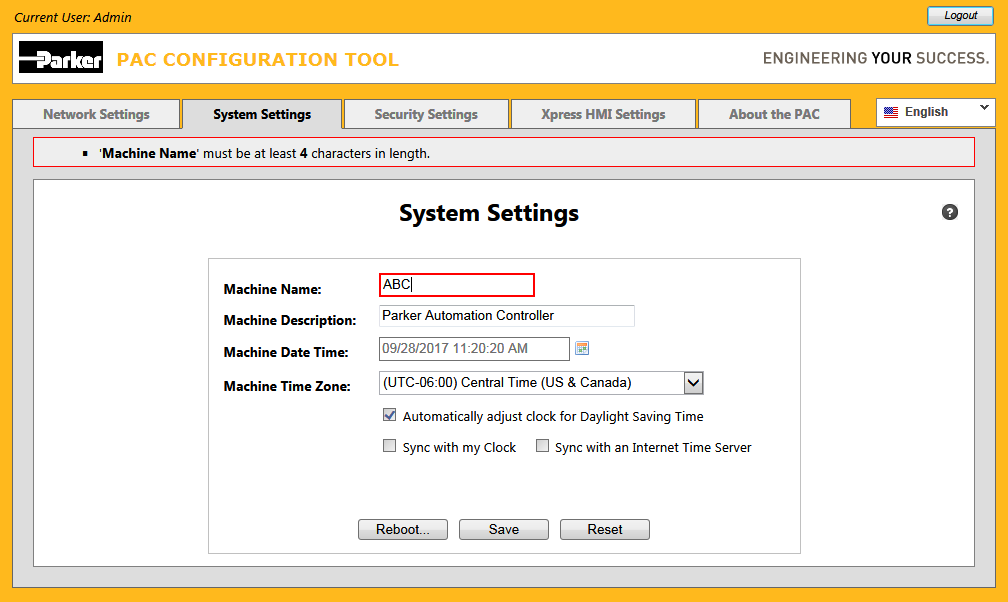
This nuance occurs whenever you make changes to the data on a page which is considered to be invalid.
The Machine Name must be a minimum of 4 and a maximum of 15 characters in length and must end with either a character or
a digit. Only the following combination of characters can be entered into this field:
[a-z] [A-Z] [0-9] [-] (dash).
-
Validating the Machine Name
before Saving Pt. 2
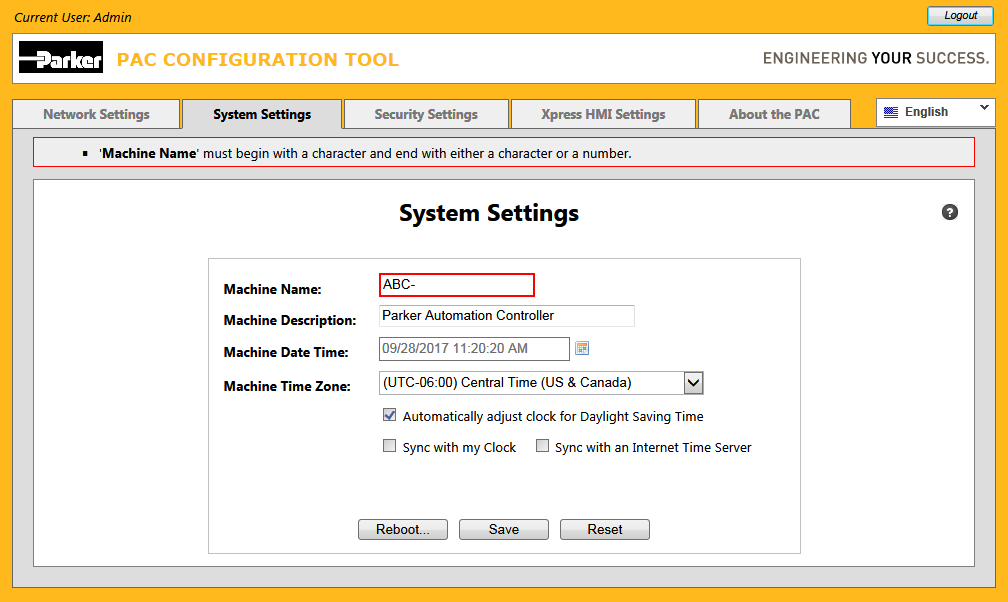
The Machine Name in this example, although meeting the minimum of 4 characters in length, ends
with a '-' (dash):
-
Validating the Machine Name
before Saving Pt. 3
Continuing from the previous example, several numbers are now entered following the dash:
The notification message and red border immediately disappears since a valid machine name has now been entered.
-
Clicking the Reset
button
If you wish to abandon any changes you make to the System Settings and return to the previously saved state, you can click
the Reset button at any time (that is, any time prior to clicking the Save
button which makes the changes permanent).
-
Displaying progress notifier while Resetting
Whenever the Reset button is clicked, the page is locked and a progress notifier is displayed:
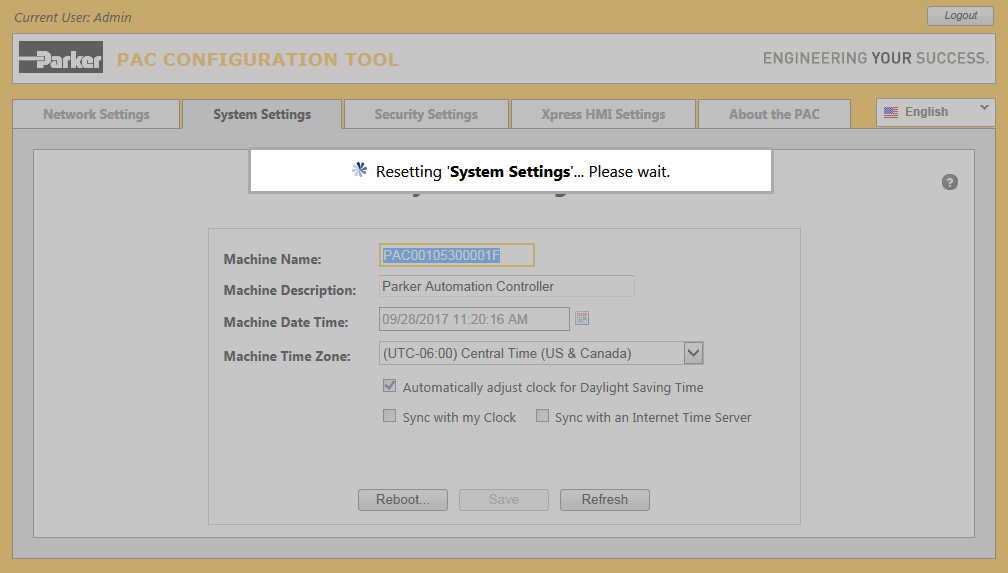
The page is unlocked and the progress notifier disappears automatically after the reset has completed.
-
Saving a changed Machine Name
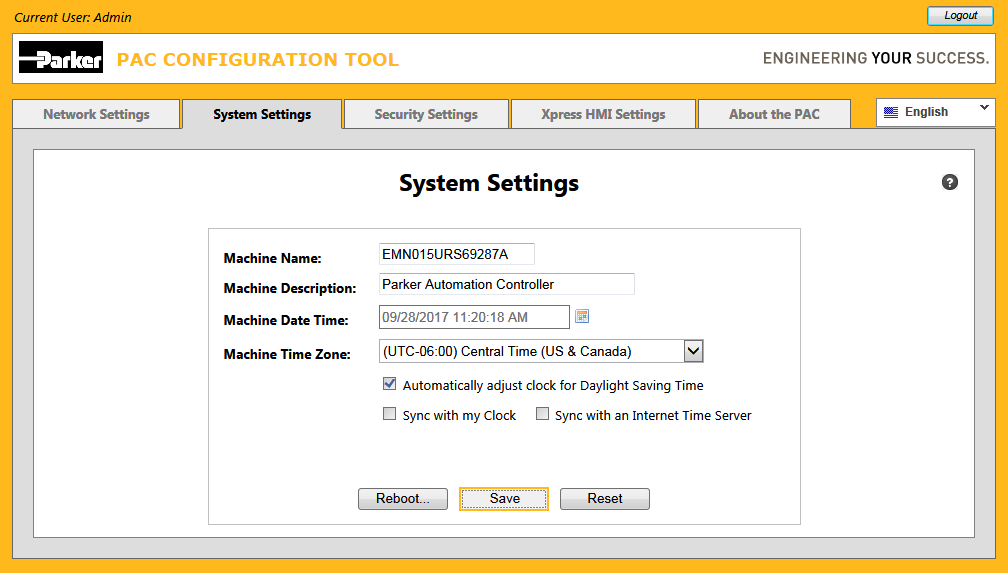
The following example illustrates a valid Machine Name being entered followed by the Save
button being clicked:
-
Checking for existing Machine Name
while Saving
After the Save button is clicked, the page is locked and a notification is displayed indicating
that the machine name is being validated:
This particular validation is to ensure that another device having the same machine name does not already exist on the network.
-
Receiving Existing Machine Name
exception while saving
If during a save, it is determined that the specified machine name already exists on the network, the following dialog will
be displayed:
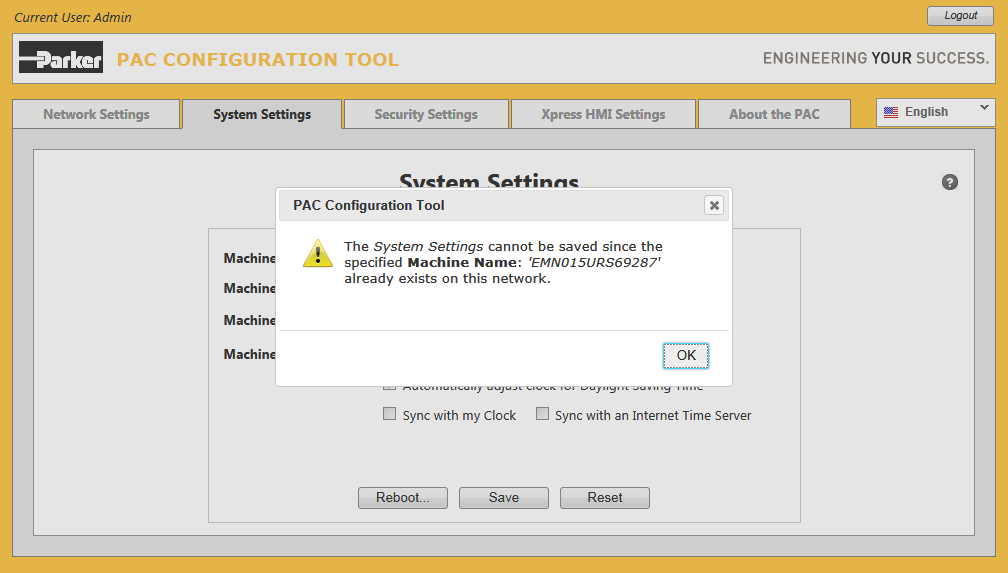
Click the OK button to close the dialog. Change the machine name to something unique; then try
saving again.
-
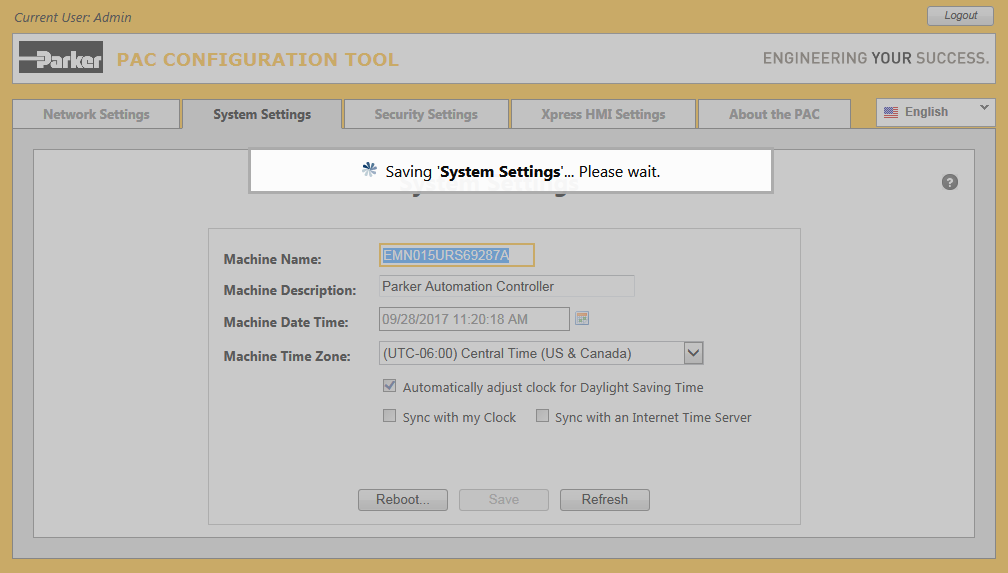
Displaying progress notifier while Saving
During a save and following a successful check for an existing machine name, the page continues to be locked with a progress
notifier displayed:

The page is unlocked and the progress notifier automatically disappears after the save has completed.
-
Changing the Machine Description
Click anywhere on the Machine Description field to facilitate changing its value:
You can enter up to 80 characters using a combination of any of the following:
[a-z] [A-Z] [0-9] [- ] (dash or a space)
-
Changing Machine Date Time
Pt.1
When the System Settings page is first displayed the Machine Date Time field will show the date
and time the PAC is currently set to. The value will be automatically refreshed once every second unless/until some unsaved
change is made on the page.
(For example, you begin typing a new 'Machine Description' - the date and time will be momentarily frozen
until either the page is reset or saved).
Click on the Machine Date Time field to display the drop-down control showing a calendar with the
current date and time the PAC has been set to.

Note that since the automatic refresh of the current date and time is momentarily paused, you may need to account for this
discrepancy prior to actually clicking the Done button.
-
Changing Machine Date Time
Pt.2
Click the correct day of the month on the calendar portion of the drop-down and/or move the slider buttons left or right
to adjust the current time. Click the Done button when you have completed your change.
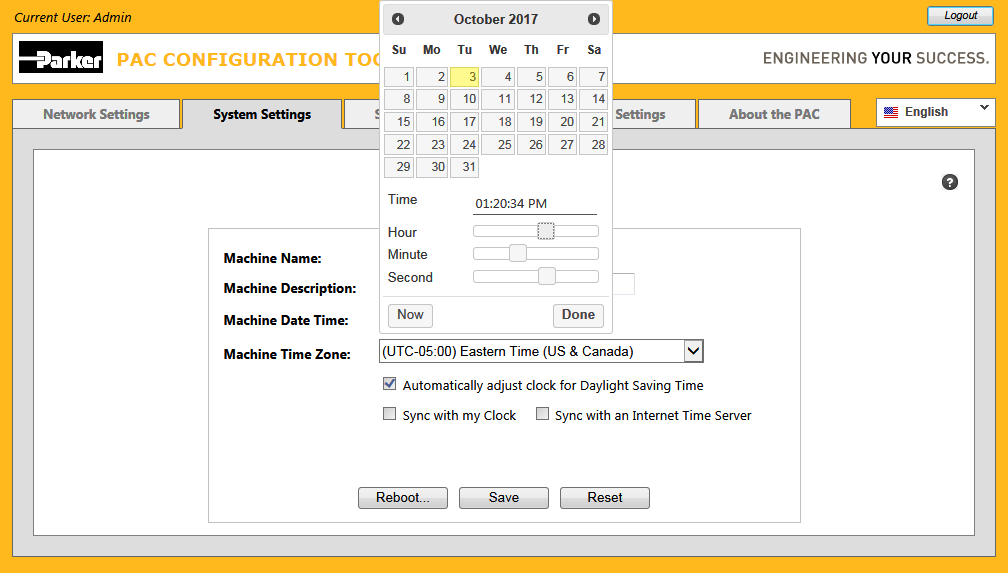
Any values set on the drop-down are not saved to the PAC until the Save button has been clicked
on the underlying page.
-
Changing Machine Date Time
Pt.3
Click the Now button on the Calendar drop-down to have it reset itself to display the current date
and time from your own computer.
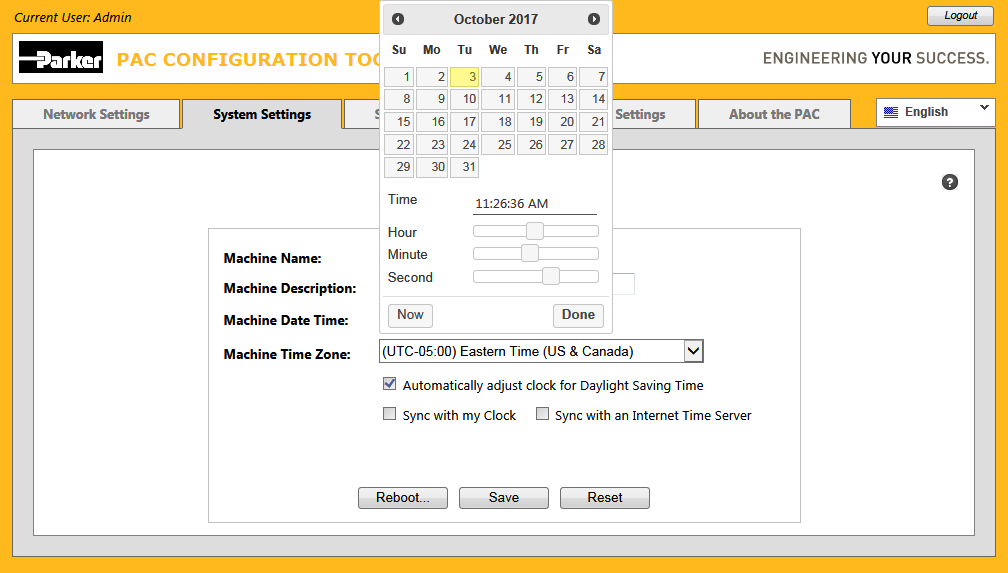
Click the Done button when you have completed your change.
-
Changing Sync with my Clock
Place a checkmark in the Sync with my Clock checkbox to set the values of the Machine Date Time
and Machine Time Zone fields to the values currently set on your own computer.
The date and time value will automatically refresh itself once every second as long as the web browser and this page is active
and there are no outstanding unsaved changes on the page.

Remove the checkmark from the Sync with my Clock checkbox to begin displaying the values currently
set on the PAC itself.
-
Changing Machine Time Zone
Click on the Machine Time Zone field to display the drop-down list-box containing the valid selections.
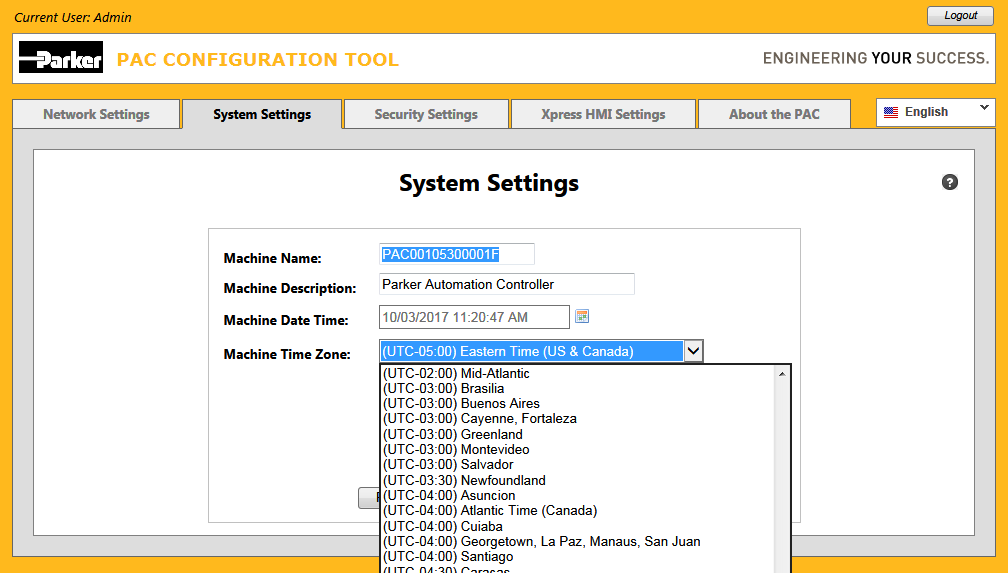
By default the current value is pre-selected. Scroll the list-box up or down to display more choices and make a new selection.
You can optionally use the Up or Down arrowkeys to move the selection
up or down and then press the Enter key to select it. Click anywhere outside the list-box to hide
the list and leave the selection as it is.
-
Automatically adjust clock for Daylight Saving Time
Click on the Automatically adjust clock for Daylight Saving Time checkbox to either add or remove
the checkmark from the checkbox.
When this item contains a checkmark, it indicates that the time value set on the PAC will be automatically adjusted whenever
Daylight Saving Time begins or ends. If it is unchecked, the time will have to be manually adjusted whenever
Daylight Saving Time changes.
-
Non Daylight Saving Time
time zones
Note that not all time zones support Daylight Saving Time (DST). If you pick a Machine Time Zone that does
not support DST, this checkbox will not be available as shown here when picking the Central America time zone.

-
Invalid data notifier displayed while attempting to Save
If the Save button is clicked while any field on the page contains invalid data, the page is locked
and a notification message is momentarily displayed:
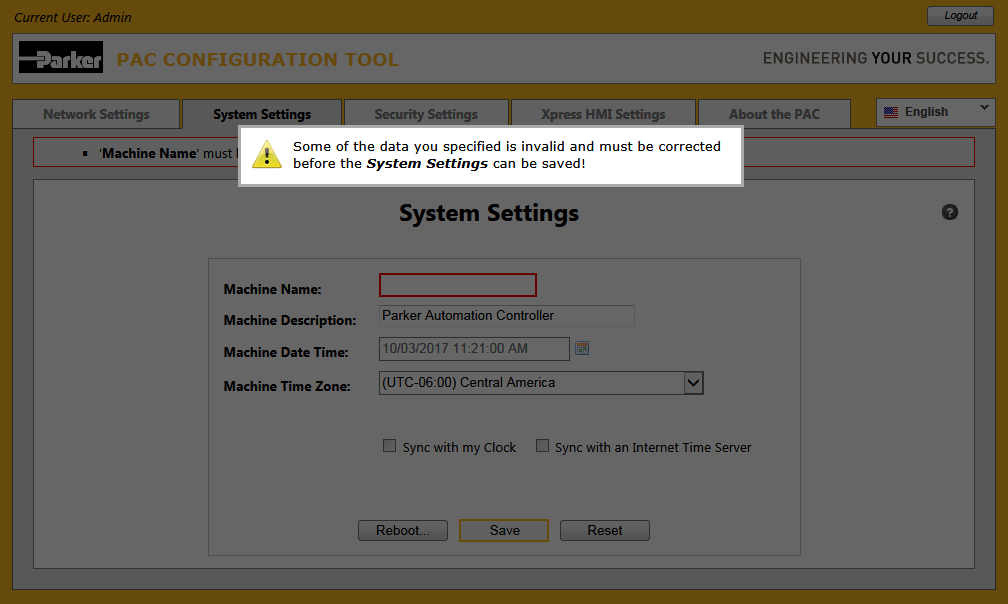
The message disappears automatically after a few seconds allowing you to proceed to make the neccessary corrections.
You can click the mouse at any time to force the message to disappear immediately without having to wait the few seconds.
-
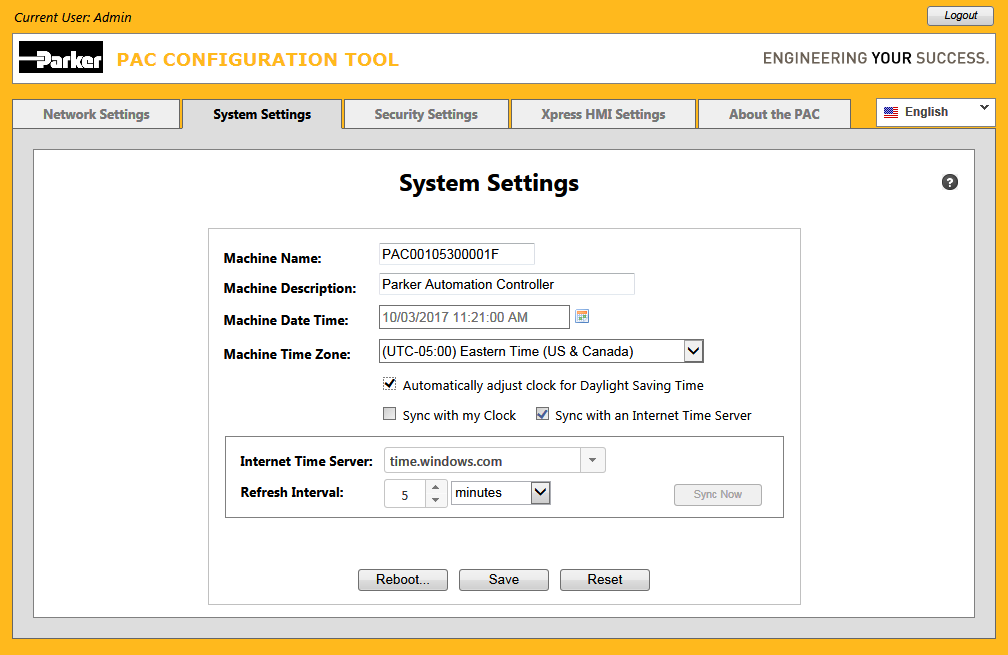
Synchronizing with an Internet Time Server
To synchronize the Machine Date Time on the PAC with an internet time server, place a checkmark into
the Sync With Internet Time Server
checkbox.
A group box containing fields for specifying the Internet Time Server
and the Refresh Interval
along with a button
to Synch Now
are displayed.
Whenever the Sync With Internet Time Server
checkbox contains a checkmark, it indicates that the time value set on the
PAC will automatically be adjusted periodically using data received from an Internet Time Server.
-
Selecting the Internet Time Server
Select a value from the pre-defined Internet Time Server list by clicking on the down arrow located beside it.
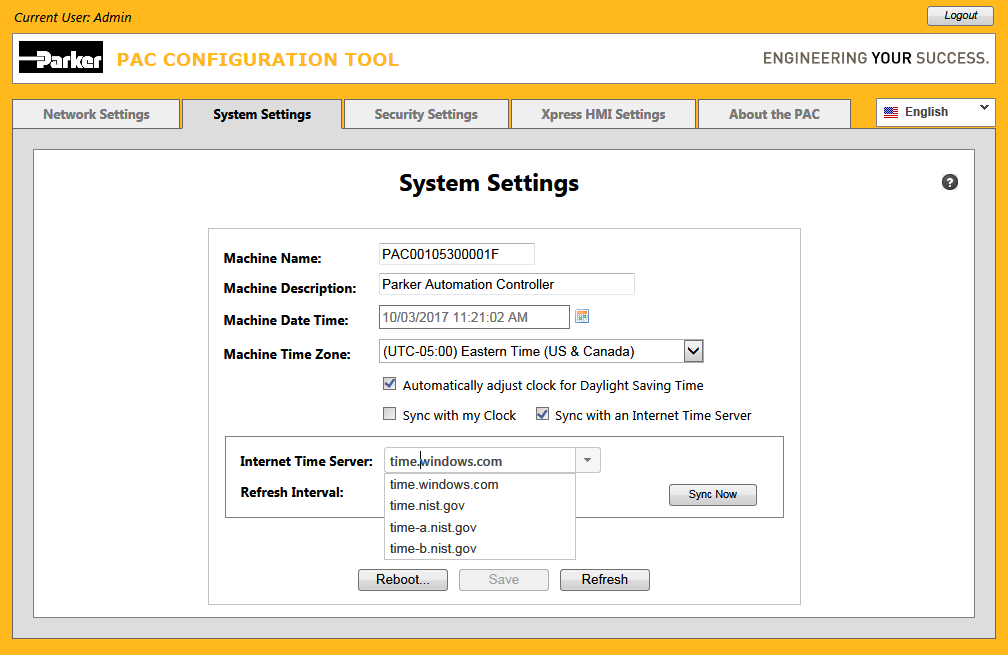
Once selected, you can use the up or down arrowkeys on your keyboard to move up or down thru the list or you can type the first few characters
which uniquely identify a value in the list to jump directly to that value.
-
Entering a custom Internet Time Server
You can enter a new custom Internet Time Server value to be added to the list, simply by clicking into the field and typing the value.
Press the Enter key on your keyboard when you have finished typing.
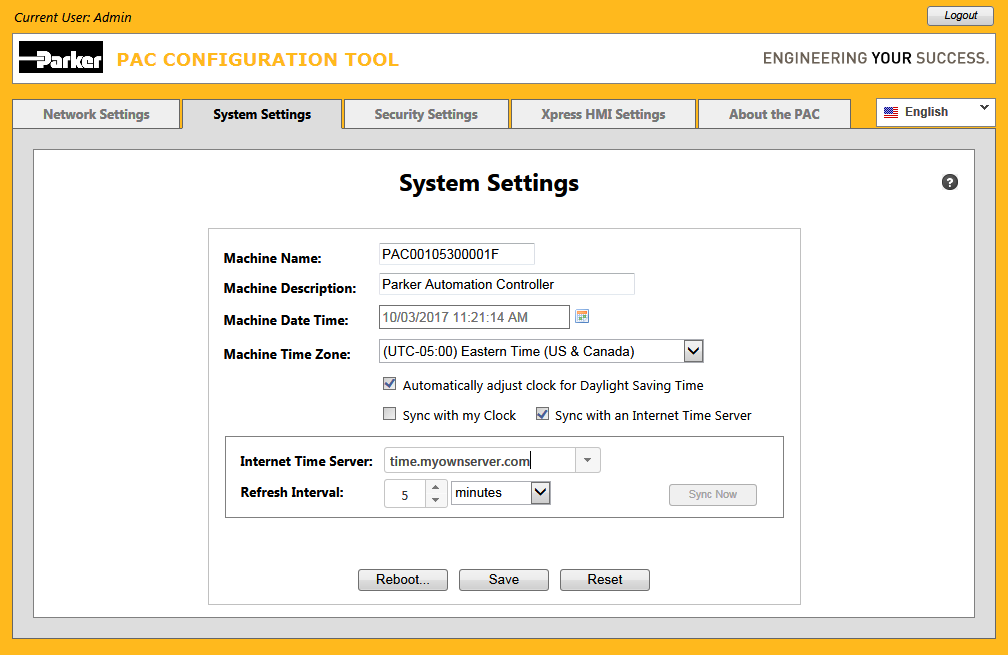
The value will be sent to the PAC and added to the list for future selection, once the Save
button is clicked.
-
Selecting a custom Internet Time Server
Expand the Internet Time Server
list to select a custom value.
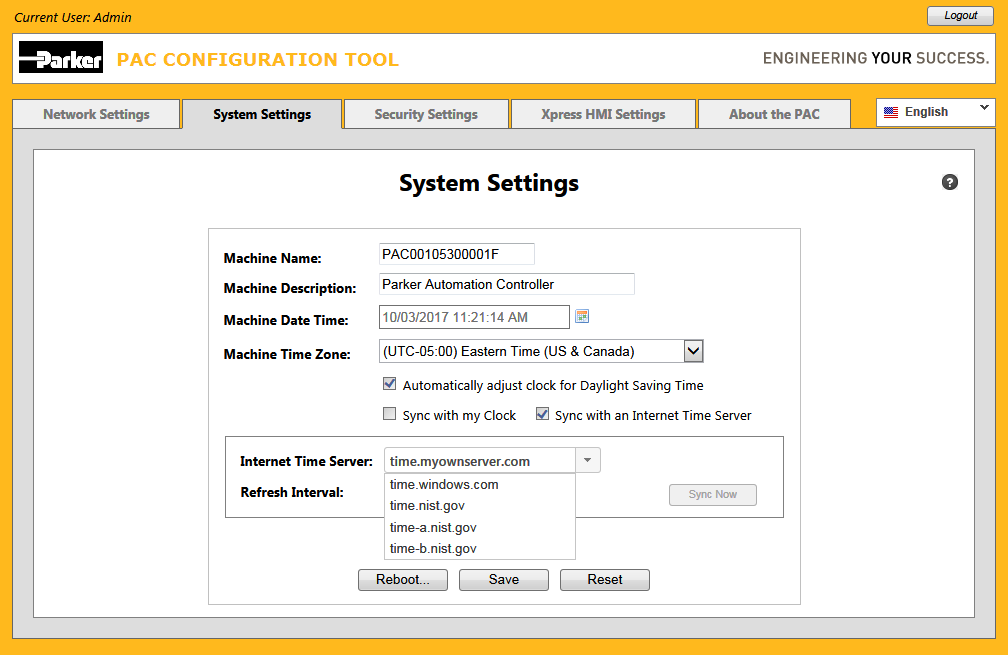
If you select another "non-custom" value and save that selection to the PAC, the custom value will be removed.
-
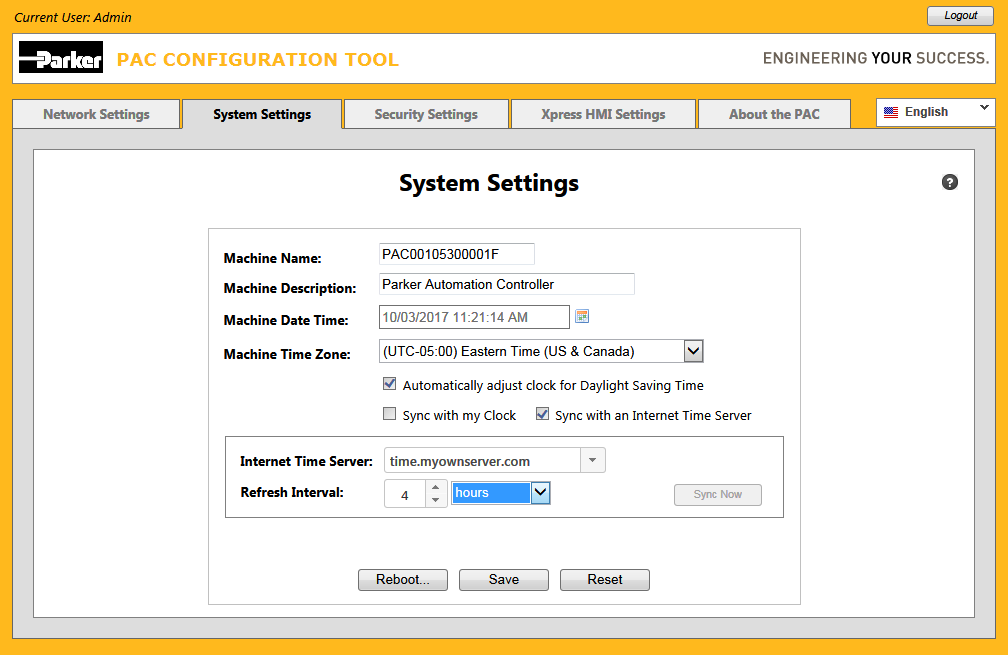
Changing the Internet Time Server Refresh Interval
Click on the Refresh Interval spinner control to change its value.
You can optionally enter a number directly into the control, click the up-down arrows located just to the right of the control,
or if you have a thumbwheel on your mouse, use it to increase or decrease the current value.
The spinner control only allows 'numbers' to be entered into it and the value must be between '1' and '9999'.
-
Refresh Interval
Validation
Whenever the Synch With an Internet Time Server
checkbox contains a checkmark and the Save
button is clicked,
before the save is actually performed, the refresh interval is validated.
If the refresh interval is less than 5 minutes or greater than 2 weeks, the save is aborted and a warning message dialog is displayed:
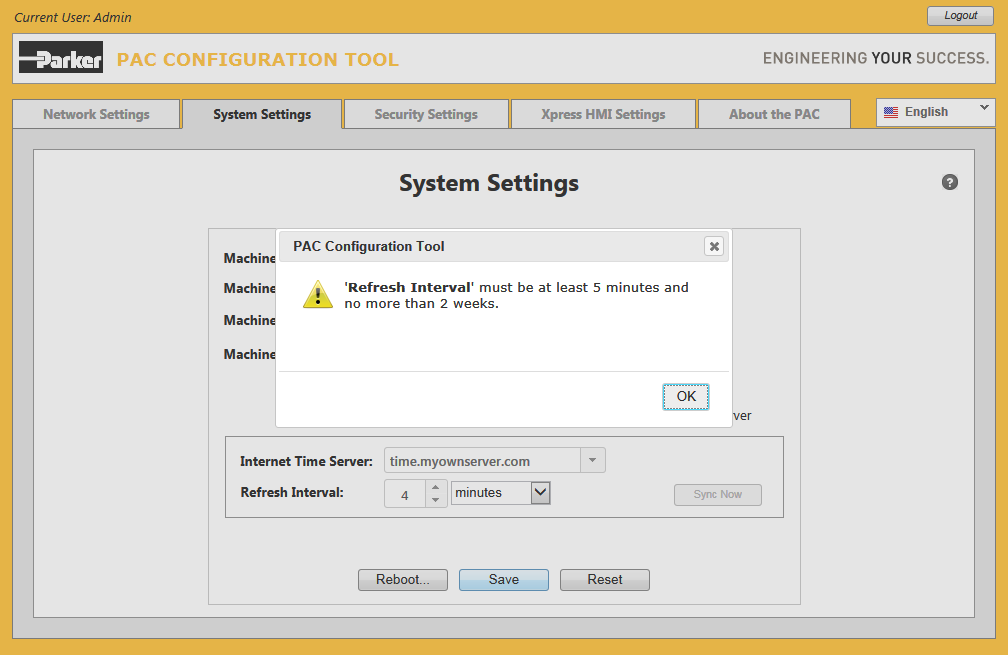
Click the OK
button on the warning message dialog to dismiss it; modify the Refresh Interval
value accordingly;
then reinitiate the save.
-
Changing the Refresh Interval Units
Tab to, or click directly on the refresh interval Units
field in order to select a different unit of time.
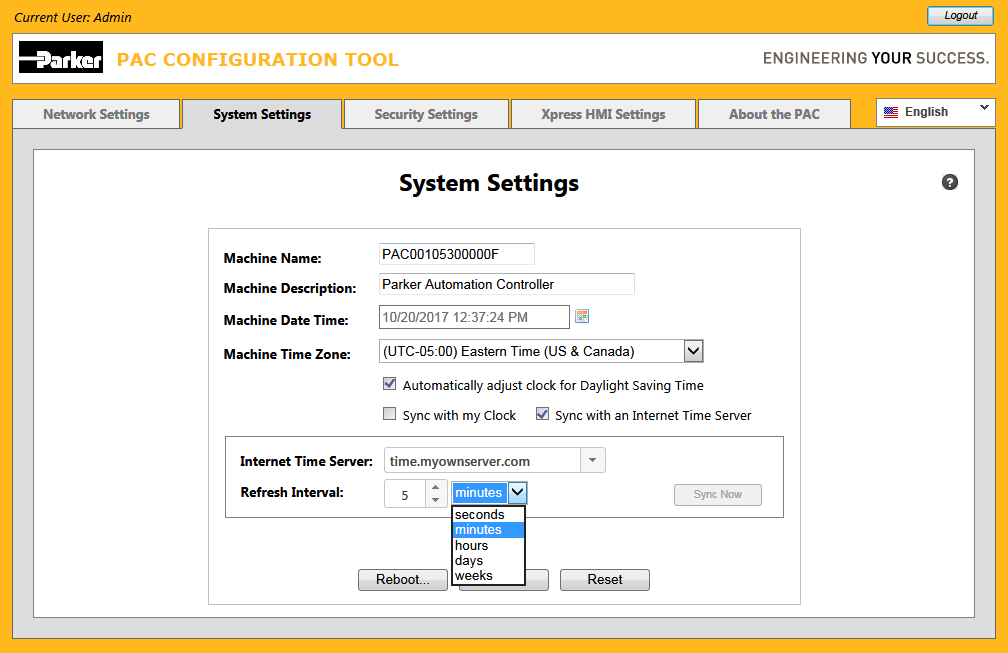
Note that once the Refresh Interval is saved and the page is refreshed, the value displayed may differ
(i.e., a value equally represented by a simpler unit of time) from what you initially entered.
For example: if you were to enter 300 minutes; it would be subsequently displayed as 5 hours once the page is refreshed.
On the other hand, entering a value such as 301 minutes would not be affected.
-
Saving Sync with an Internet Time Server
values
Changing either the Internet Time Server
value or Refresh Interval
value requires that the Save
button
be clicked before the Machine Date Time actually begins to update.
Note the Sync Now button is only enabled when there are no modifications waiting to be saved.
-
Clicking the Sync Now
button
Click the Sync Now button at anytime to immediately initiate a synchronization of the date and time on the PAC using the
specified Internet Time Server
.
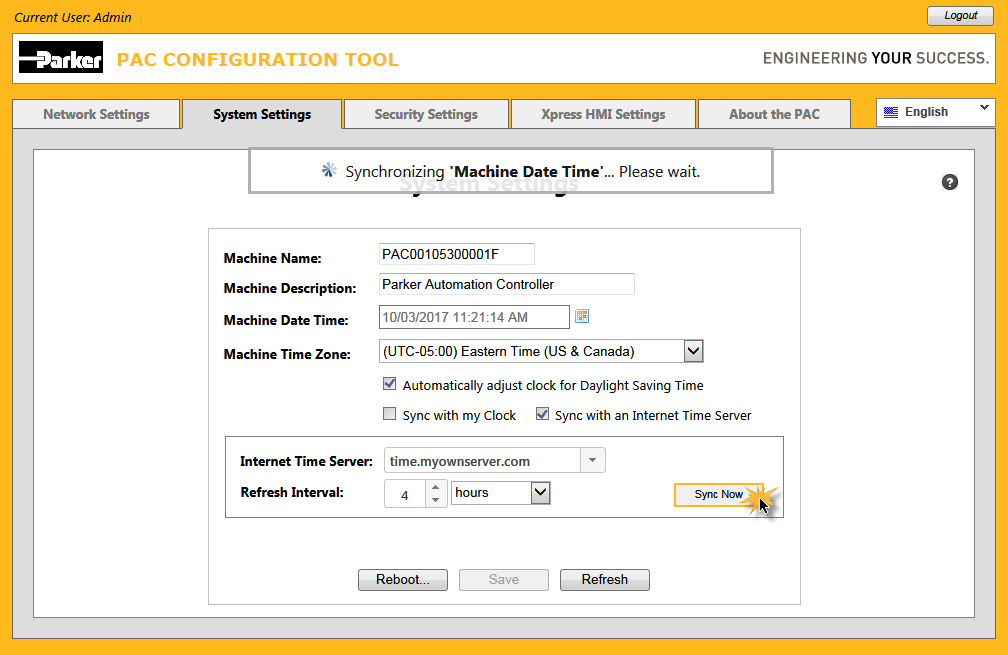
This overrides the synchronization which would normally be performed automatically on a regular basis according to the specified
refresh interval.
-
Opening the Online Help
Click on the [?] button at the upper right corner of the page to display this online help at any
time:
Online help appears independently in its own window within the web browser.