-
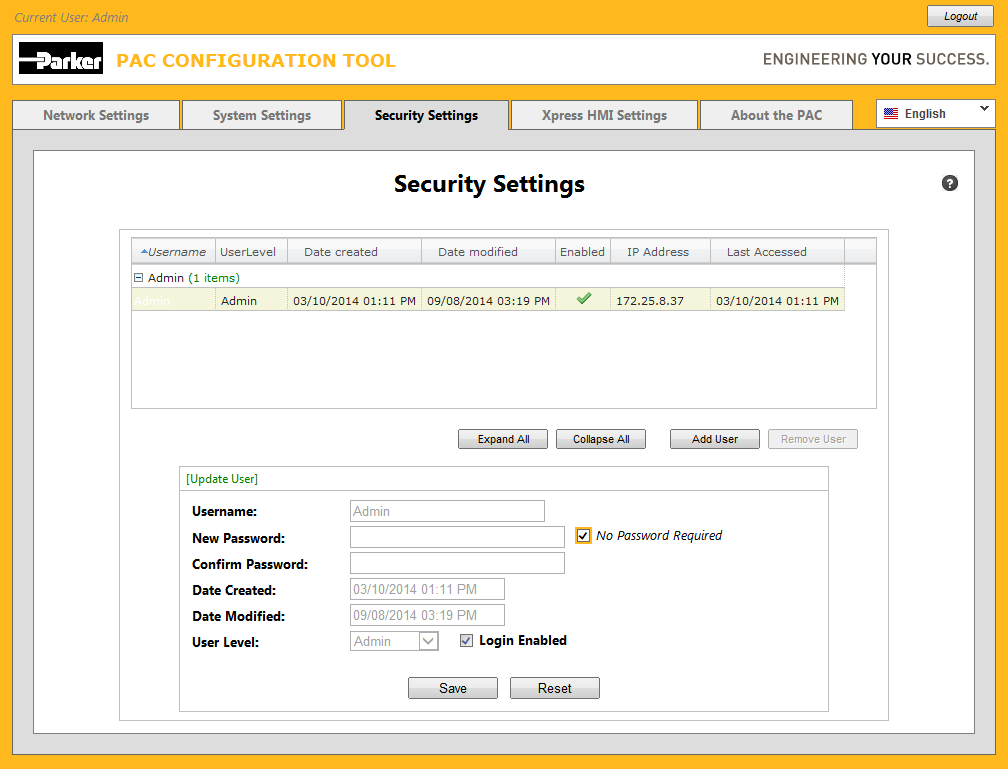
Displaying the Security Settings
Page
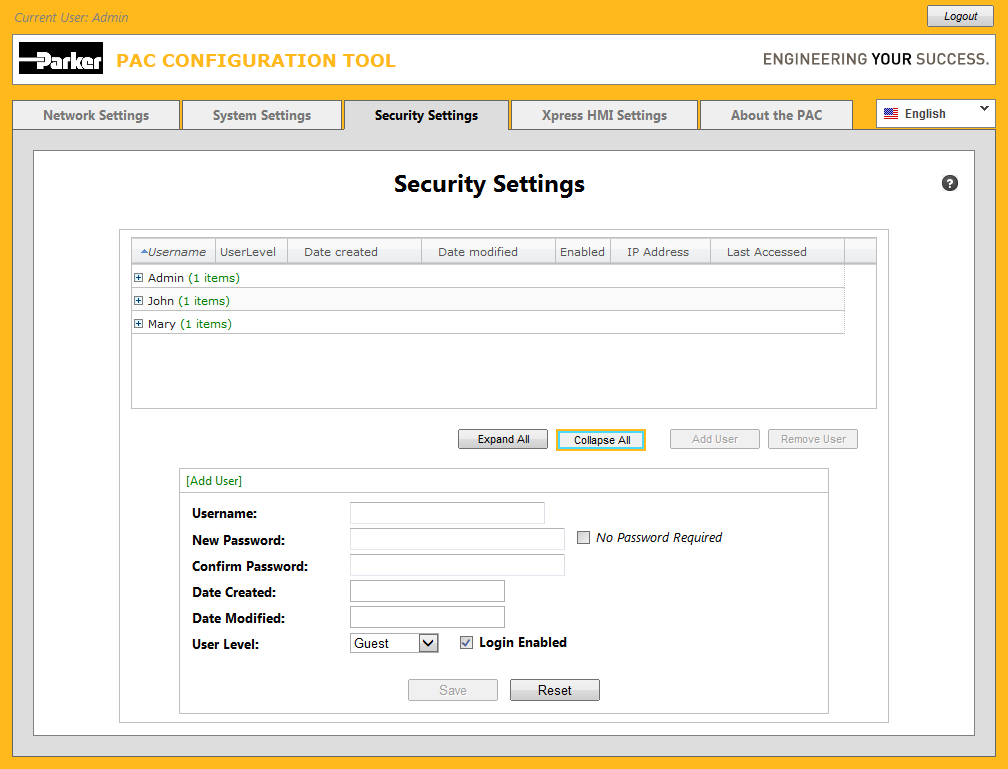
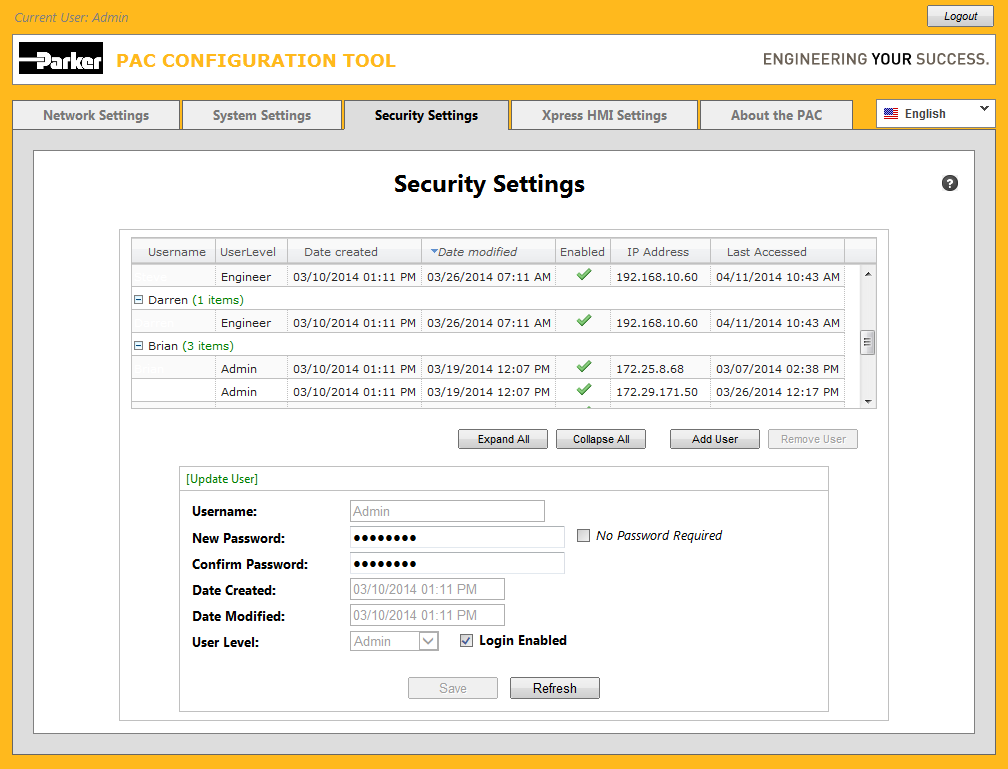
The following is an example of the page displayed in the web browser when the Security Settings tab is clicked for
the very first time:
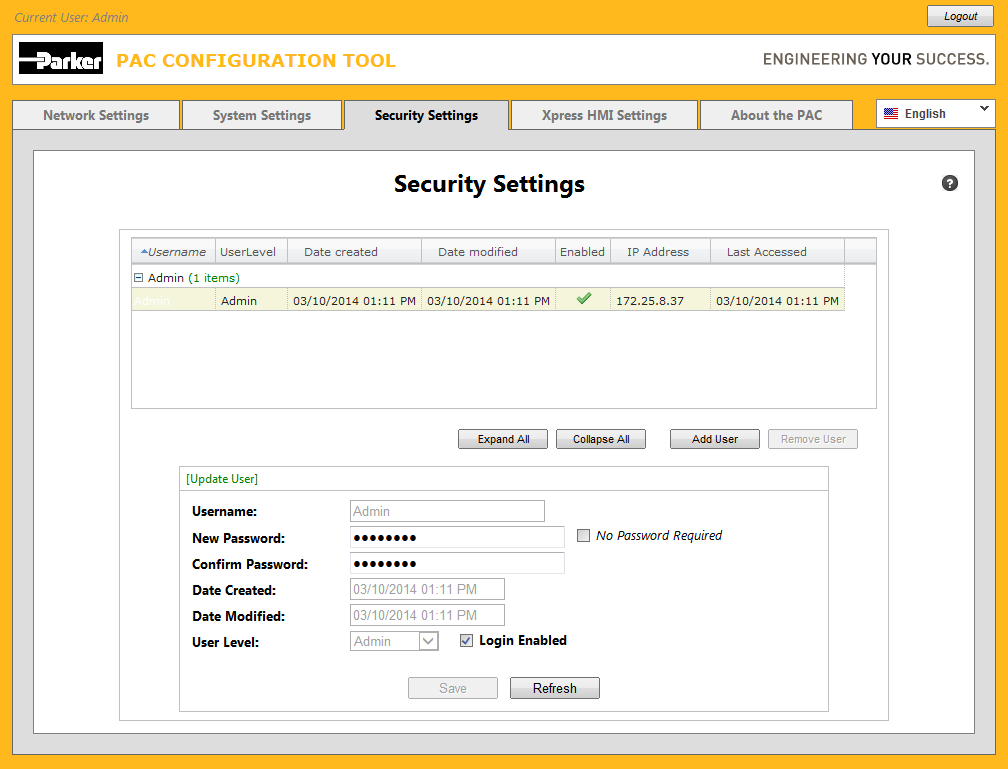
Initially there is only a single user named "Admin" which is automatically added to the PAC and the "Admin"
user requires no password to be entered* in order to login.
(* For obvious security reasons, the empty password might be one of the first items you may want to change).
-
Changing a User's Password
Pt. 1
Make sure the 'Admin' is selected in the grid, then click anywhere on the New Password field.
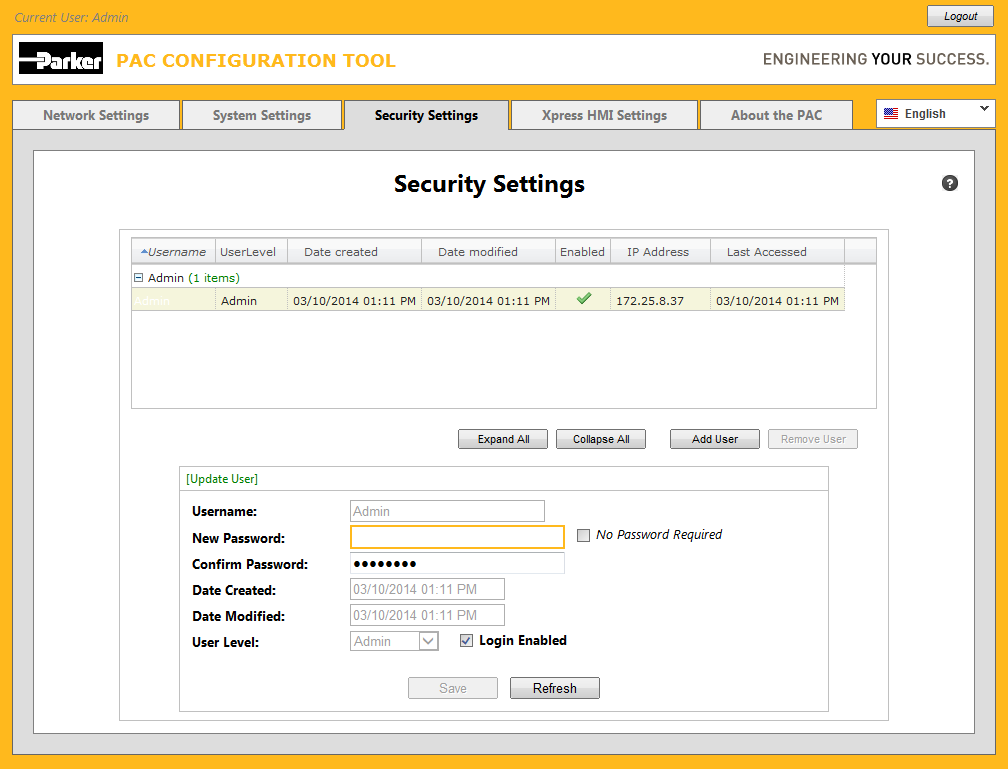
Notice that the group of dots (normally used to obfuscate the password from view), disappears and you can begin to enter
a new password.
-
Changing a User's Password
Pt. 2
After entering a password into the New Password field, click anywhere on the Confirm Password field.
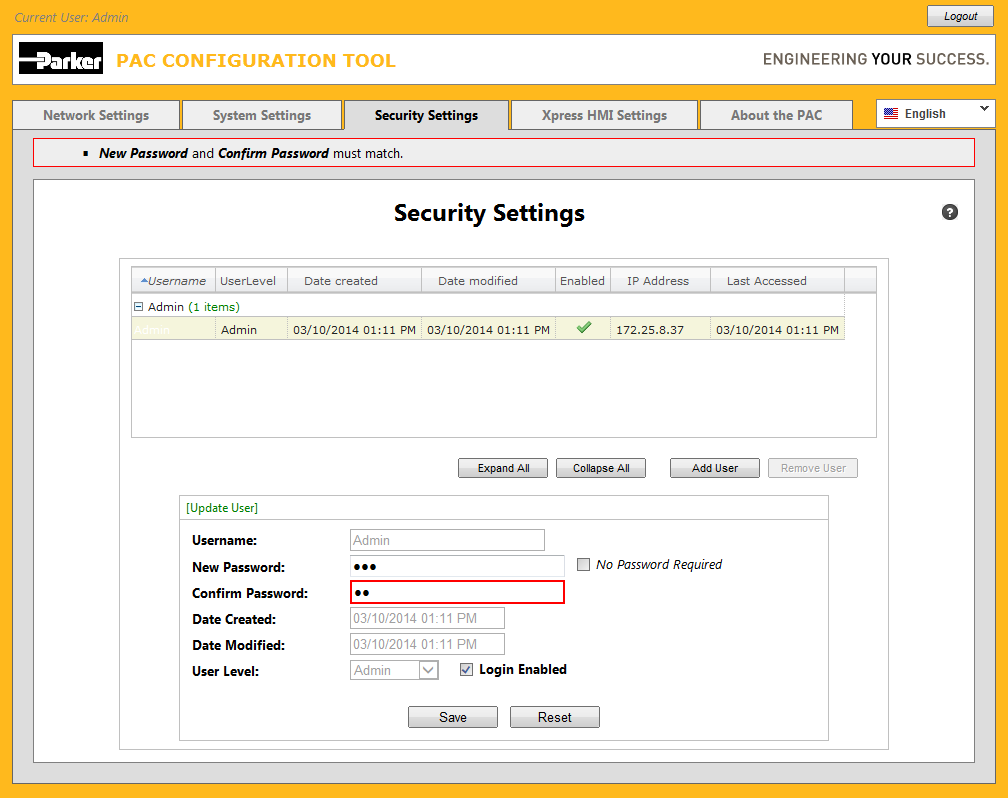
You can begin entering the value into the Confirm Password field.
The password entered into this field must exactly match the password entered previously into the New Password field.
If the two password fields do not match exactly, a red border is drawn around the field and a red information frame appears
at the top of the page containing information related to this discrepancy. Once the two password fields match, the red border
and red information frame disappear.
-
Saving User
Click the Save button to make changes to Security Settings permanent.
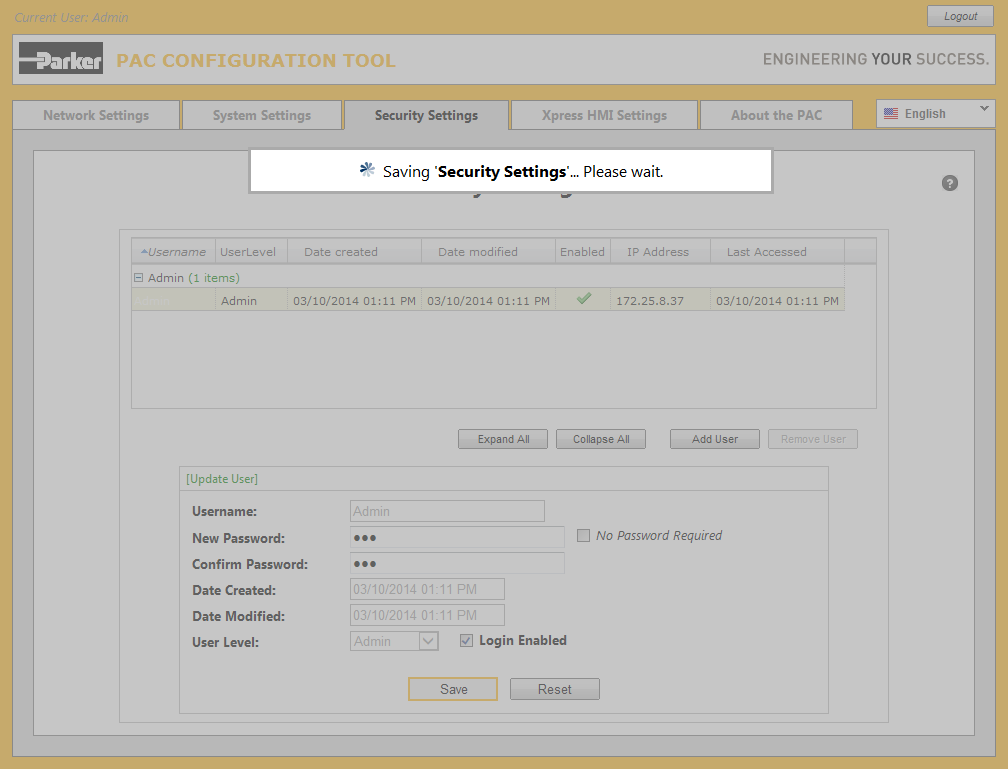
A progress notification is temporarily displayed. This notification disappears once the save has completed.
-
Saving User requiring no password
There may be instances where for simplicity sake, you want yourself or another user to NOT have to enter a password
in order to login to the PAC, (although for obvious security reasons, this is not highly recommended)!
Place a checkmark into the No Password Required checkbox by clicking on it.
Notice that the two password fields are cleared and become disabled when the No Password Required checkbox contains
a checkmark.
-
Resetting Security Settings
Click the Reset button to discard changes you made inadvertently to the Security Settings anytime prior to
clicking the Save button.
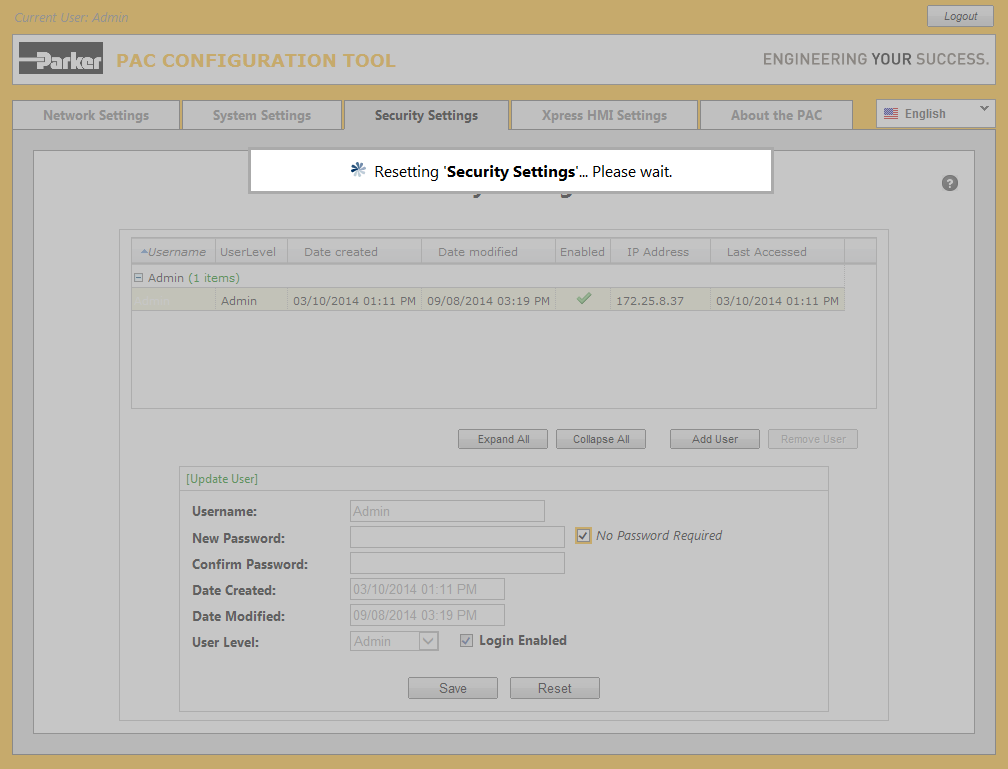
A progress notification is temporarily displayed until the reset has completed at which time the Reset button is
replaced by a Refresh button.
-
Refreshing Security Settings
You can click the Refresh button anytime you wish to refresh the contents of the Security Settings tab page.
Note that the Refresh button is automatically replaced by a Reset button once any change is made to the currently
displayed data.
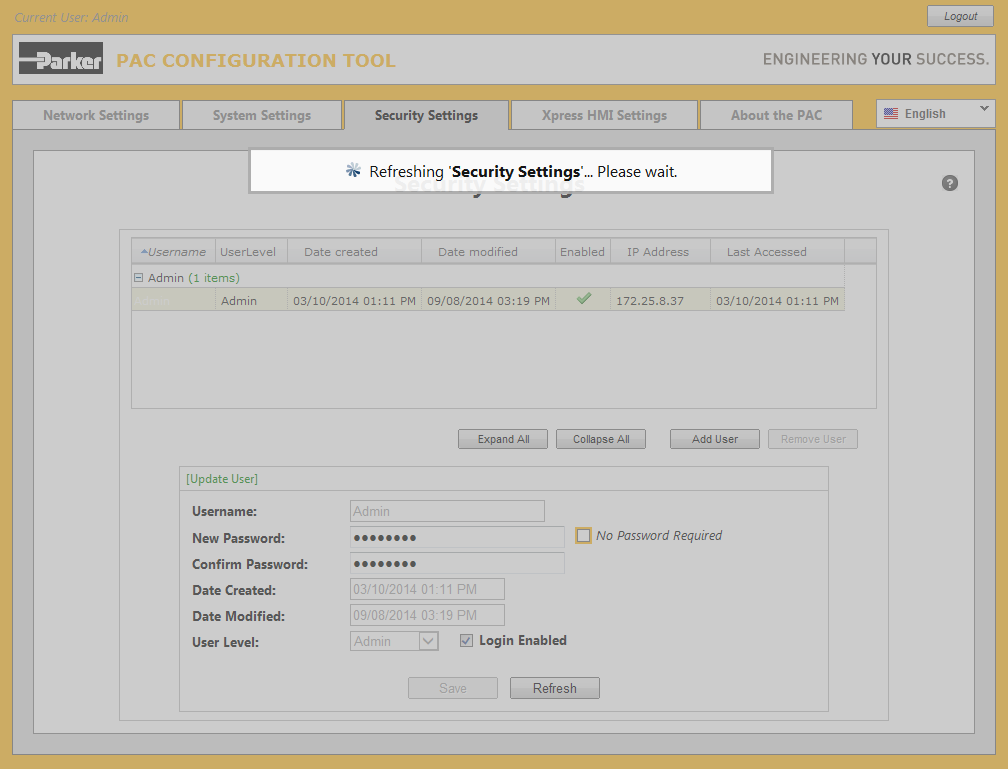
A progress notification is temporarily displayed until the refresh has completed.
-
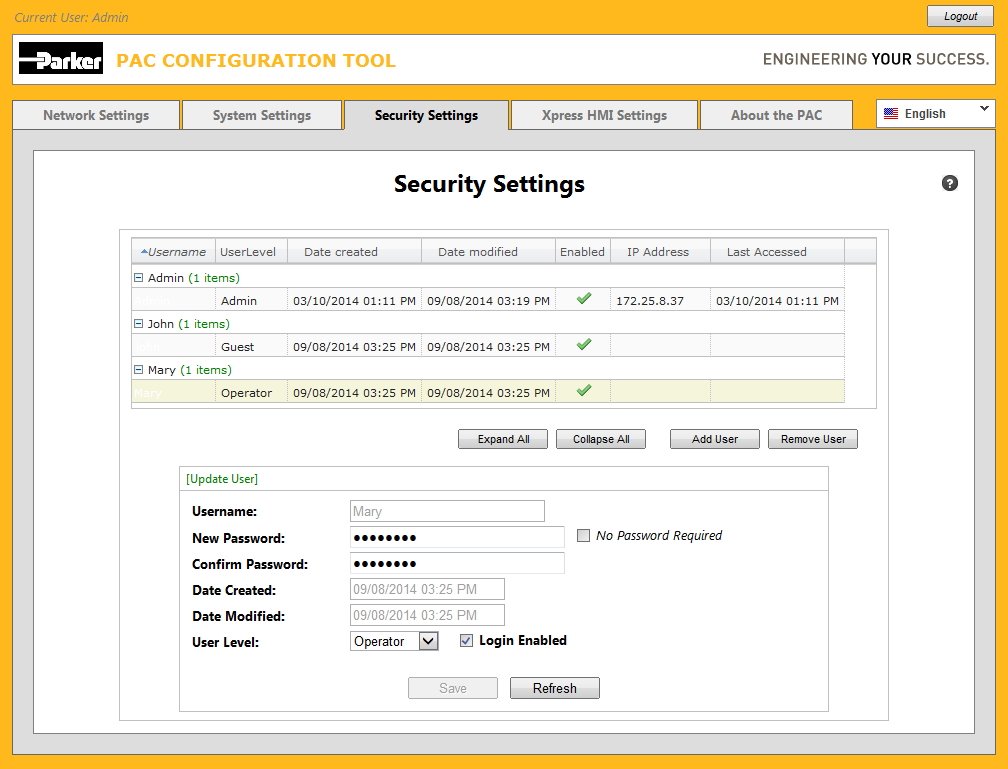
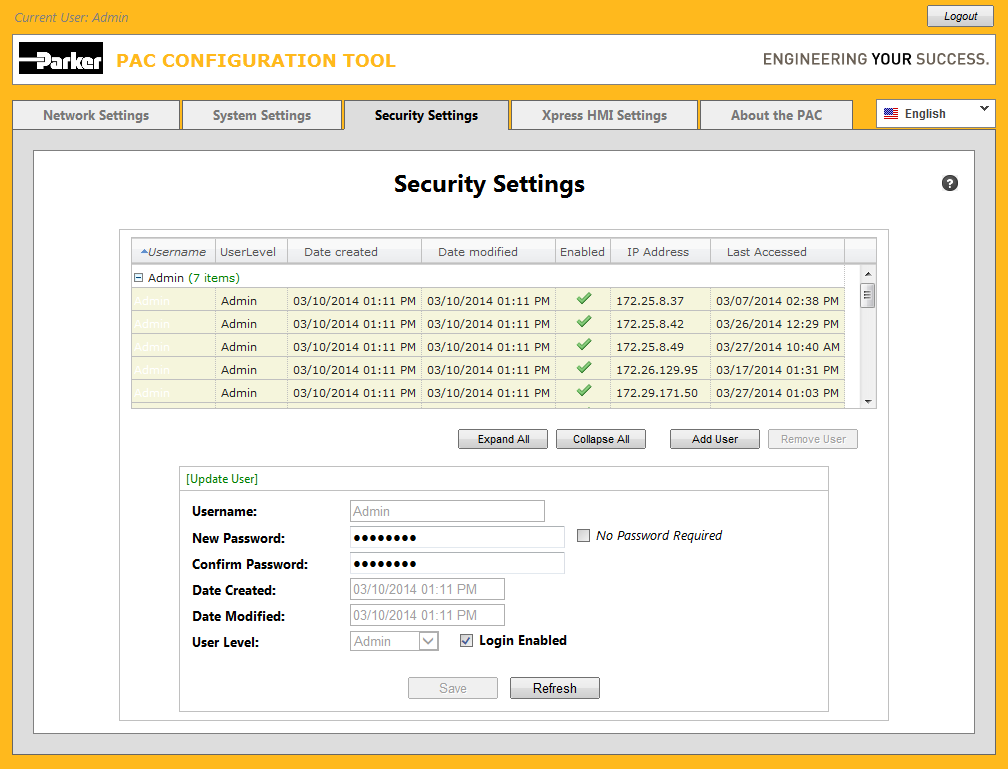
Updating other User properties
Aside from a unique username and password, all users have several other associated properties such as Date Created
and Date Modified which are automatically maintained by the system (i.e., they are always read-only and shown
disabled for any user selected).
Two other properties of users: User Level and Login Enabled are always read-only and disabled
whenever the Admin user is selected.

Note that there are other properties IP Address and Last Accessed associated with all users (shown as two
additional columns in the grid).
Each time a user logs into the PAC, the ip address the user is logging in from is recorded as is the date and time the PAC
was last accessed from that ip address.
-
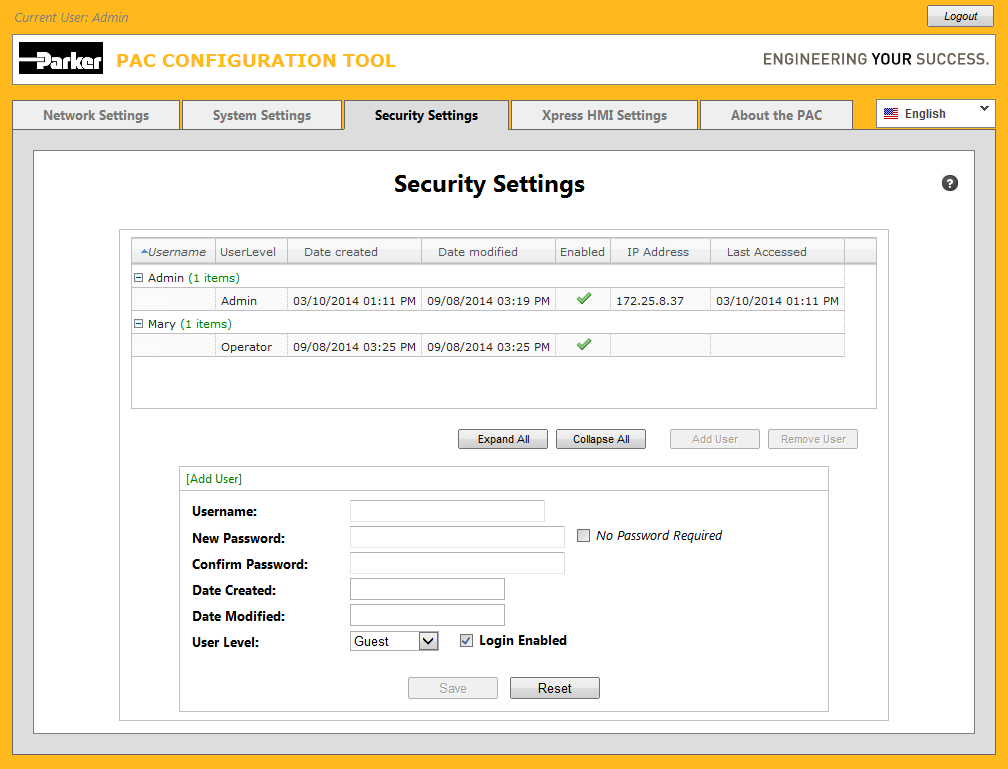
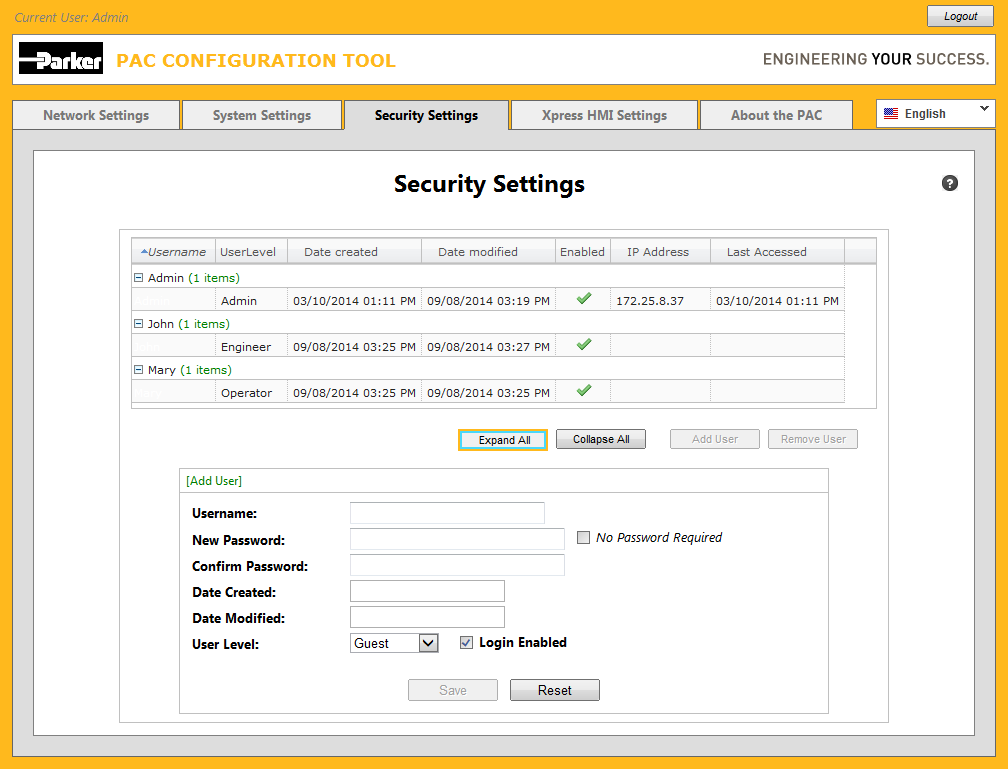
Adding a New User
Click the Add User button in the middle of the page to begin adding a new user.
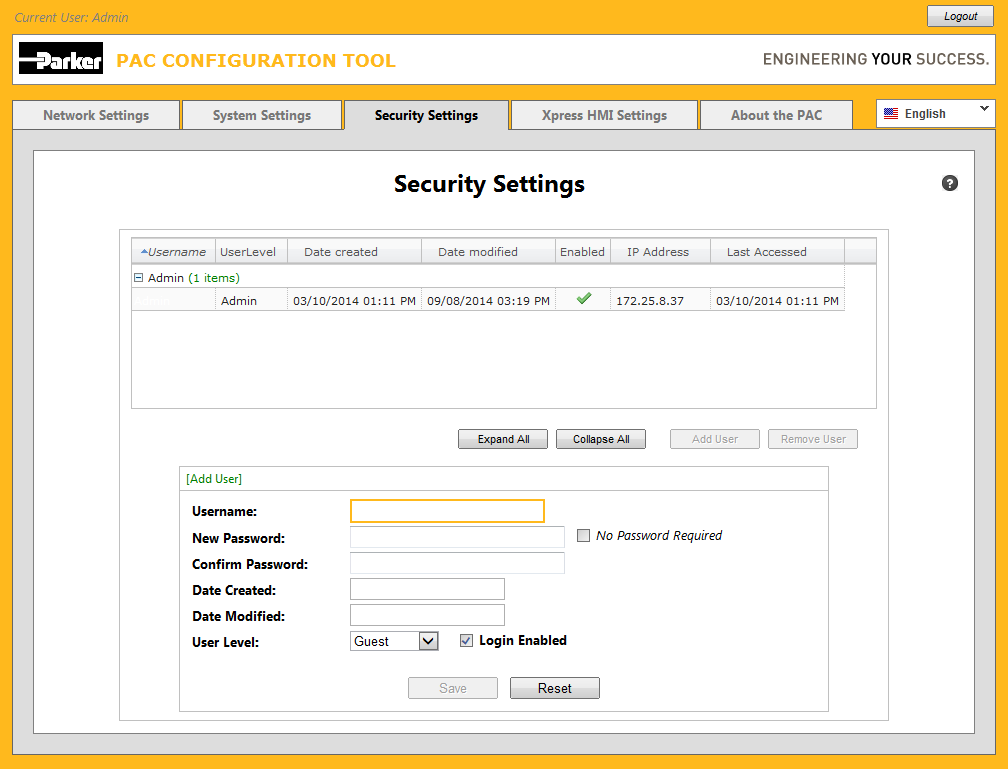
The Username field gains the focus and you can immediately begin entering a new username and then the corresponding
passwords.
-
Setting User Level
Click the User Level drop-down to display the various choices for user level.

By default all new users are provided with the Guest access level. This is the minimum access level available.
Also by default, new users have the ability to login to the PAC (i.e., the Login Enabled checkbox contains a checkmark).
In this example we are providing the user 'John' with 'Supervisor' user level access and his ability to login
has been enabled.
-
Saving a New User
Click the Save button to add the new user ('John') to the PAC.

Notice a new row corresponding to the new user 'John' is now displayed in the grid. John has not logged in yet so obviously
there is no IP Address nor Last Accessed data recorded.
-
Saving another New User
Repeat the same steps as above, this time adding a new user named 'Mary' having the 'Operator' access level.
Click the Save button and notice the new user 'Mary' is now displayed in the grid.
-
Updating a User
Click on another user in the grid. Notice the properties of that user are shown in the editable fields at the bottom of
the tab page and the mode is automatically set to [Update User] by default.
(The available modes are [Add User], [Update User], and [Remove User]).

You can begin to update the properties of the currently selected user or select another user to view/or update by selecting
him or her from the grid.
-
Removing a User
Once a user is selected in the grid, you can click the Remove User button located in the middle of the page to indicate
the current user should be removed.
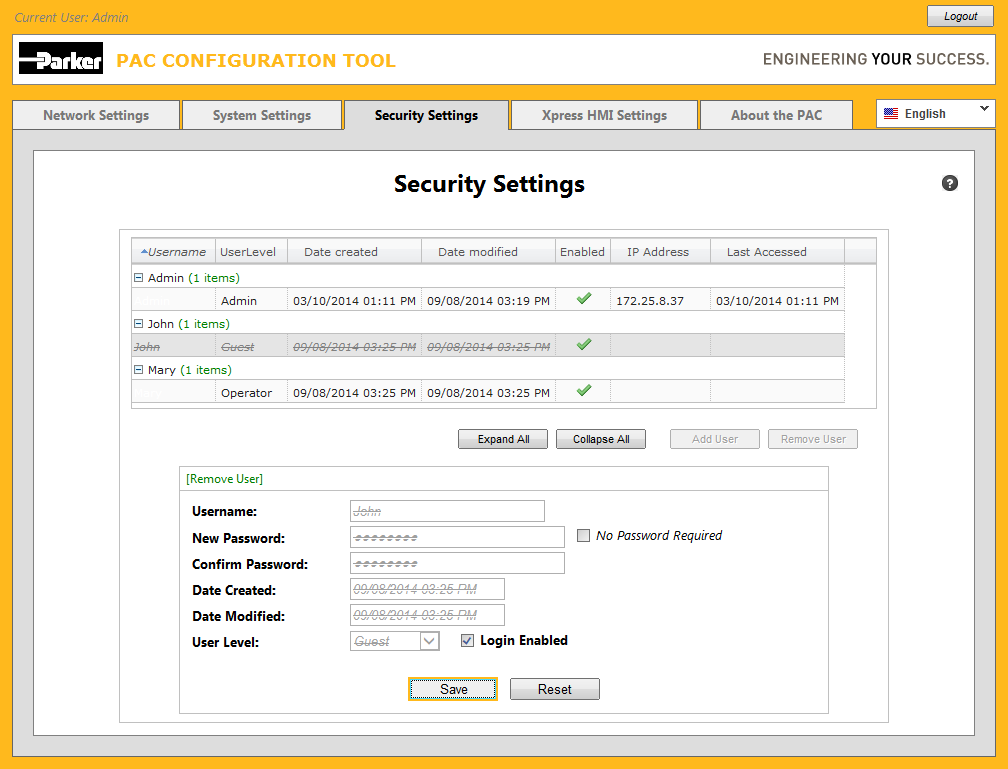
Note that clicking Remove User changes the current display to show all the user's data with a strikeout through it,
but the user is not actually removed until you click the Save button.
-
Removing a User from view
Click the Save button to remove the user from view.
You can always cancel a remove prior to clicking the Save button, by simply selecting another user from the grid.
Note that the 'Admin' user can never be removed; i.e., when the 'Admin' user is selected, the Remove User button
is disabled.
-
Re-adding a Removed User
For all practical purposes, once created, users are actually NOT permanently removed from the PAC; i.e., removed
users become merely hidden from view. This is because of the need for historical tracking purposes.
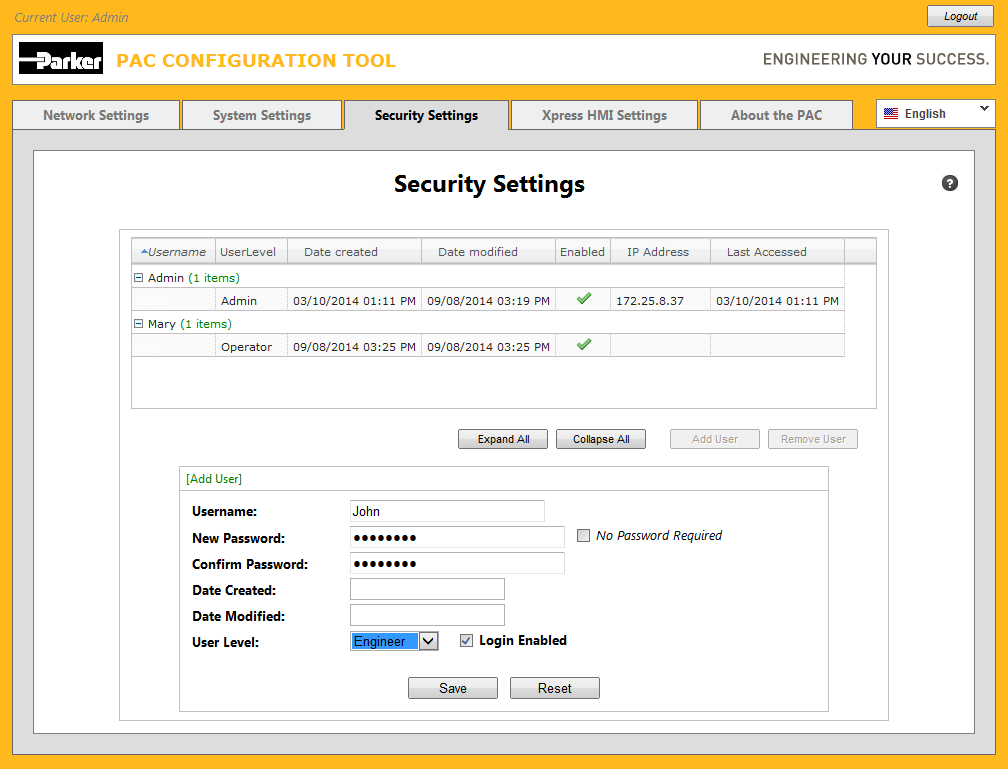
You can re-add (i.e., bring back into view), a removed user at anytime by simply clicking the Add User button then
typing in the username and clicking the Save button. The original properties and other information such as IP Address
and Last Accessed date and time are restored.
-
Saving a Re-added User
In this example, type 'John' (who was removed an earlier example), into the Username field. Also select 'Engineer'
from the User Level drop-down, then click the Save button.

John reappears with his original creation date, but a modification date consisting of the current date and time.
He also now has his user level set to 'Engineer'...
-
Clicking the Collapse All
button
Click the Collapse All button located in the middle of the page to collapse the grid view to show only user names.
-
Clicking the Expand All
button
Click the Expand All button located in the middle of the page to expand the grid view to show all user names and
all rows of historical data related to each user.
-
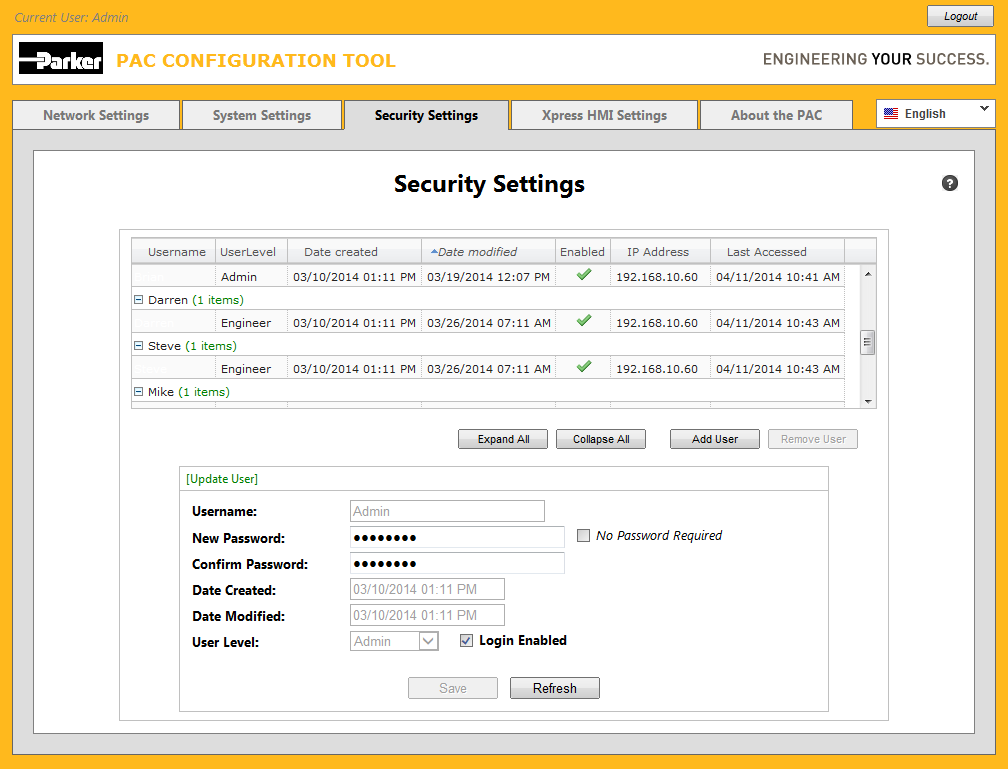
Maintaining Multiple Users
The following shows a typical view of the Security Settings tab after the PAC has been logged into multiple times
by the 'Admin' user from a number of different IP Addresses.
Note that whenever you click on any row corresponding to an individual user, all the related rows are automatically selected.
-
Sorting rows of the grid in ascending order
You can click any of the column headers in the grid to sort all the rows of the grid based on that column.
In the example above, the Date Modified column has been sorted in ascending order.
-
Sorting rows of the grid in descending order
Click the same column header currently used to sort all the rows of the grid to reverse the sort, (i.e., change the sort
order from ascending to descending or vice versa).
In the example above, the Date Modified column has been sorted in descending order.
-
Non-Admin login Pt. 1
If you are a user that does not have 'Admin' user level, whenever the Security Settings tab is first displayed, you will
see the username you logged in with pre-selected in the grid.
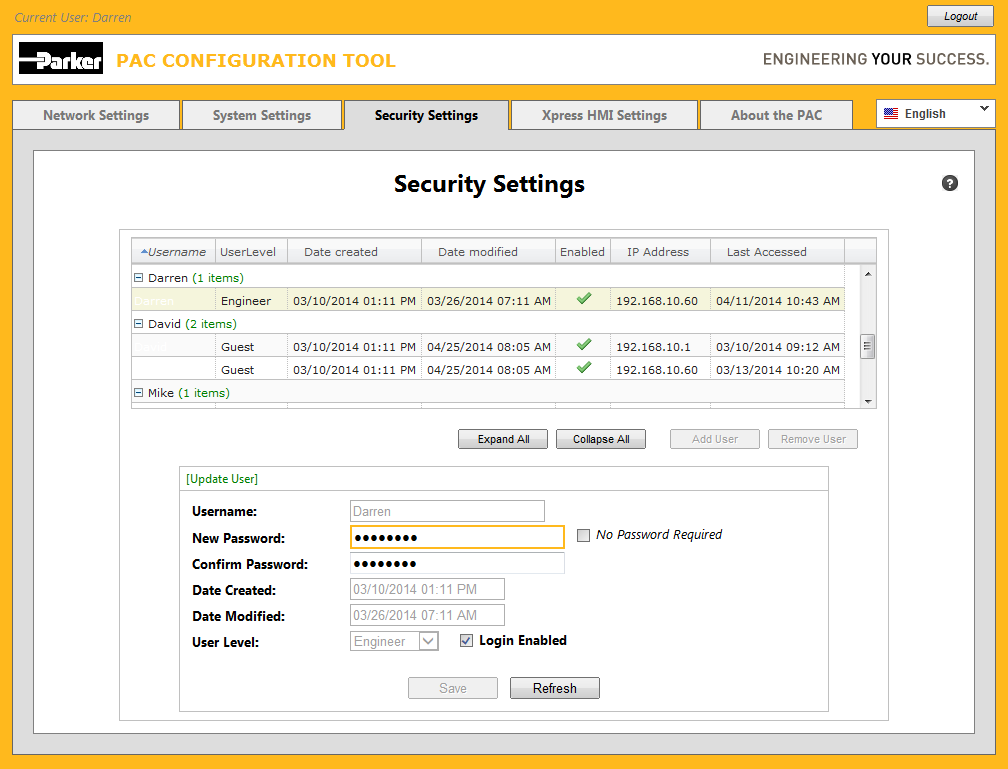
All fields other than the two password fields are read-only. This is true for all users other than users having the 'Admin'
user level.
You can however, click the New Password and Confirm Password fields and type in a new password for yourself.
Click the Save button to make the password change permanent.
-
Non-Admin login Pt. 2
Only a user having the 'Admin' user level can modify other users. The following example shows a typical Security Settings
tab view when a non-Admin user has logged in.
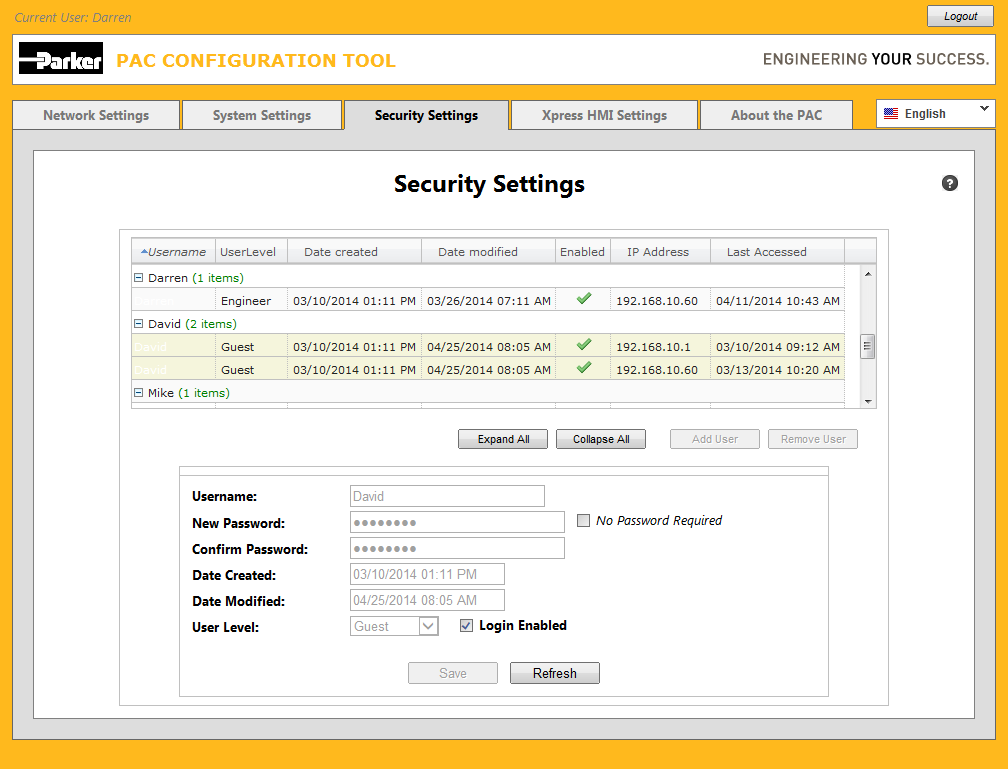
The currently selected user is 'David', but the user currently logged in is 'Darren', thus no changes can be made.
-
Opening the Online Help
Click on the [?] button at the upper right corner of the page to display this online help at any
time:
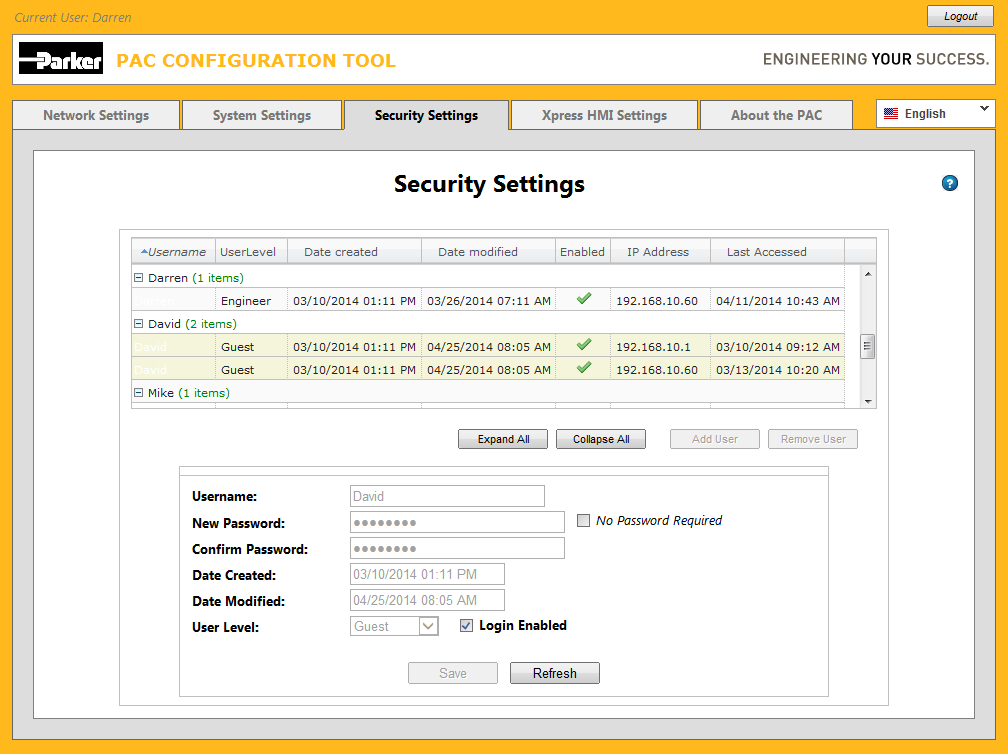
Online help appears independently in its own window within the web browser.