-
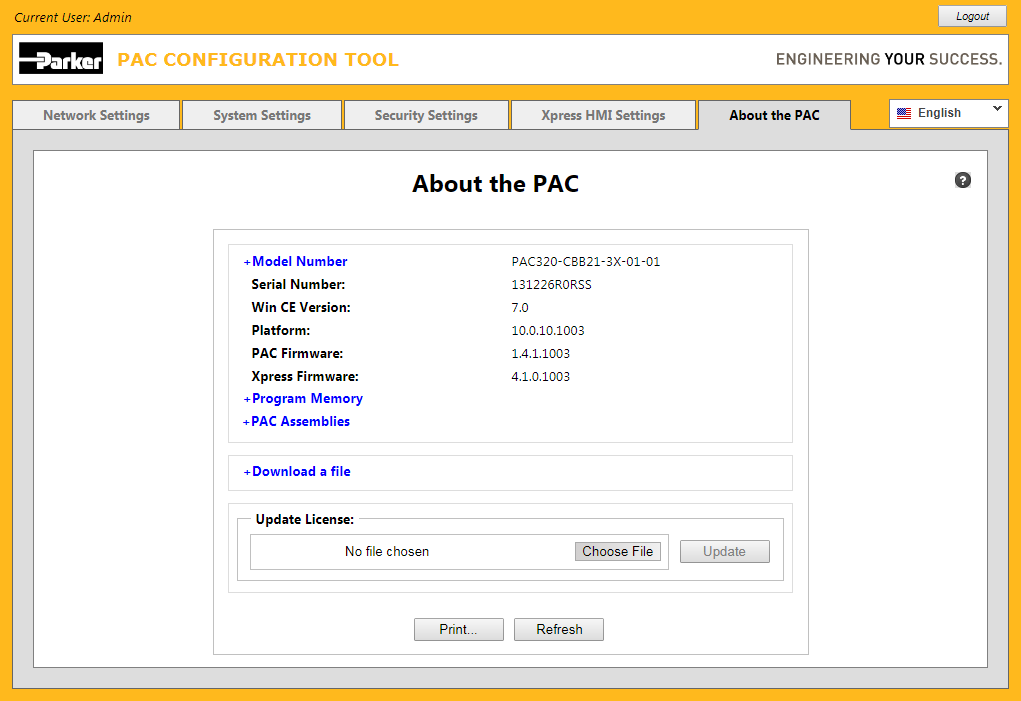
Displaying the About the PAC
page
The following is an example page displayed in the web browser when the About the PAC tab is clicked:

-
Expanding the Model Number
information
Click on the + Model Number hyperlink to expand the composite model number into its individual
components:
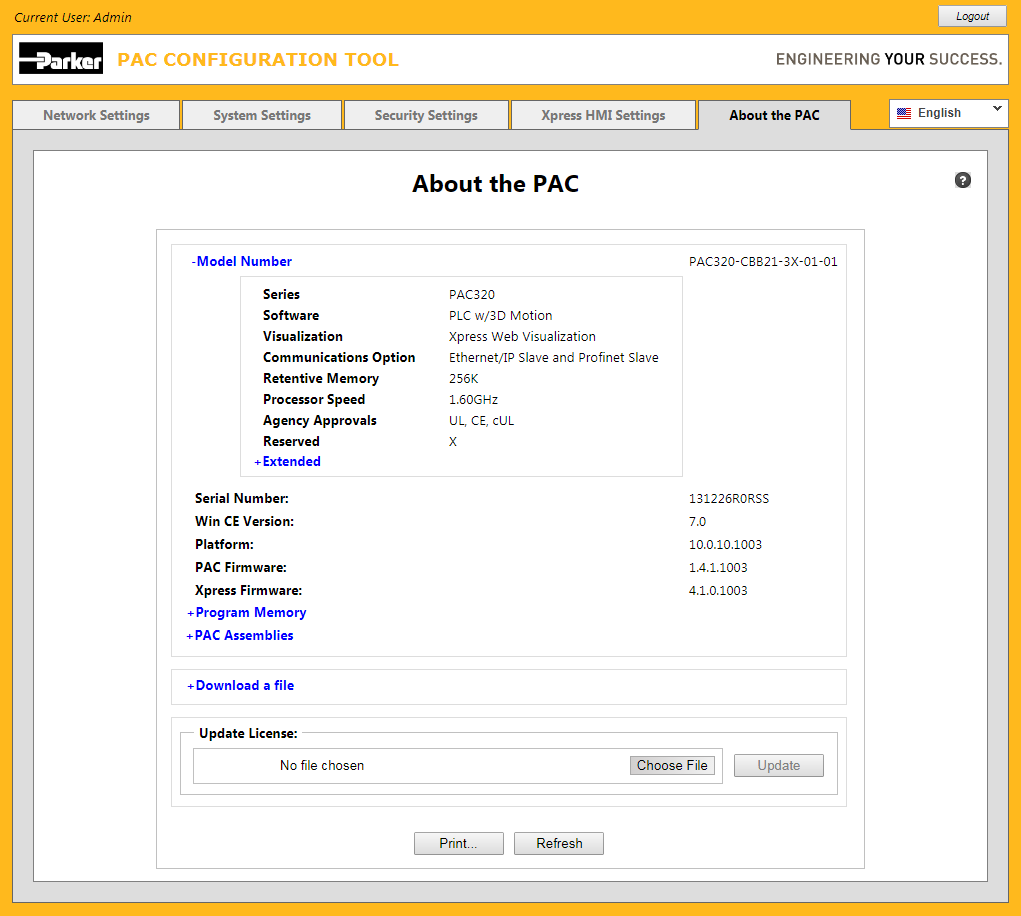
Alternatively click on the - Model Number hyperlink to collapse it back to just showing the composite
model number.
-
Expanding the Extended Model Number
information
Click on the +Extended hyperlink to expand the extended model number showing each available
option and whether it is currently licensed for use on this PAC or not:
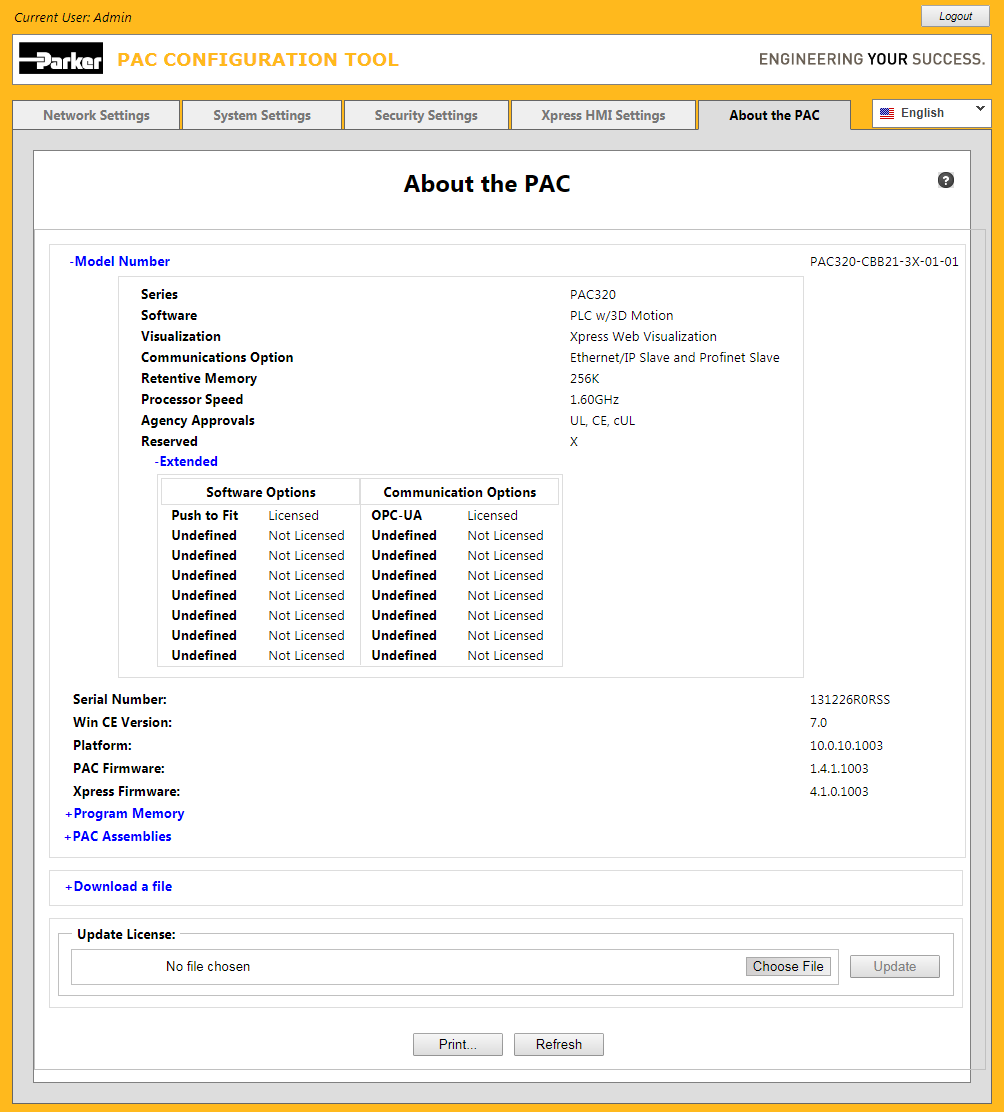
Once the informational area is expanded, you can click on the -Extended hyperlink to collapse it.
-
Expanding the Program Memory
information
Click on the + Program Memory hyperlink to see how memory is currently being used on the PAC:
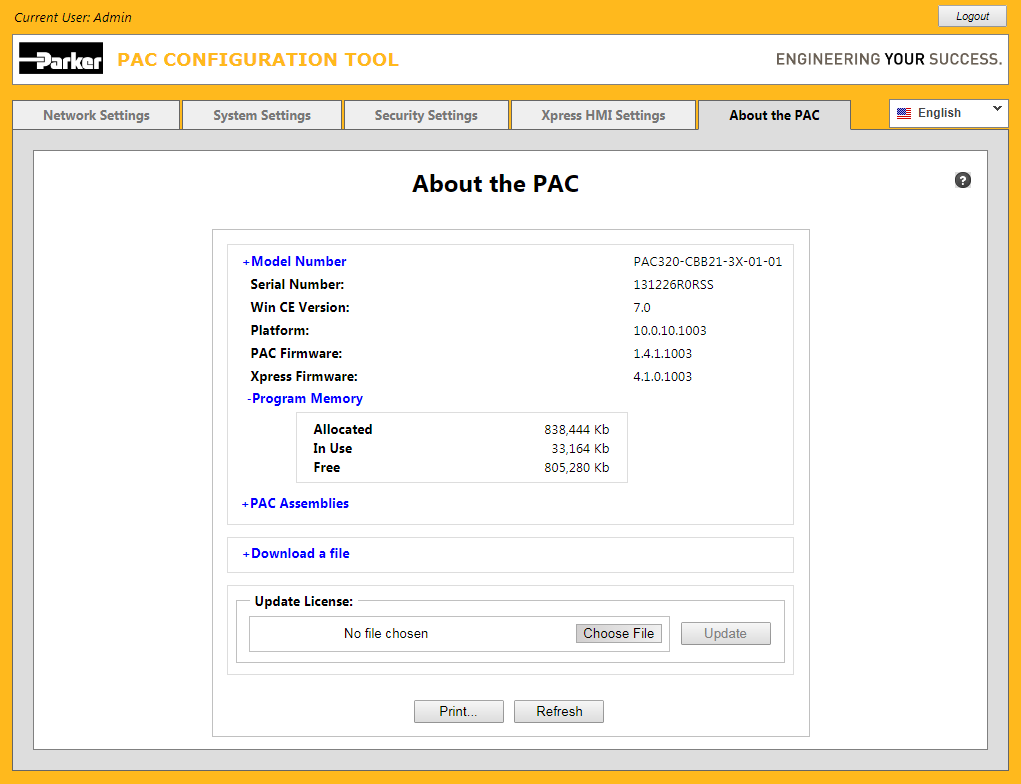
Alternatively click on the - Program Memory hyperlink to collapse it.
-
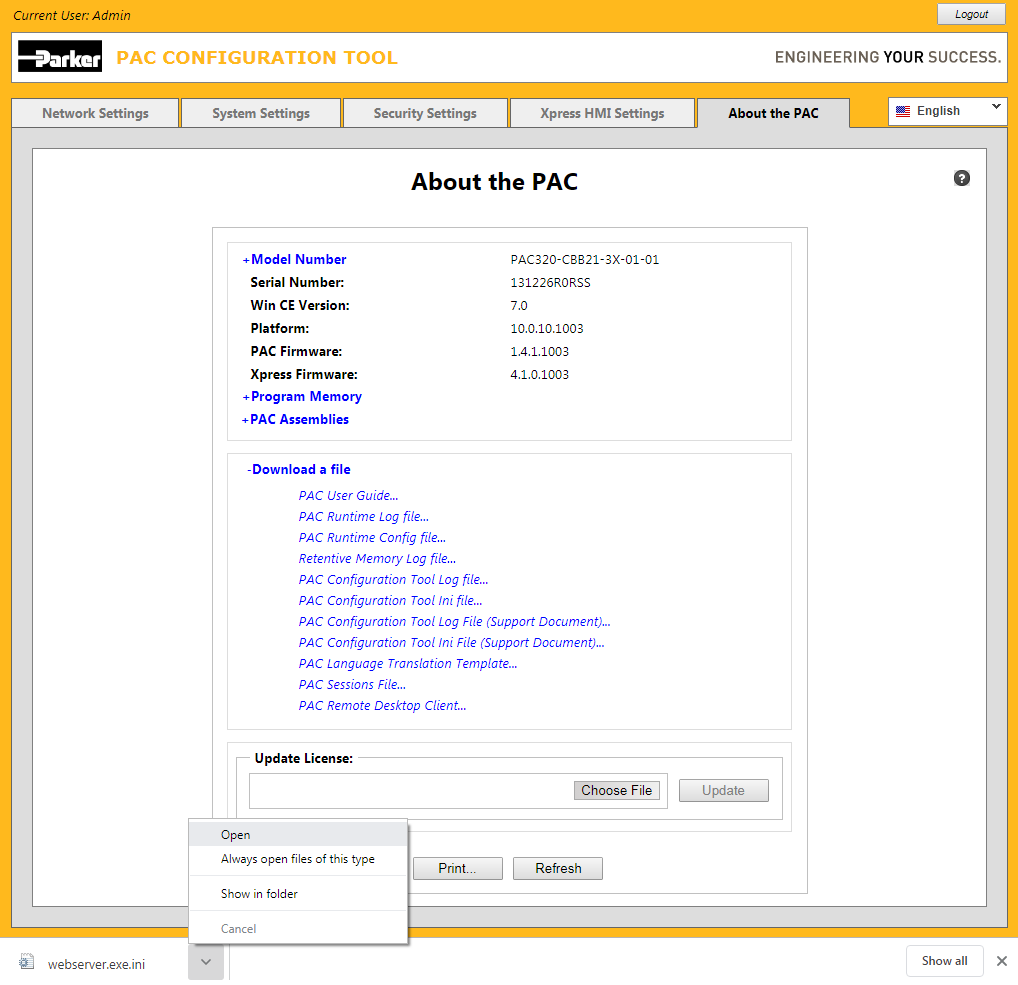
Expanding Files to Download
Click on the + Download a file hyperlink to expand the single line into a list of files available
for download.

Click on the - Download a file hyperlink to collapse the list of files available for download into
a single line.
-
Choosing a file to download
As you hover the mouse over the list of files to download, the item color changes from blue to green.
Click on any of the selectable items to begin the download process.

-
Opening or saving a downloaded
file Pt.1
On some browsers such as Internet Explorer a "File Download" dialog box will appear on the screen allowing you to either Open the file for viewing or to Save the file to your computer for later
recall. Other browsers such as Google Chrome will immediately download the selected file to a pre-determined location on your computer.
A button will subsequently appear at the bottom of the browser with the ability to either open the folder containing the downloaded file or open/view the file directly.

If you inadvertantly clicked one of the download hyperlinks, you can simply click the Cancel button to dismiss the
"File Download" dialog, otherwise you can click either the dialog's Save or the Open button.
-
Opening or saving a downloaded
file Pt.2
Clicking the Save button results in a dialog box as shown below appearing on the screen prompting you to navigate
to the folder where you want to save the downloaded file and/or provide an alternate name for it.
Click the dialog's Save button when you are ready to actually save the file to your computer. This will complete
the download file process.
-
Printing
the contents of the screen
Click the Print button at the bottom of the page at any time to open a print dialog such
as:
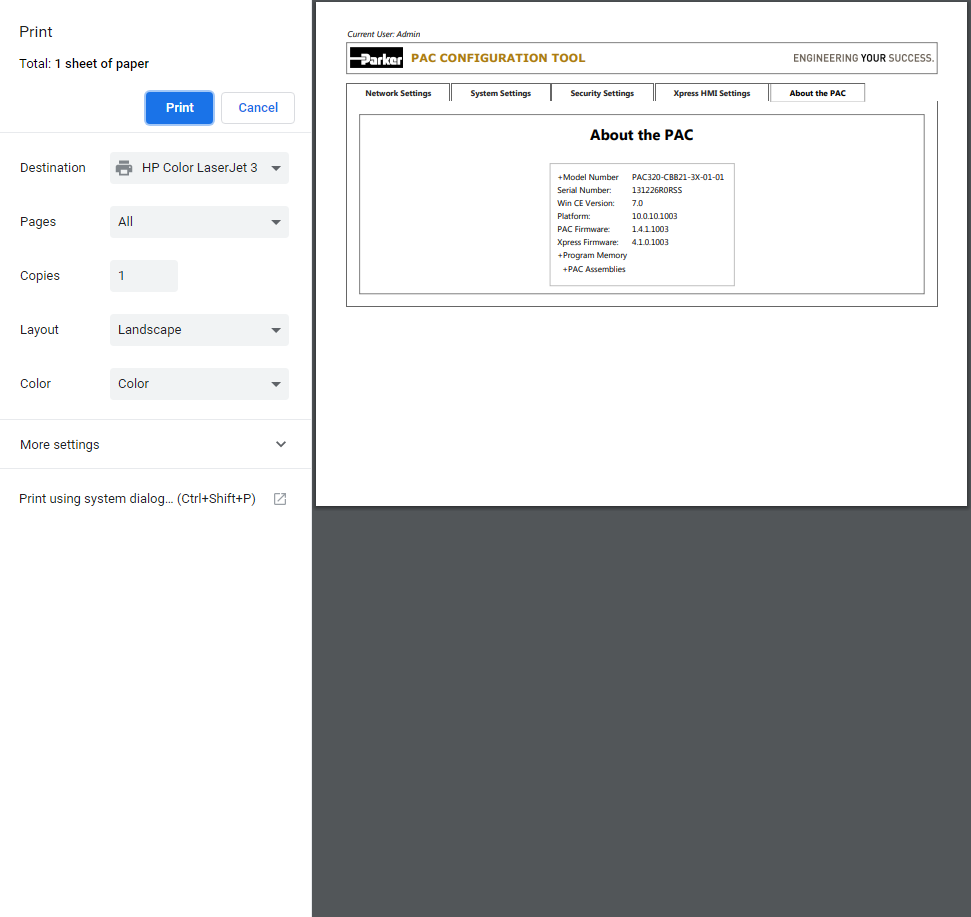
Select from the various options in the print dialog then click the Print button to have the output send to the chosen
printer.
-
Selecting Print Preview
using the context menu
Prior to sending output to a printer, you can right-click anywhere on the page and select Print Preview... from the
context menu to display a window depicting what the output will actually look like when it is printed.

The "Print Preview" dialog provides the ability to optionally change other default settings such as the orientation and
the print margins.
-
Showing the Print Preview
dialog
Select from the various options available in the "Print Preview" dialog, then click the printer icon at the upper left corner
of the dialog to send the output to the printer.
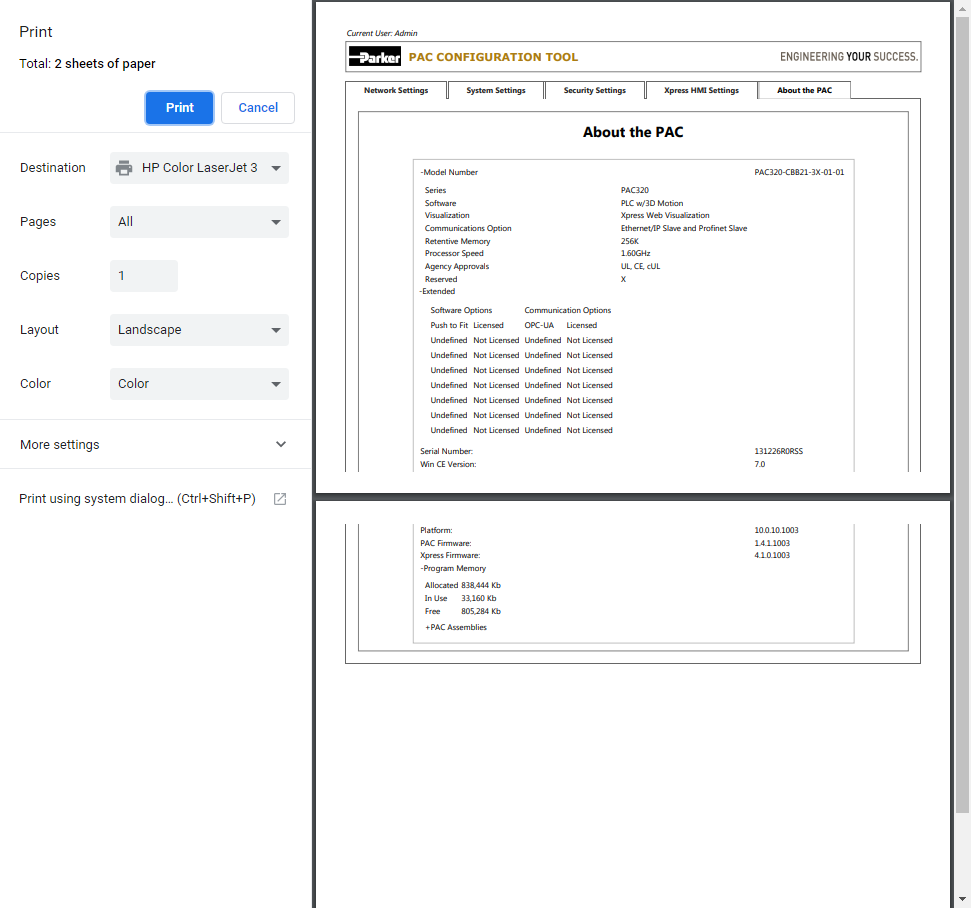
You can also click the Close button at the upper right corner of the dialog to dismiss the dialog cancelling printing
of the page altogether.
-
Clicking the Refresh
button
Click the Refresh button at the bottom of the page at any time to retrieve the latest values stored
on the device:

Note that this is the preferable method for refreshing content versus clicking the browser's own refresh button which always
resets and retrieves the entire page along with all its values instead of just retrieving the values...
-
Displaying the progress notifier
while page is refreshing
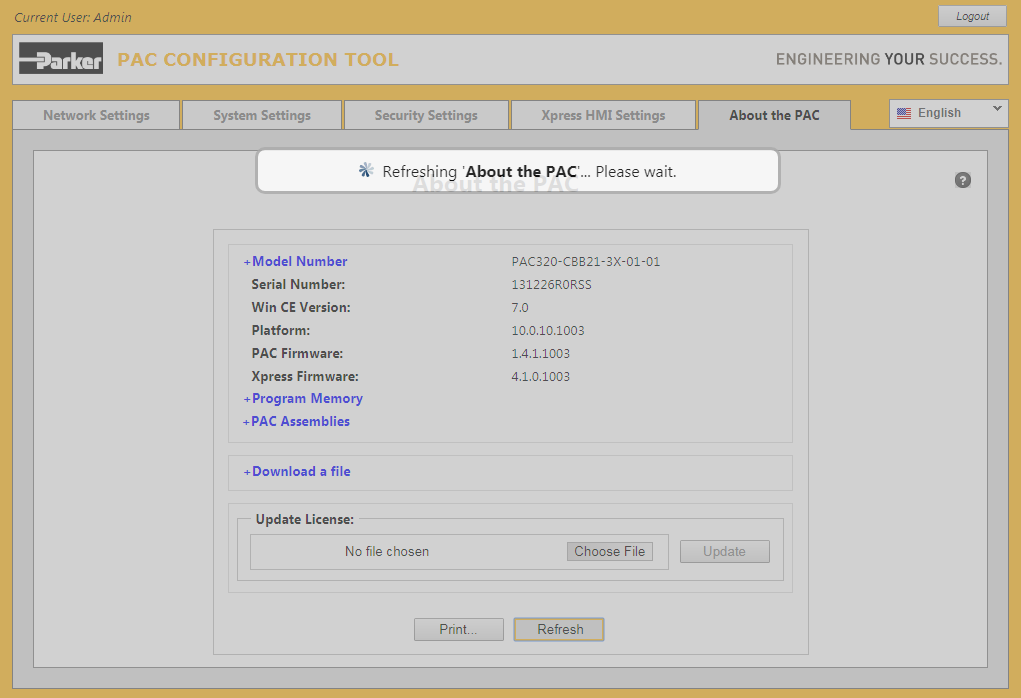
Whenever the Refresh button is clicked, the page is locked and a progress notifier is automatically
displayed while the data is being refreshed:

The page is automatically unlocked and the progress notifier hidden as soon as the refresh has completed.
-
Displaying the PAC Assemblies
link
A special link titled PAC Assemblies is available only for selection when the system is running in *Debug mode.
* Debug mode is used primarily by support personnel for providing special assistance to the end user.
-
Updating the License
on the PAC Pt. 1
To update the license
on the PAC is a multi-step process.
First you must choose the license file provided to you by your Parker Support Representative.
(Note the Update
button is disabled whenever there is no file currently chosen.)

Click the Choose File button if using Google Chrome, or the Browse... button if using Internet Explorer or FireFox, to display an 'Open' file dialog.
(Note that clicking anywhere on the chosen 'File' field will also have the same affect.)
-
Selecting the License
file on the PAC Pt. 1
An Open
file dialog is displayed whenever a file needs to be chosen:
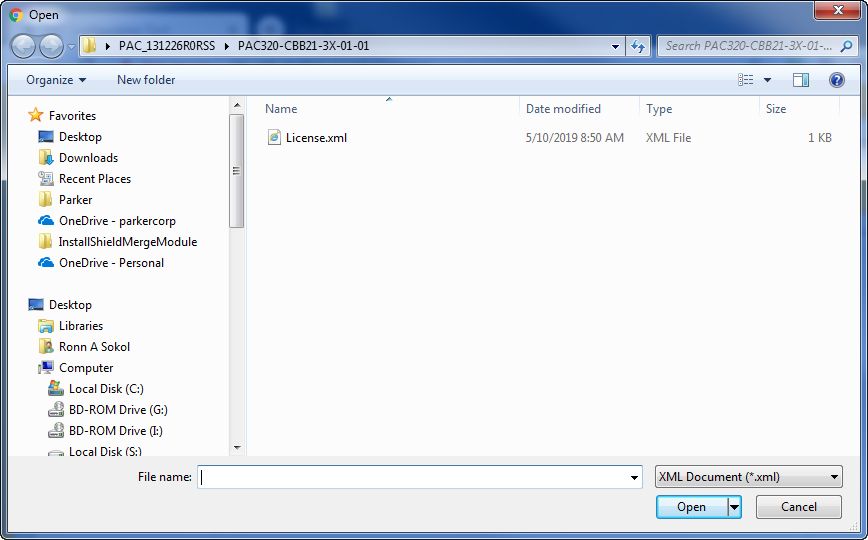
Browse to the folder on your computer containining the License.xml
file you received from your Parker Support Representative.
-
Selecting the License
file on the PAC Pt. 2
Click the License.xml
file displayed in the right panel of the Open file dialog.
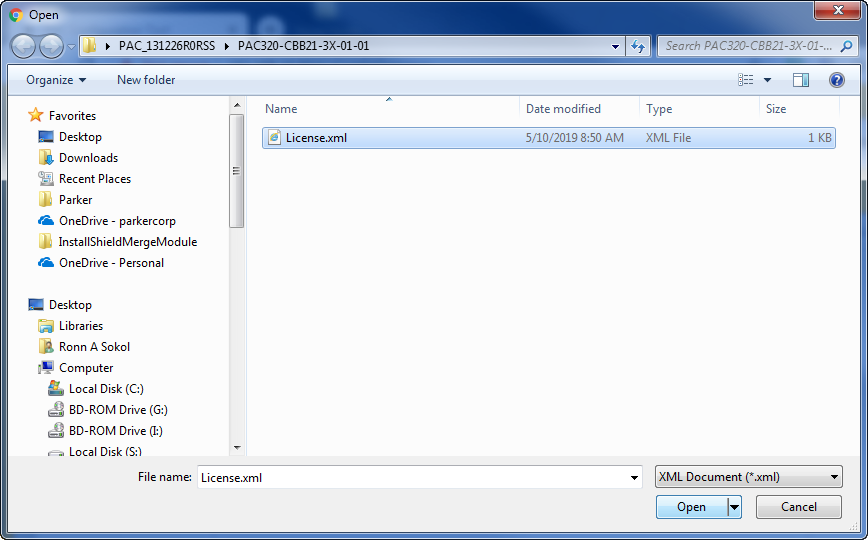
Next, click the Open button which will dismiss the dialog and reflect the name of the file in the Chosen file field.
(Optionally you can double-click the License.xml
file in the right panel of the Open file dialog to perform the last two steps simultaneously.)
-
Updating the License
on the PAC Pt. 2
Once a license file has been chosen from the Open file dialog it will appear in the chosen file field and the Update button will become enabled.
Click the Update button to begin the license update process on the PAC.
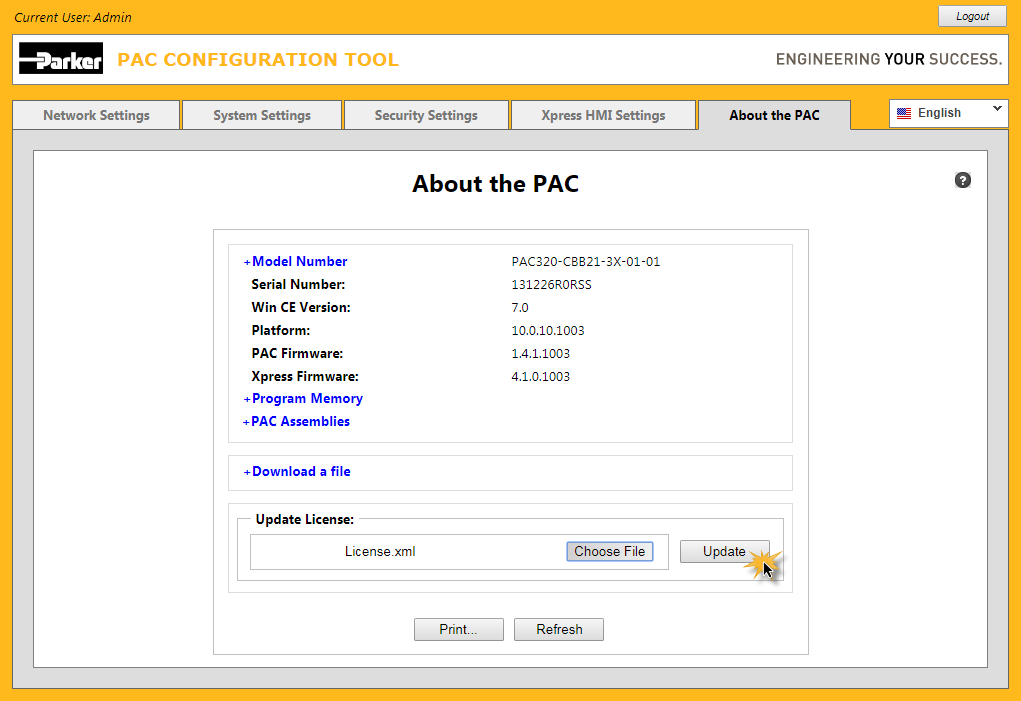
The file content is uploaded to the PAC and examined for validity. If the file is valid, the PAC is updated with the new information and then automatically rebooted.
The reboot of the PAC may take up to a minute or more to complete.
This will cause the connection to the PAC to be monentarily severed resulting in the PAC Config Tool's 'Login' page being redisplayed.
After waiting a few moments, you should be able to re-login to the PAC.
After successful login, reselect the 'About the PAC' page and verify that the PAC license has been updated by expanding and examining the +Model Number +Extended information.
-
Invalid License file
If you inadvertently select an invalid license file on your computer, for example a file other than 'License.xml', as soon as you click the Update button
a warning message is displayed at the top of the web page to indicate the anomaly.
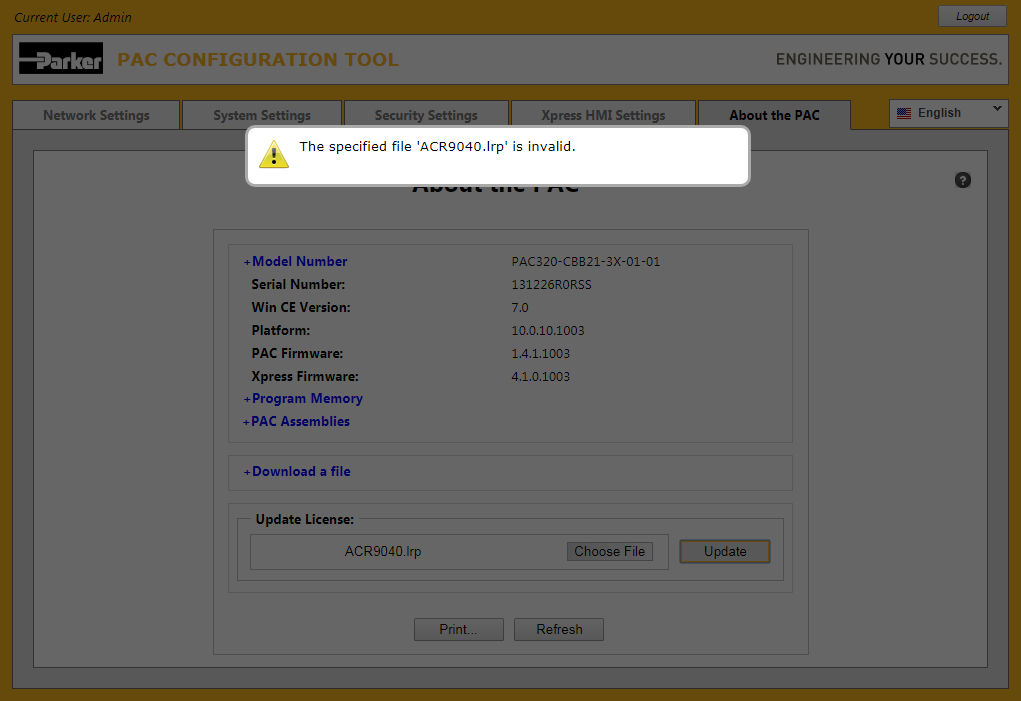
Click anywhere on the web page to dispose the warning message or simply wait for the message to dissappear by itself after a few seconds.
You can then go back and repeat the last few steps, this time selecting a valid 'License.xml' file.
-
Expanding the PAC Assemblies
link
Clicking on the + PAC Assemblies
link results in it being expanded to display additional information as shown
in the following example:
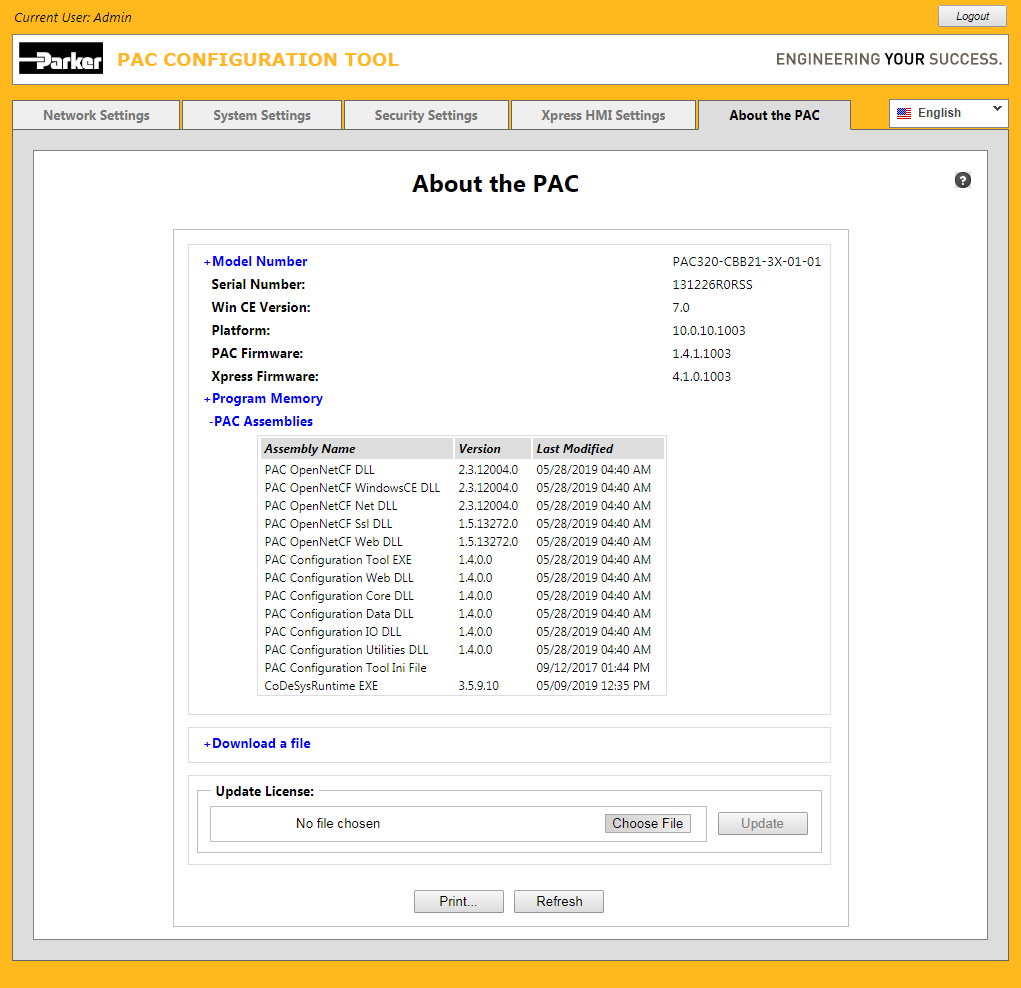
The Assembly Name, Version, and Last Modified date is shown corresponding to each assembly.
Clicking on the + PAC Assemblies
link when it is expanded results in it being collapsed.
-
Displaying Online Help
Click on the [?] button at the upper right corner of the page to display this online help at any
time:
Online help appears independently in its own window within the web browser.